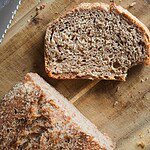
100% Fresh Milled Sourdough in a Loaf Pan (The Two-Pan Method)
Jump to VideoThis is an everyday sourdough loaf made for real family baking. The dough is flexible and easy to handle, and it bakes into a soft loaf you can slice for toast, sandwiches, or eat warm with butter and honey. The simple two-pan method traps steam in the oven, so you get a good crust without needing a Dutch oven.
PIN THIS RECIPE!
Equipment
- 2 loaf pans
Ingredients
- 400 g freshly milled hard white wheat
- 280 g water
- 120 g active sourdough starter
- 8 g salt
Instructions
- Add everything to a bowl. The order doesn’t matter. I usually mix by hand so I can squeeze the dough and make sure the starter and salt are fully dispersed. Mix until there are no dry bits of flour left.
- At this stage, the dough will feel sticky and almost like wet sand. That’s completely normal with fresh-milled flour. It won’t be stretchy yet. Cover the bowl with a wet tea towel, shower cap, or anything that keeps it from drying out. Let rest for 30 minutes to 1 hour.
- After the rest, do your first set of stretch and folds. What are stretch and folds? With wet hands, gently grab one side of the dough, lift it slightly, and fold it over itself. Turn the bowl and repeat on all four sides. That’s one round. Be gentle. No need for long pulls. It’s better to do short, soft folds than to tear the dough. Cover again and rest 30 minutes. Do a second round. After another 30 minutes, you can do a third round if you want, but I usually stop at two.
- Let the dough bulk ferment for 4–6 hours, depending on your kitchen. - Summer: closer to 4 hours - Winter: closer to 6 hours You’re looking for about 30–50% rise, not a full doubling. If you’re using a glass bowl, you should see bubbles throughout the dough. Don’t wait for dramatic volume. Fresh-milled dough behaves differently.
- Lightly flour your work surface. Turn the dough out so the side that was exposed to air is now on the bottom. Roll it gently into a loose log, then lightly into a ball. Nothing tight. Let it rest on the counter for about 5 minutes while you prep your loaf pan. Generously oil one loaf pan.
- Turn the dough again so the exposed side becomes the bottom once more. Flatten slightly, then roll it up once into a log. Gently squeeze the sides to neaten it. Place seam-side down into your oiled loaf pan. Cover with a wet towel, shower cap, or slip the whole pan into a plastic bag.You now have two flexible options: - Option 1: Counter Rise Let it sit at room temperature for about 1 hour while your oven preheats. - Option 2: Fridge Rise (My Go-To) Place the loaf in the fridge anywhere from 3 hours up to overnight (max ~24 hours). Because this recipe uses a good amount of starter, going longer than 24 hours will make it quite sour. Most fermentation happens while the dough is cooling down, so once it’s cold, the exact fridge time isn’t critical. This makes it very schedule-friendly.
- When you're ready to bake, preheat your oven to 220°C (425°F) if you're using convection, or 235°C (455°F) for a conventional oven.Place a second loaf pan upside-down on top of the first one to trap steam. Bake covered for 40 minutes. Then remove the top pan and bake uncovered for another 10 minutes, until the top is nicely browned. The internal temperature should reach about: 96–98°C / 205–208°F
- Once baked, use a flat spatula / pancake turner (a fish spatula works great) to gently loosen the sides if needed. Let the bread sit in the pan for about 5 minutes, then remove and transfer to a wire rack. Don’t let it cool in the pan, or you’ll get soggy sides and bottom. For best crumb, let it cool completely before slicing. I know it’s hard. But it’s worth it.
Notes
I use 9x5 loaf pans for this recipe, but you can use 9x4 too - the bread will be a bit taller this way, but they'll work!
Tried this recipe?Please consider Leaving a Review!
