Sourdough Semolina Pizza Dough (Crispy, Chewy, and Full of Flavor)
What's the secret to a next lever sourdough pizza crust? If you're looking for one that's crisp around the edges, chewy in the center, and tastes amazing, this sourdough semolina pizza dough is one to keep on repeat! Bread flour gives it plenty of strength, while fine semolina flour adds a beautiful color, and just a hint of different (but good!) flavor.

Homemade pizza is one of our favorite weekend traditions, and this semolina version feels just a little more special without being any more difficult to make. The overnight fermentation means most of the work is done ahead of time, so all that's left is stretching the dough, adding your favorite toppings, and baking.
If you already enjoy making sourdough bread, this is a fun way to use your starter for something completely different. The nice thing is that basics are the same, so if you can bake bread...you can make good pizza too (and focaccia, which is almost a mix of the two!). Or, you can always go for something easy like sourdough discard skillet pizza.
Summarize & Adapt This Recipe On:
Quick Look
- Prep Time: 30 minutes
- Fermentation Time: Approximately 17-18 hours (5-6 hours at room temperature + overnight cold fermentation)
- Cook Time: 10 minutes
- Total Time: Approximately 18 hours 40 minutes
- Servings: 4-6 (2 medium 12-inch pizzas)
- Difficulty: Easy to Intermediate
- Baking Method: Baking Sheet, Pizza Stone, or Pizza Steel
- Best For: Homemade artisan-style pizza with a crispy crust, chewy interior, and rich sourdough flavor
Jump to:
- Summarize & Adapt This Recipe On:
- Quick Look
- Important Ingredients
- Substitutions & Variations
- How to Make Sourdough Semolina Pizza Dough
- Baking Schedule
- 💭Crucial Success Tips
- Recipe FAQs
- How To Store Sourdough Semolina Pizza Dough
- Other Delicious Recipes
- Sourdough Semolina Pizza Dough (Crispy, Chewy, and Full of Flavor)
- Need Help Tweaking This Recipe?
- Other Sourdough Recipes You'll Love
- Sourdough Pretzel Bagels
- Neapolitan-Style Sourdough Pizza Dough
- Italian Semolina Sourdough Bread
Important Ingredients
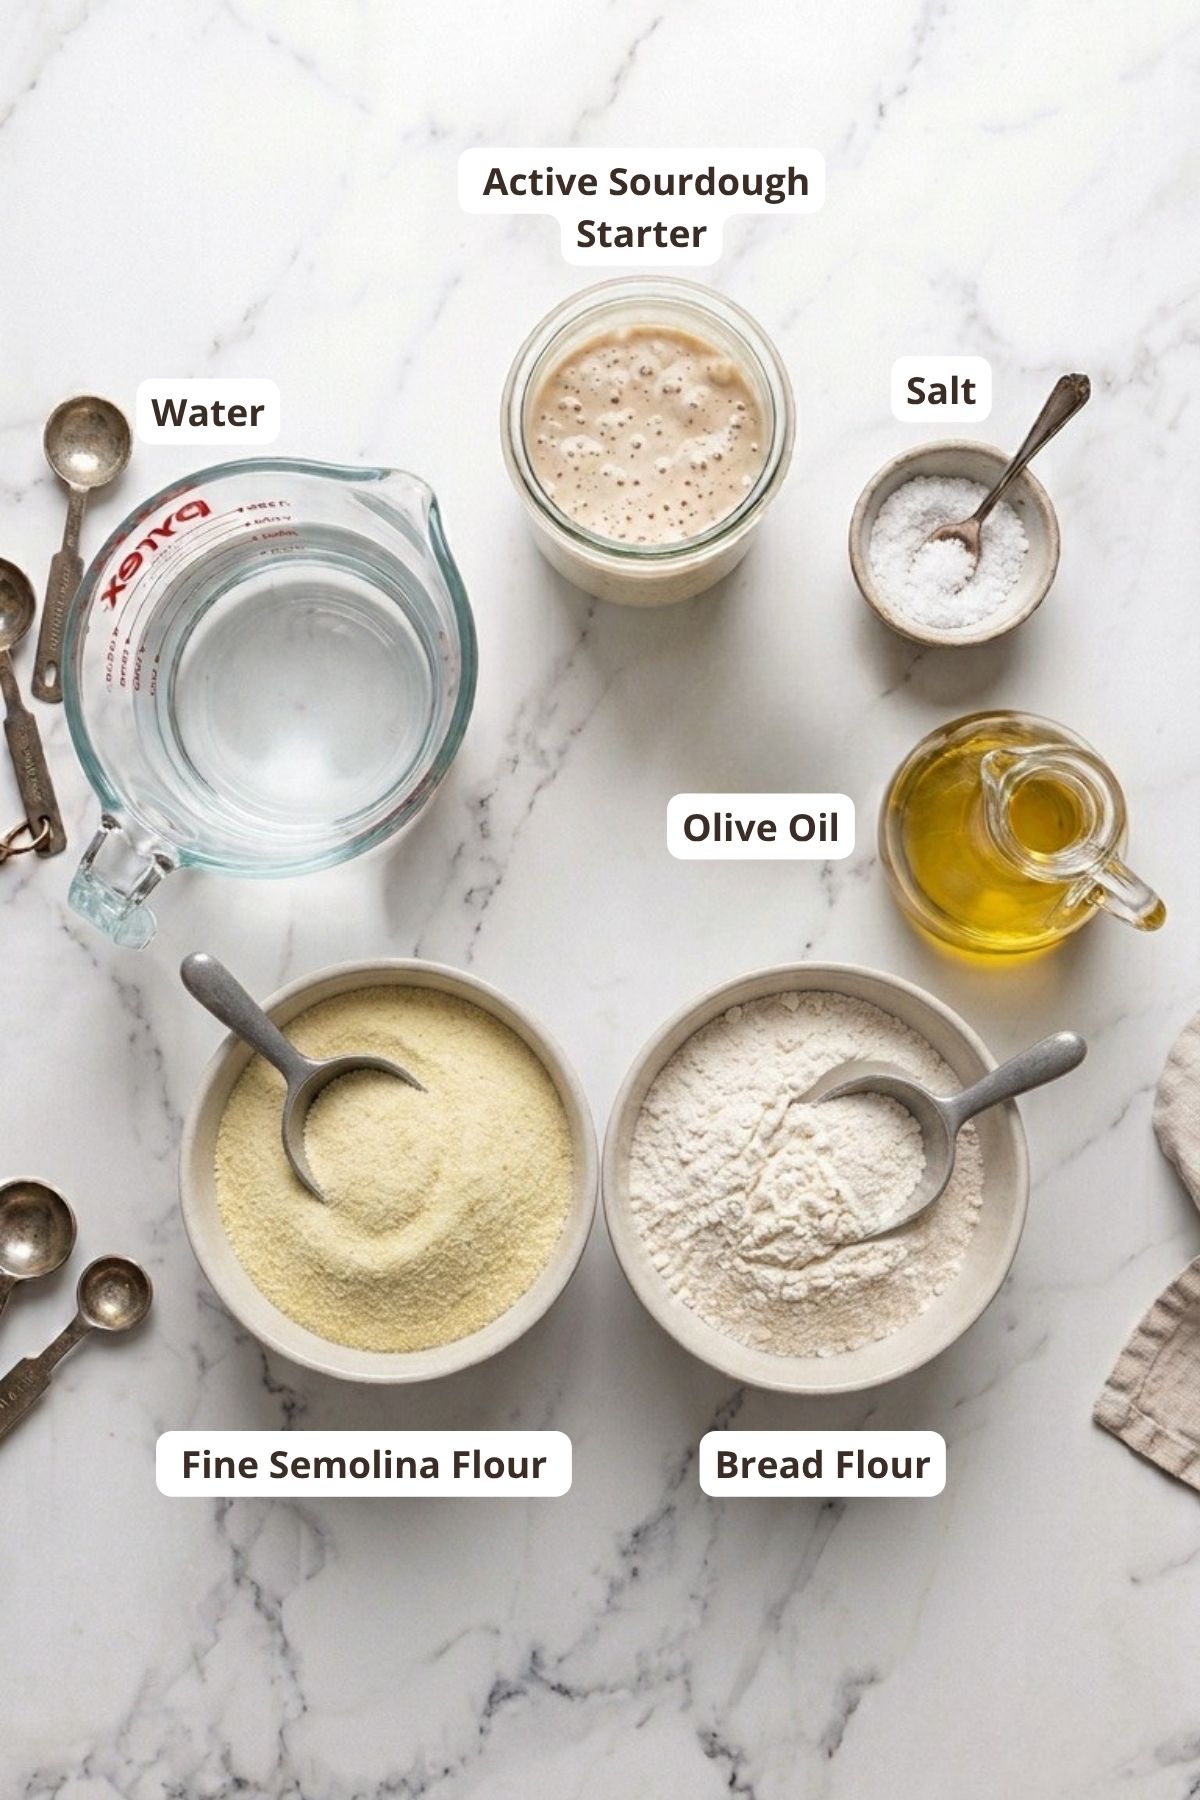
- Bread Flour provides the gluten strength needed for a light, chewy crust.
- Fine Durum Semolina Flour is what gives this pizza dough its signature golden color, nice crunch, and a nutty flavor. For the best results, use a finely milled durum flour labeled "extra fancy" or "semolina rimacinata" (Italian for twice-milled semolina). Because it's ground much finer than coarse semolina, it hydrates more easily and creates a smoother, more elastic dough that's ideal for pizza and other breads.
- Active Sourdough Starter naturally leavens the dough while developing the flavor during fermentation.
- Olive Oil adds softness and makes the dough easier to stretch.
See recipe card for quantities.
Substitutions & Variations
- Substitute all-purpose flour for bread flour if necessary, though the crust will be slightly softer and just a tad bit difficult to work with.
- If fine semolina isn't available, durum flour is the closest alternative.
- Add up to 10% whole wheat flour for a heartier flavor.
- Top with classic Margherita ingredients or experiment with roasted vegetables, prosciutto, spicy salami, mushrooms, or fresh burrata after baking.

Free resource
Get all 3 when you subscribe
Bake beautiful bread that fits Your life - not the other way around
How to Make Sourdough Semolina Pizza Dough
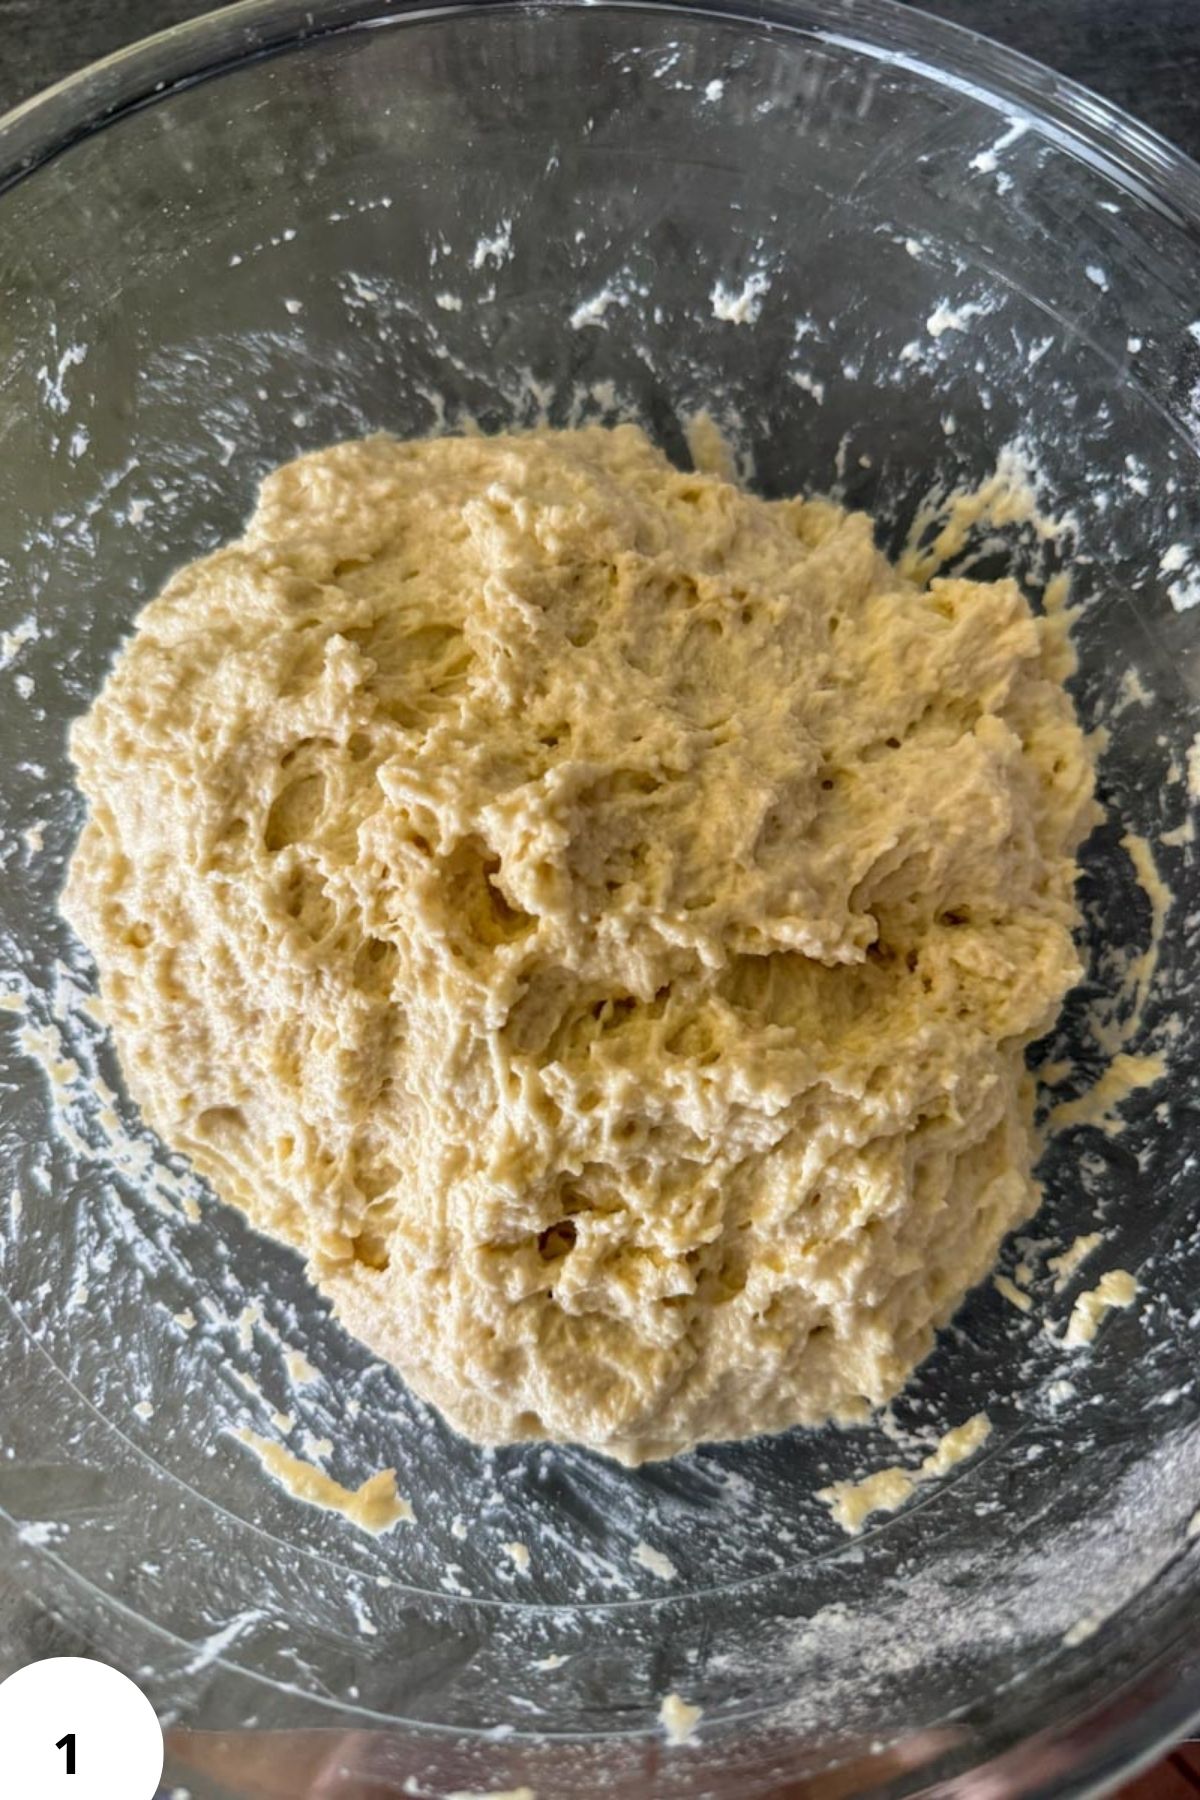
Step 1: In a large mixing bowl, combine the water, active sourdough starter, salt, olive oil, bread flour, and semolina flour.
Mix until everything is incorporated (Image 1). I usually do this directly in the bowl with wet hands. The dough will look shaggy and rough.
Cover the bowl and let the dough rest for 30 minutes.
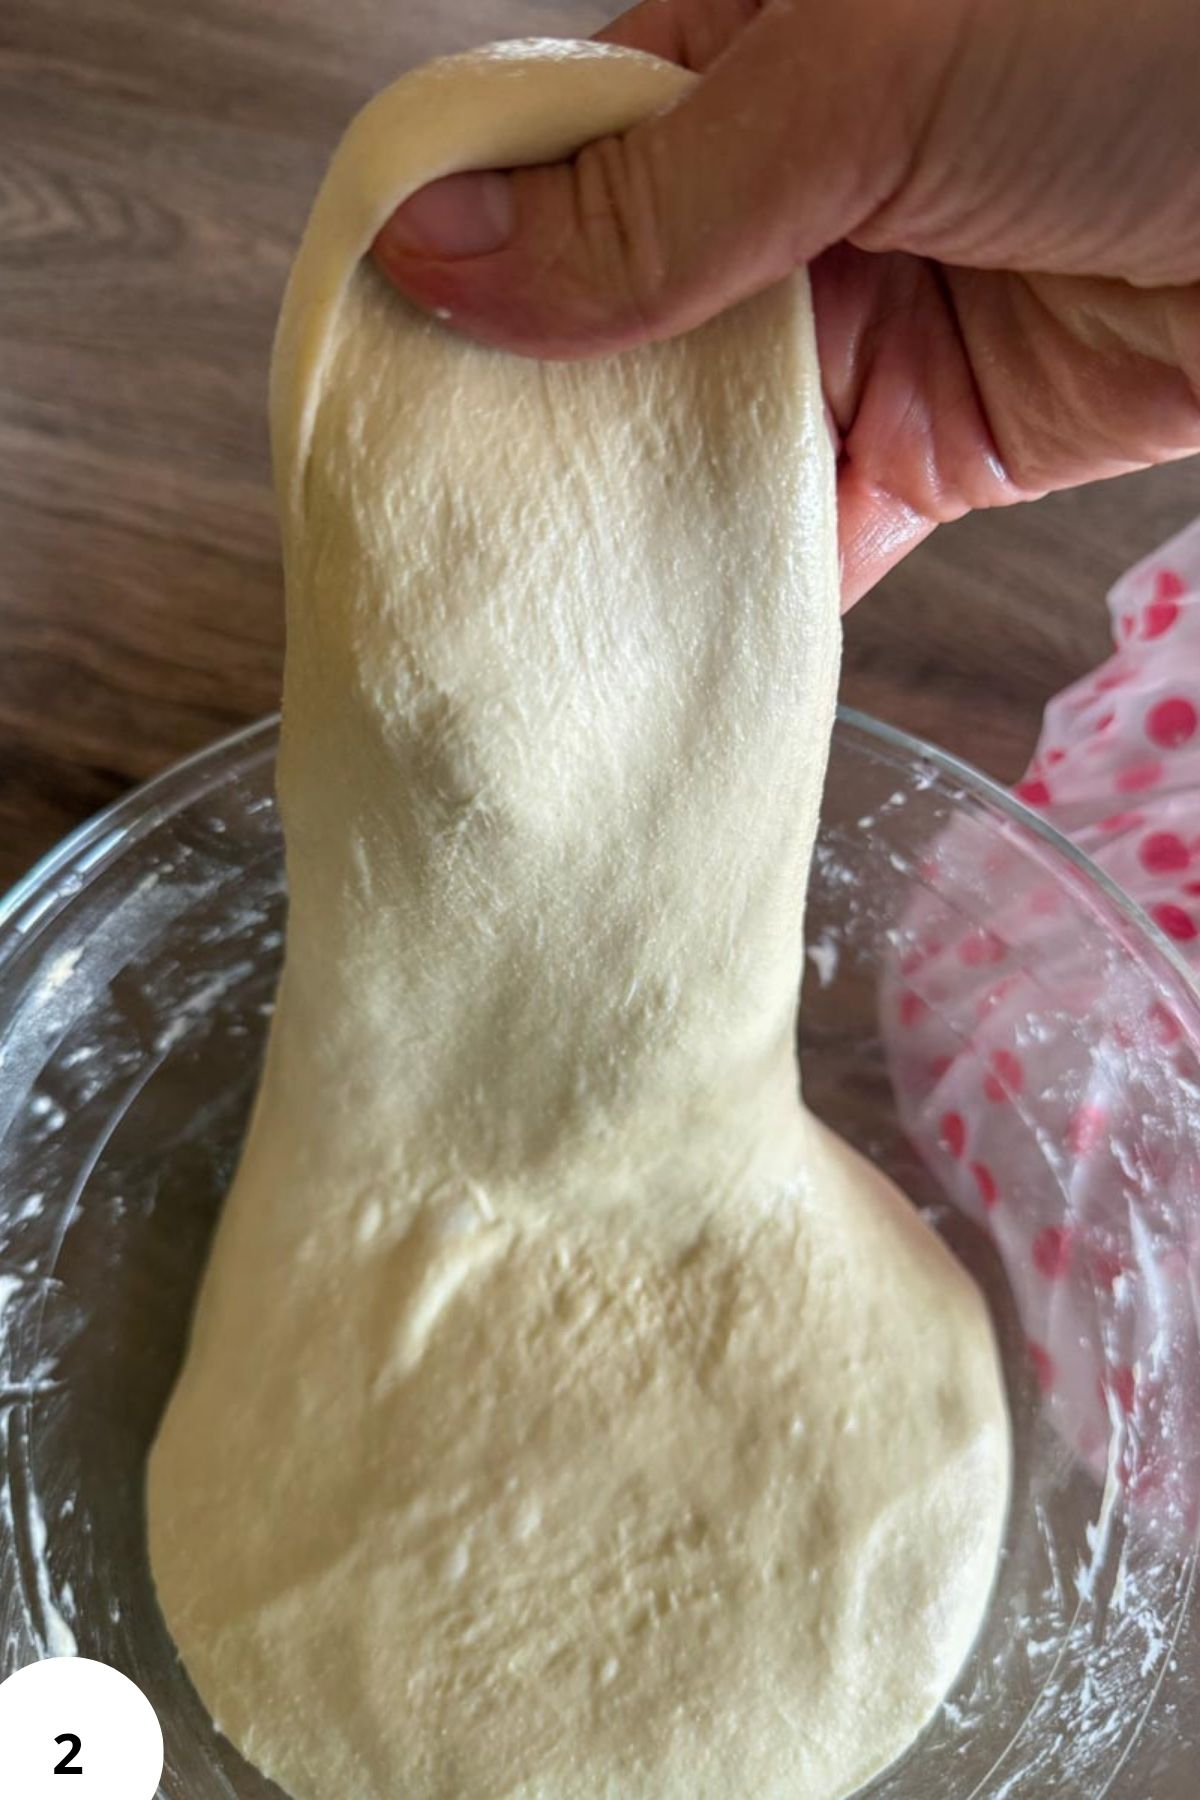
Step 2: During the first 1½ to 2 hours of fermentation, perform 3 sets of stretch and folds about 30 minutes apart.
To do this, grab one side of the dough, stretch it upward, and fold it over itself (Image 2). Rotate the bowl and repeat until you've worked your way around the dough.
Cover between each set.
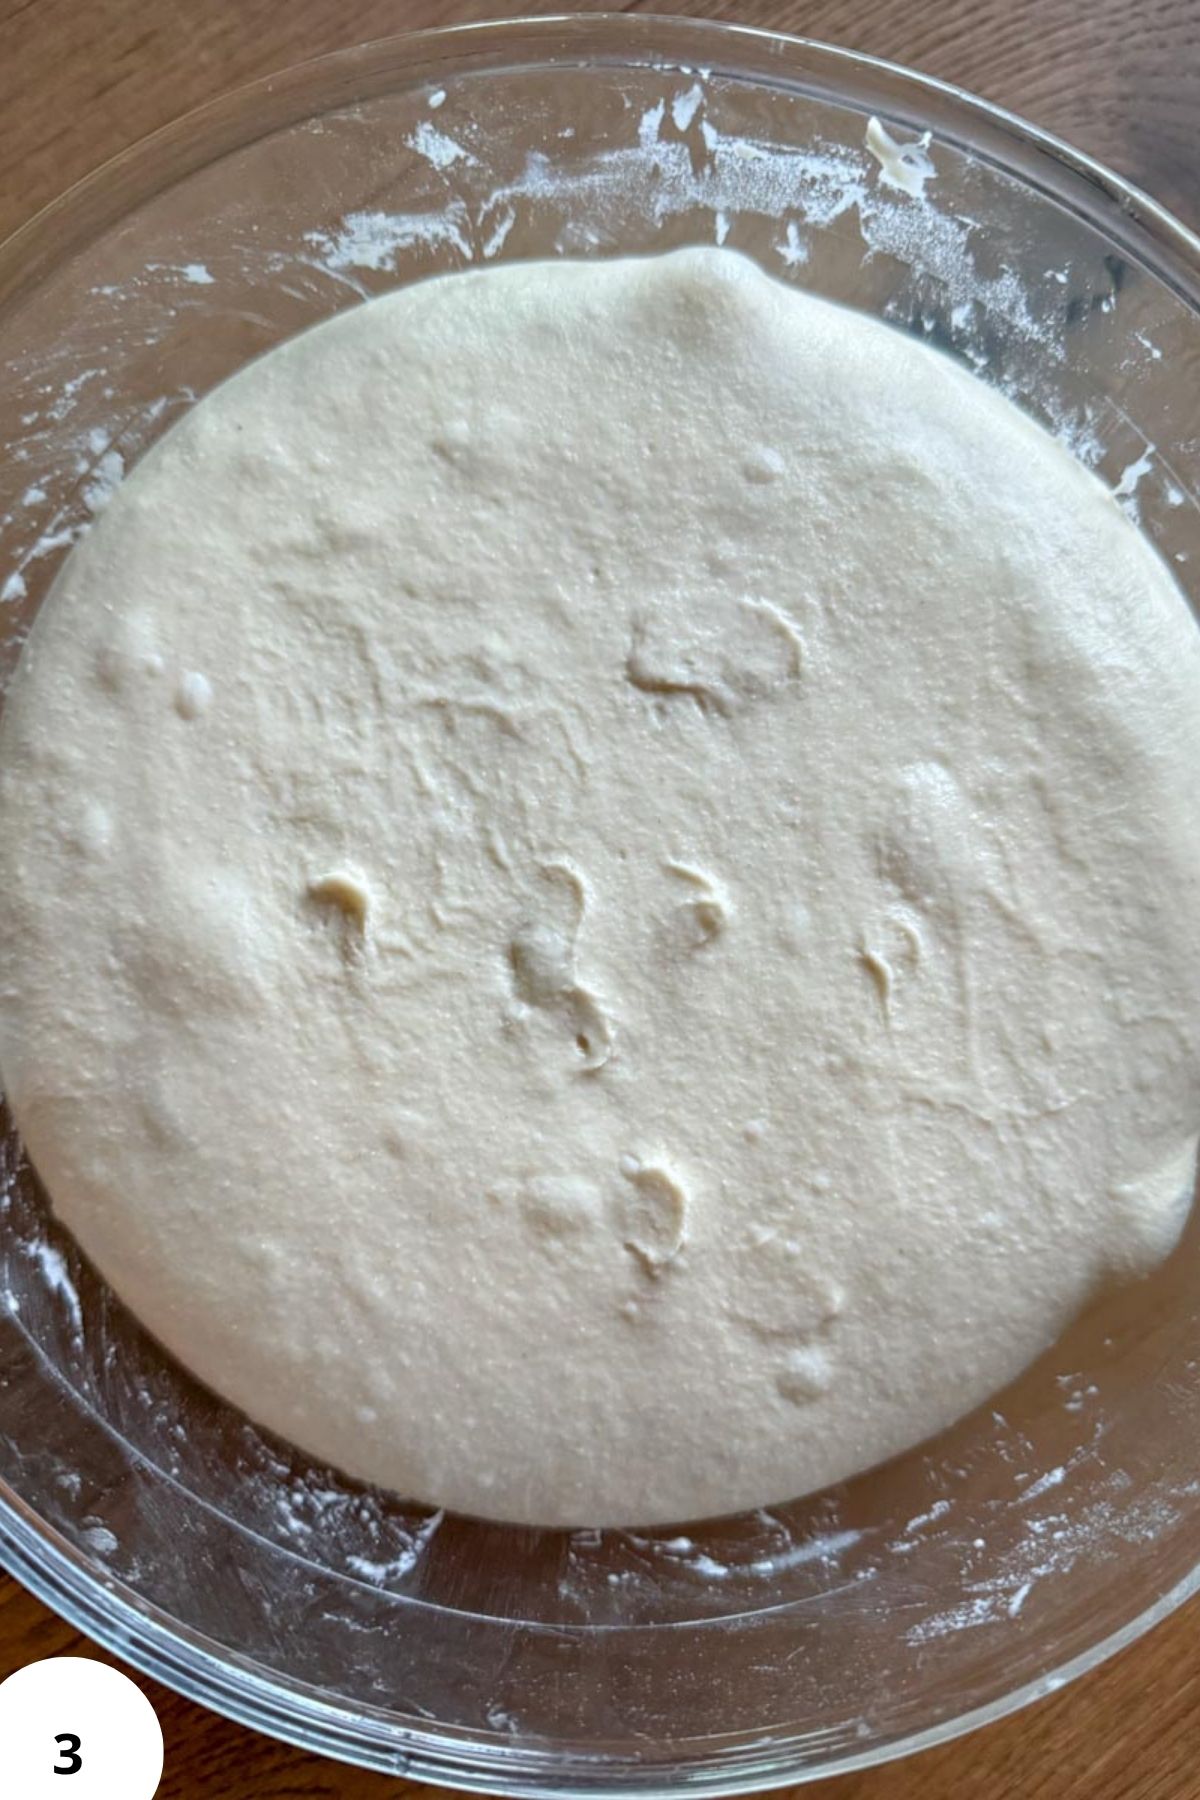
Step 3: Leave the dough to rise at room temperature until noticeably puffy and airy (Image 3), but not fully fermented. The reason is that we want to save some of the fermentation and rising power to happen in the fridge. So it's better to cut the bulk fermentation short a bit sooner. If you plan to keep your dough in the fridge for 2-3 days, ferment it for an even shorter amount of time.
Depending on the temperature of your kitchen, this usually takes 5 to 6 hours (from the moment you mixed up all your ingredients!).
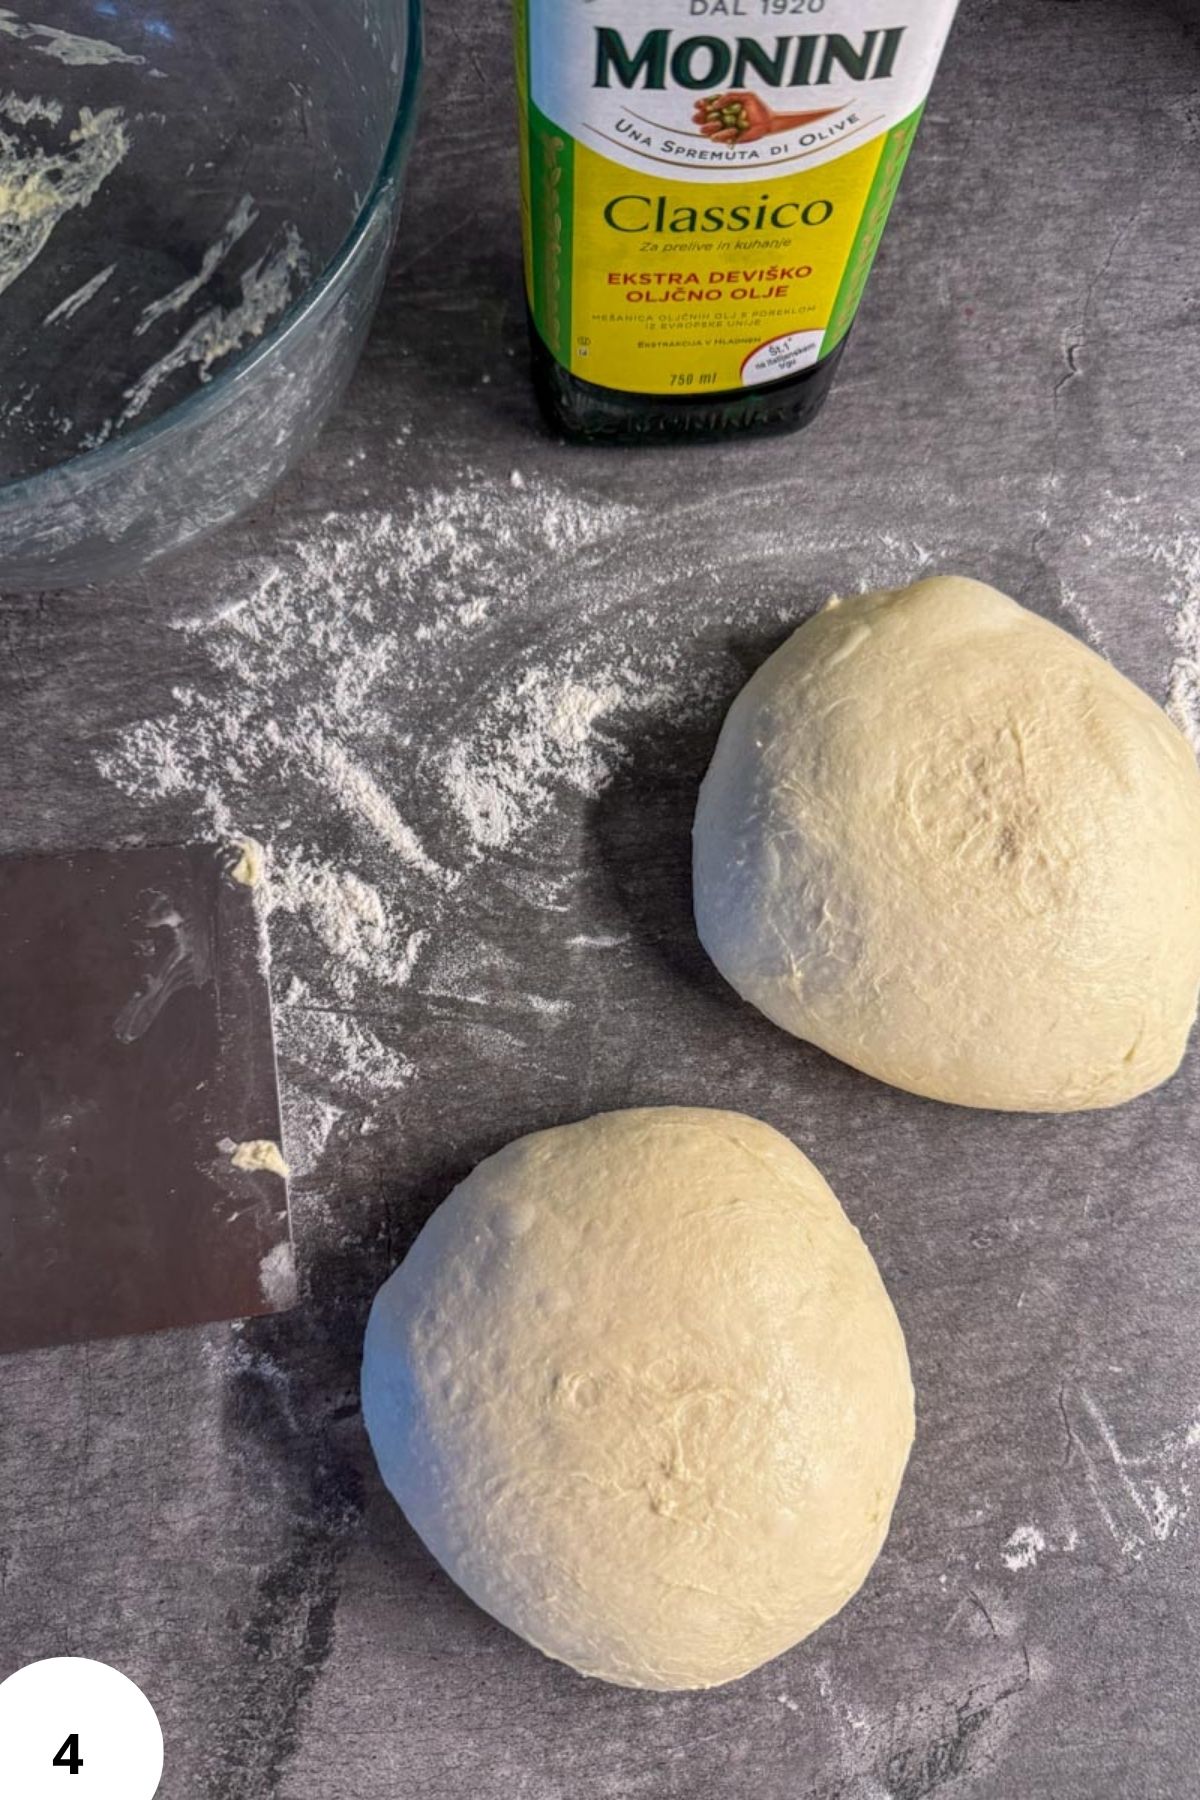
Step 4: Turn the dough onto a floured work surface. Divide it into two equal pieces and shape each piece into a smooth ball (Image 4). Place the dough balls into lightly oiled containers or bowls.
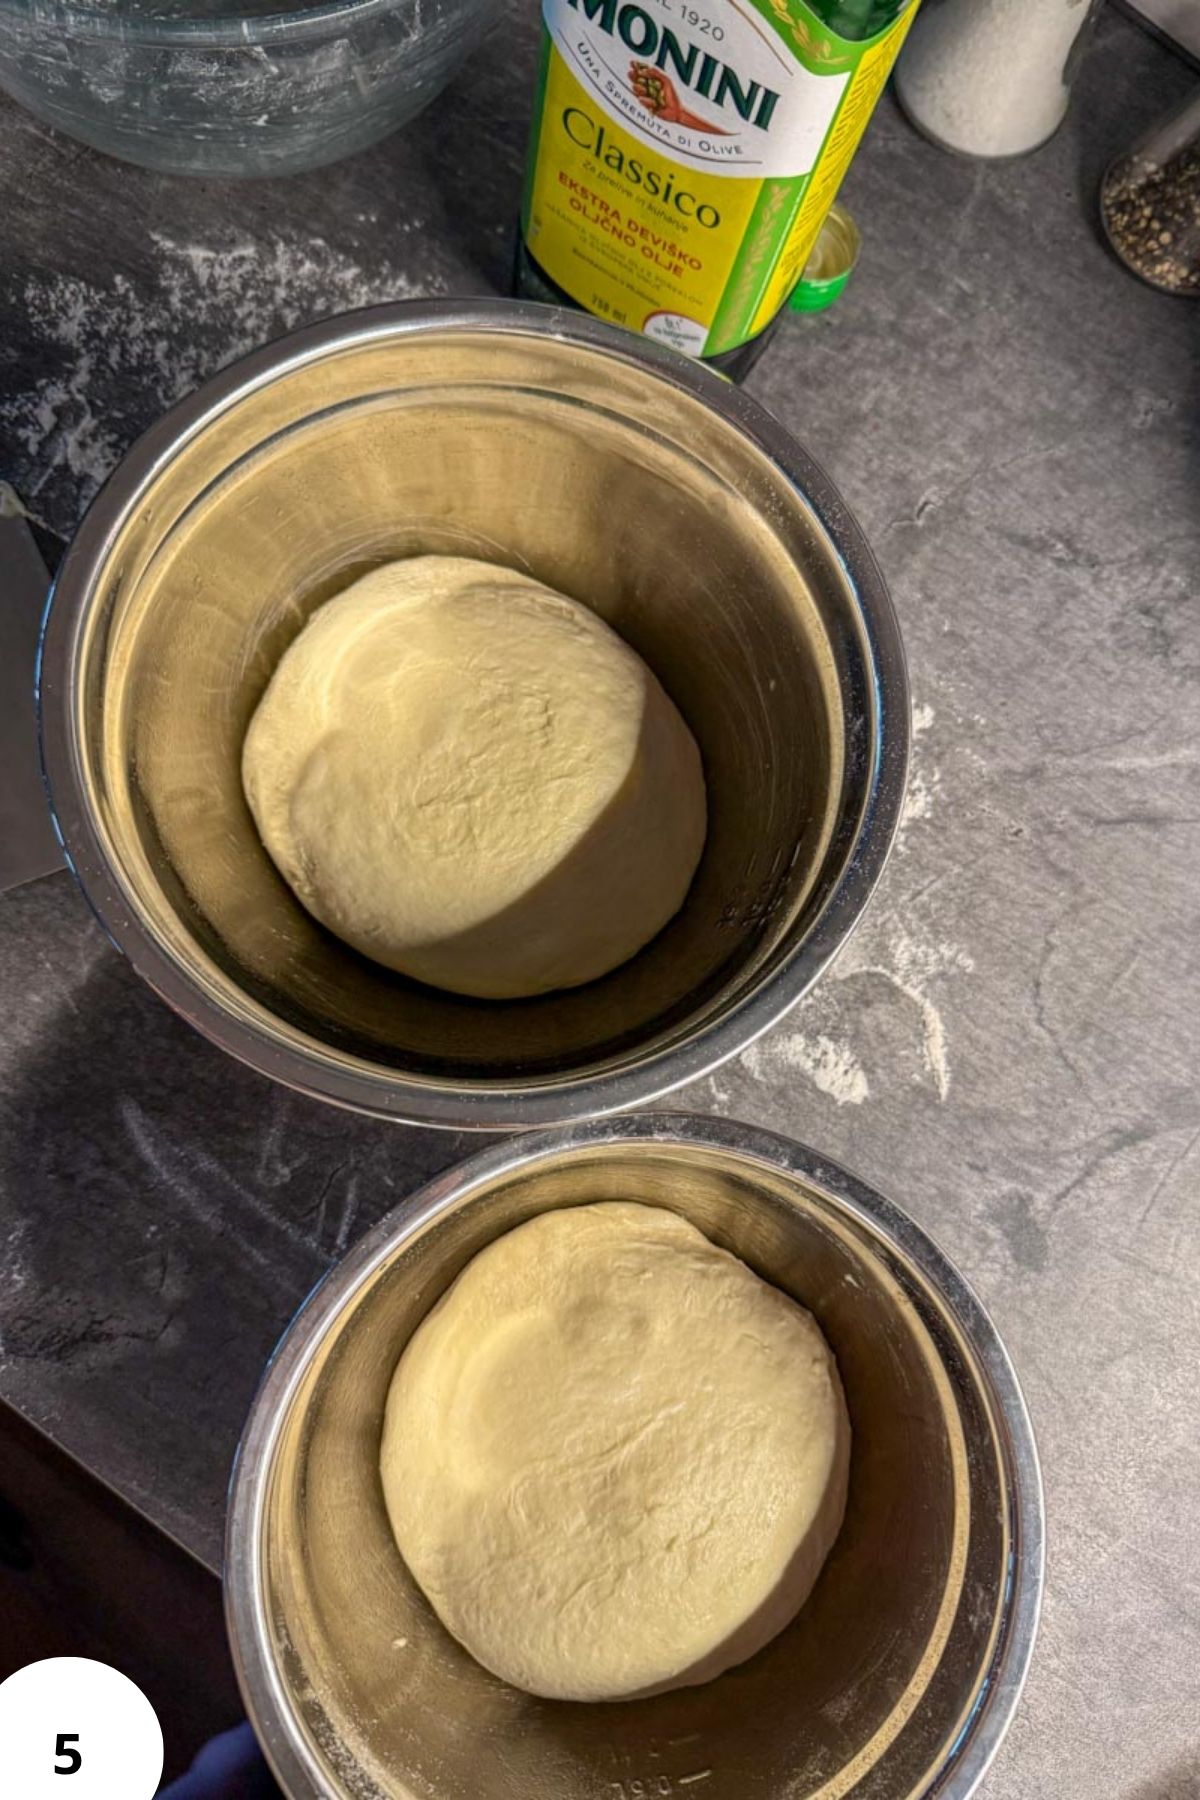
Step 5: Cover and refrigerate overnight or for up to 3 days (Image 5). This step develops flavor and makes the dough easier to stretch. It also makes it tender.
When you know when you'll be making them, remove the dough from the refrigerator 1 to 2 hours before baking. If you're in a pinch, you can go ahead and shape the dough cold, but it will be slower and harder to do.
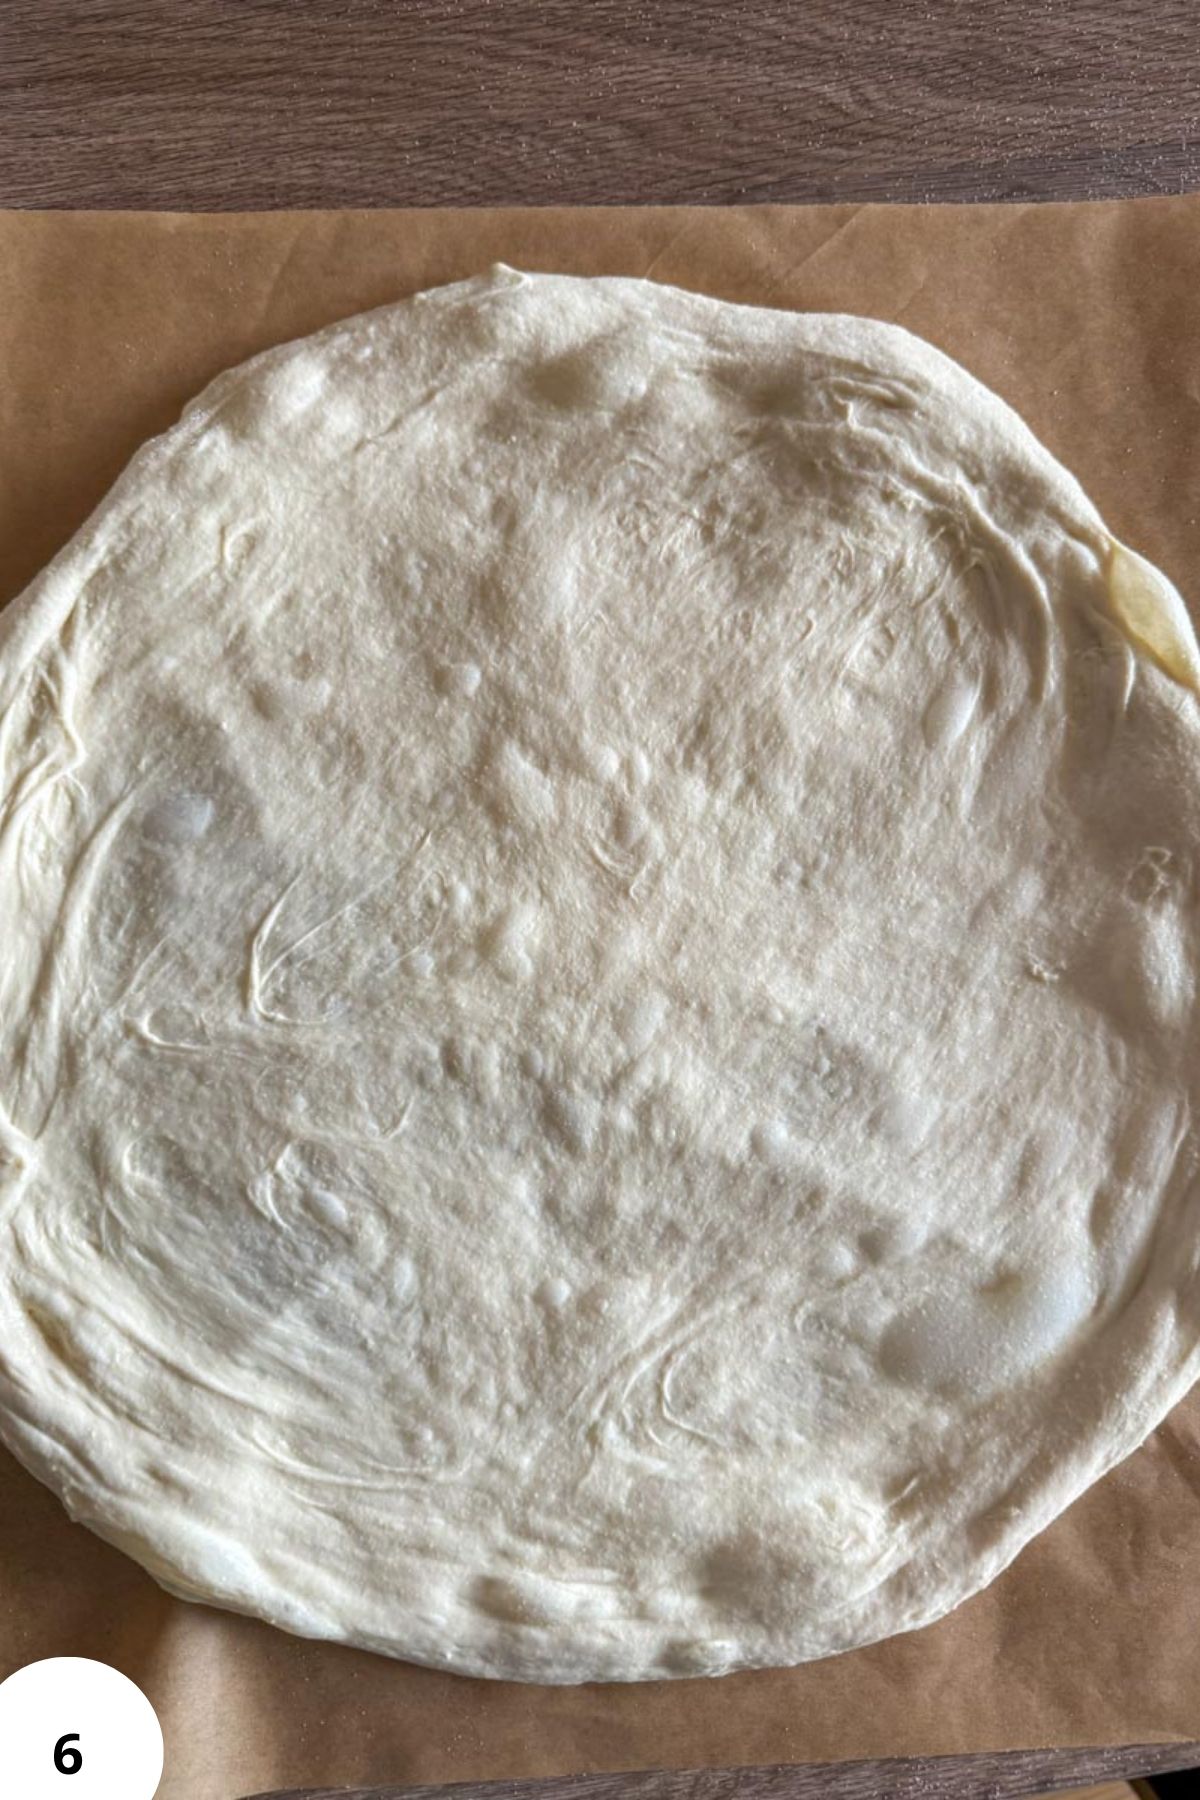
Step 6: Place a sheet of parchment paper on your work surface and dust it with semolina flour.
Transfer one dough ball onto the parchment paper and gently stretch it into a 12-inch (30 cm) circle (Image 6).
Don't worry about making it round exactly round, homemade pizzas are meant to be rustic. Add your toppings directly onto the dough.

Step 7: Bake (Image 7).
Baking on a Baking Sheet
This is my preferred method because it's simple and works in any kitchen: Place a baking sheet in the oven and preheat to 250°C (475°F).
Carefully transfer the parchment paper and pizza onto the hot baking sheet.
Bake for 12 to 15 minutes, or until the crust is golden brown and the cheese is bubbling.
Baking on a Pizza Stone or Steel
If you own a pizza stone or steel, you can use it with this recipe as well.
Place the stone or steel in the oven while it preheats.
Heat the oven to 260°C (500°F) or as high as your oven allows.
Transfer the parchment paper and pizza directly onto the hot stone.
Bake for 9 to 13 minutes, depending on your oven and desired level of browning.
Hint: For the crispiest crust, don't overload your pizza with sauce or toppings. Too much moisture can keep the center from baking all the way through!
Baking Schedule
Day 1
- Mix the dough.
- Rest for 30 minutes.
- Complete 3 stretch-and-fold sessions over 2 hours.
- Finish bulk fermentation (about 5-6 hours total).
- Divide into dough balls and refrigerate.
Day 2 or 3
- Remove dough from the refrigerator 1-2 hours before baking.
- Preheat your oven and baking surface.
- Stretch, top, and bake.
💭Crucial Success Tips
The biggest mistake I see with homemade pizza dough is waiting for it to fully double before refrigerating it. Unlike a loaf of bread, pizza dough continues fermenting during its cold rest.
Instead, refrigerate the dough when it's noticeably puffy and has increased by about 50 to 75% in volume. This leaves plenty of fermentation for the refrigerator, where the dough develops better flavor, becomes easier to stretch, and bakes with a lighter, airier crust.

Recipe FAQs
Yes! In fact, I recommend it. After dividing the dough into balls, refrigerate them overnight or for up to 3 days. The longer cold fermentation develops deeper flavor and makes the dough easier to stretch.
Absolutely. After shaping the dough into balls, place each one in a lightly oiled freezer-safe container or airtight bag and freeze for up to 3 months. Thaw overnight in the refrigerator, then let the dough sit at room temperature for 1 to 2 hours before stretching and baking.
Cold dough naturally feels tighter because the gluten hasn't relaxed yet. Let it sit at room temperature for an hour or two before shaping. If it still springs back, let it rest for another 10 to 15 minutes, then continue stretching gently with your fingertips rather than forcing it.
Yes! I actually make this recipe most often on a preheated baking sheet. It produces a wonderfully crisp crust and doesn't require any special equipment. If you own a pizza stone or steel, they'll work beautifully too, but they're definitely not required.
How To Store Sourdough Semolina Pizza Dough
Unbaked dough balls can be stored in the refrigerator for up to 3 days in lightly oiled, covered containers.
To freeze, wrap each dough ball tightly or place it in airtight containers for up to 3 months. Thaw overnight in the refrigerator before using.
Leftover baked pizza can be refrigerated in an airtight container for up to 4 days. Reheat in a hot skillet, oven, or air fryer to restore the crispy crust.

Other Delicious Recipes
- Sourdough Pretzel Bagels

- Neapolitan-Style Sourdough Pizza Dough
- Italian Semolina Sourdough Bread
- Sourdough Picnic Rolls (Pull-Apart Bread Rolls)


If you tried this sourdough semolina pizza dough (crispy, chewy, and full of flavor) or any other recipe on my blog please leave a 🌟 star rating and let me know how it went in the 📝 comments below! Happy Baking!

Sourdough Semolina Pizza Dough (Crispy, Chewy, and Full of Flavor)
Jump to VideoIngredients
- 350 g bread flour about 2¾ cups
- 150 g semolina flour about 1 cup, fine
- 350 g water 1½ cups
- 100 g active sourdough starter about ½ cup
- 10 g salt 1¾ teaspoons
- 15 g olive oil 1 tablespoon
Instructions
- In a large mixing bowl, combine the water, active sourdough starter, salt, olive oil, bread flour, and semolina flour. Mix until everything is incorporated. I usually do this directly in the bowl with wet hands. The dough will look shaggy and rough. Cover the bowl and let the dough rest for 30 minutes.
- During the first 1½ to 2 hours of fermentation, perform 3 sets of stretch and folds about 30 minutes apart. To do this, grab one side of the dough, stretch it upward, and fold it over itself. Rotate the bowl and repeat until you've worked your way around the dough. Cover between each set.
- Leave the dough to rise at room temperature until noticeably puffy and airy, but not fully fermented. The reason is that we want to save some of the fermentation and rising power to happen in the fridge. So it's better to cut the bulk fermentation short a bit sooner. If you plan to keep your dough in the fridge for 2-3 days, ferment it for an even shorter amount of time. Depending on the temperature of your kitchen, this usually takes 5 to 6 hours (from the moment you mixed up all your ingredients!).
- Turn the dough onto a floured work surface. Divide it into two equal pieces and shape each piece into a smooth ball. Place the dough balls into lightly oiled containers or bowls.
- Cover and refrigerate overnight or for up to 3 days. This step develops flavor and makes the dough easier to stretch. It also makes it tender. When you know when you'll be making them, remove the dough from the refrigerator 1 to 2 hours before baking. If you're in a pinch, you can go ahead and shape the dough cold, but it will be slower and harder to do.
- Place a sheet of parchment paper on your work surface and dust it with semolina flour. Transfer one dough ball onto the parchment paper and gently stretch it into a 12-inch (30 cm) circle. Don't worry about making it round exactly round, homemade pizzas are meant to be rustic. Add your toppings directly onto the dough.
- Baking on a Baking Sheet: This is my preferred method because it's simple and works in any kitchen: Place a baking sheet in the oven and preheat to 250°C (475°F). Carefully transfer the parchment paper and pizza onto the hot baking sheet. Bake for 12 to 15 minutes, or until the crust is golden brown and the cheese is bubbling.Baking on a Pizza Stone or Steel: If you own a pizza stone or steel, you can use it with this recipe as well. Place the stone or steel in the oven while it preheats. Heat the oven to 260°C (500°F) or as high as your oven allows. Transfer the parchment paper and pizza directly onto the hot stone. Bake for 9 to 13 minutes, depending on your oven and desired level of browning.
Video
Notes
- Fine semolina flour works best in this recipe.
- The dough can stay in the refrigerator for up to 3 days.
- Parchment paper makes transferring pizza much easier and is what I recommend for most home bakers.
- For extra flavor, let the dough ferment for 48 hours before baking.


Yum! Great recipe!
So excited to try this! We make homemade pizza every Friday night and I’m definitely going to use this recipe!
This looks amazing!!
we make sourdough pizza weekly as an easy meal. excited to add this to the rotation.
This looks amazing - adding it to our menu for the week!