Sourdough Kaiser Rolls (Austrian Kaisersemmeln)

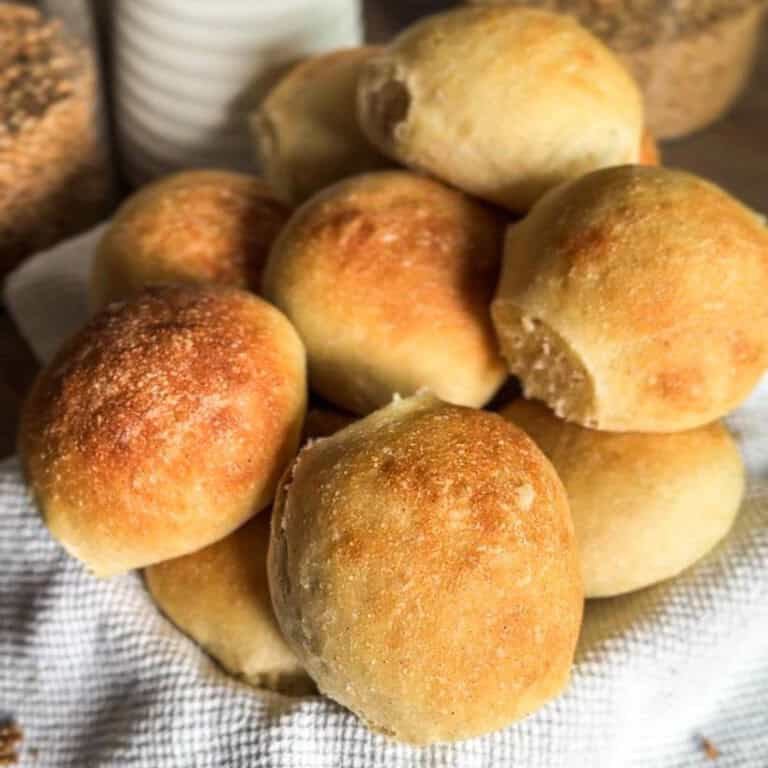
If we ever buy bread from the store, it's Kaiser rolls! They're a staple across Central Europe, including here in Slovenia, and I love how soft they are. This sourdough version of Kaiser rolls keeps the softness, but makes them even better flavor-wise because we're using a sourdough starter. They require just one extra step, but it's so worth it because they're instantly elevated from a simple bread roll to something everyone wants to eat for breakfast with a bit of butter and jam.
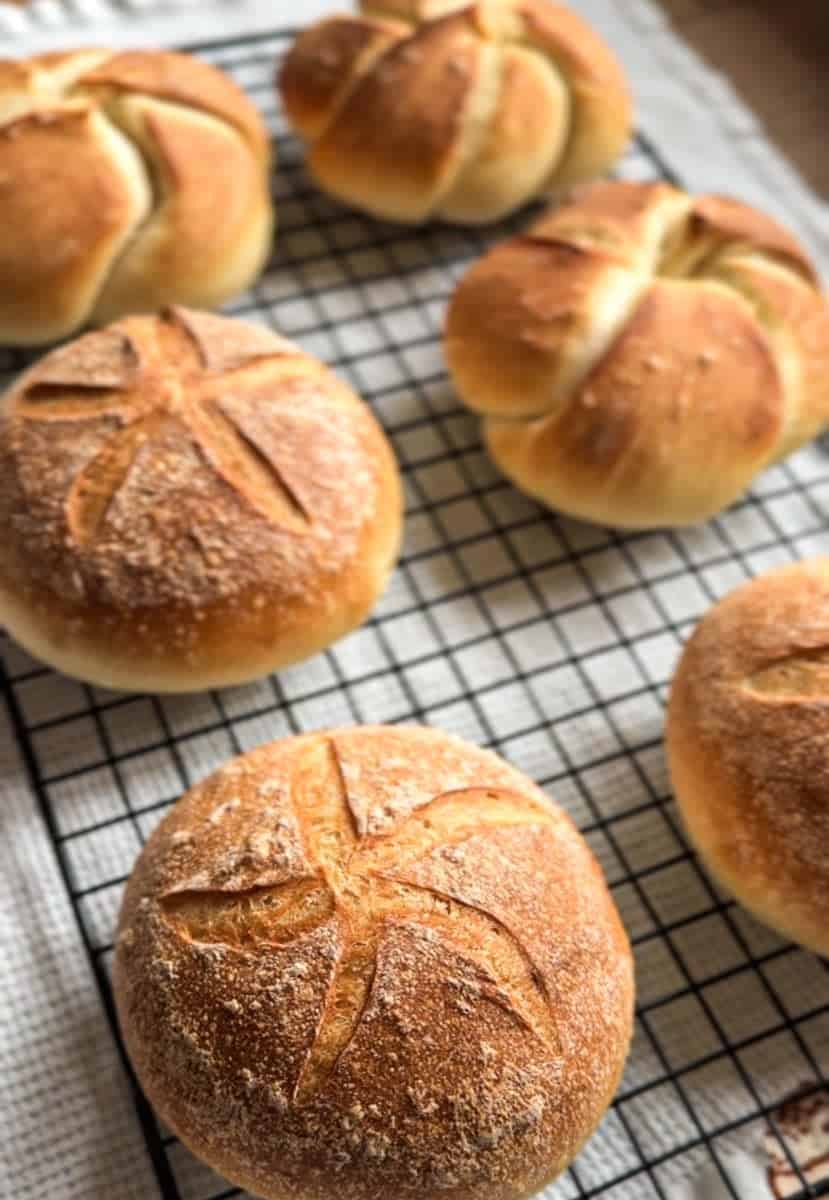
Kaiser rolls, also known as Kaisersemmeln, are traditional bread rolls from Austria and are popular throughout Central Europe. They're commonly enjoyed for breakfast, served with butter, jam, cheese, or cold cuts. And if you're still learning to shape Kaiser rolls, don't worry! You can make round rolls and score the traditional pattern on top instead.
If you're family enjoy soft sourdough rolls, these soft sourdough italian milk rolls and soft sourdough sandwich rolls are another bread option to serve at breakfast or alongside family meals.
Quick Look
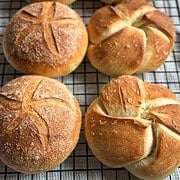
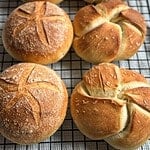
- The loaf: Soft sourdough Kaiser rolls with a golden crust and the traditional five-part star shape.
- Starter: 150 g active sourdough starter (100% hydration), at or near peak.
- Method: Mix and knead the dough, bulk ferment, divide and shape into knots, proof, and bake with steam.
- Hands-on time: About 35 minutes.
- Plan ahead: Shape the rolls, cover, and refrigerate for 8-12 hours. The next morning, let them finish proofing at room temperature if needed before baking.
- Baking: Bake at 425°F (220°C) for 10 minutes with steam, then reduce to 410°F (210°C) and bake for another 10-15 minutes.
- Yield: 6 large rolls.
- How I serve it: Serve with butter and jam for breakfast, or slice and fill with eggs, cheese, cold cuts, or your favorite sandwich fillings.
Summarize & Adapt This Recipe On:
Jump to:
- Quick Look
- Summarize & Adapt This Recipe On:
- Important Ingredients
- Substitutions & Variations
- How to Make Sourdough Kaiser Rolls (Austrian Kaisersemmeln)
- Recipe Timeline
- 💭Crucial Success Tips
- Can I Add Yeast? (Optional section!!)
- Which Grains Can I Use?
- Recipe FAQs
- How To Store Sourdough Kaiser Rolls (Austrian Kaisersemmeln)
- Other Delicious Sourdough Bread Recipes
- Sourdough Kaiser Rolls (Austrian Kaisersemmeln)
- Other Sourdough Recipes You'll Love
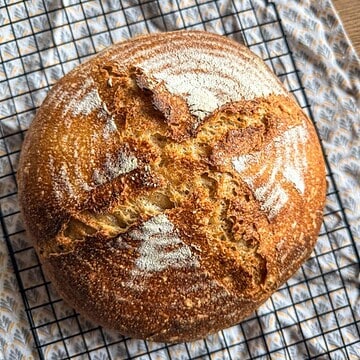
- Fresh Milled Buckwheat Sourdough Rolls
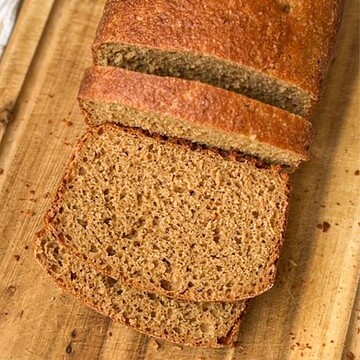
- The Easiest Fresh Milled Einkorn Sourdough Bread (Loaf Pan Method)
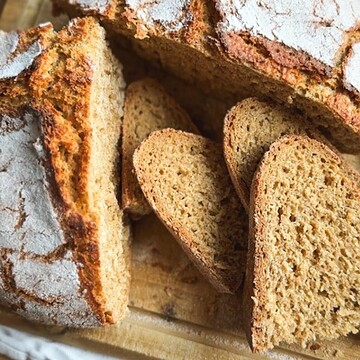
- 100% Fresh-Milled Einkorn Sourdough Bread
Important Ingredients
- active sourdough starter help the dough rise and give the rolls a mild sourdough flavor.
- all-purpose flour helps create soft rolls that hold their shape.
- lukewarm water helps bring the dough together and supports fermentation without being too hot for the starter.
- unsalted butter adds a little richness and helps keep the inside of the rolls soft.
- sugar adds mild sweetness and helps the rolls brown during baking.
- fine sea salt brings out the flavor of the dough and balances the other ingredients.
- oil helps prevent sticking when flattening them during the second rise.
See recipe card for quantities.
Substitutions & Variations
- Use all purpose flour with around 11-12% protein for soft rolls that hold their shape. Bread flour also works, but the rolls may turn out a little chewier - that's why I prefer all purpose!
- The small amount of sugar adds mild sweetness and makes the rolls brown easily. You can reduce it a bit, though the finished rolls may look a bit paler.
- Divide the dough into 8 portions instead of 6 for smaller breakfast rolls. They'll be a bit harder to shape though! That's why I recommend trying this recipe first with 6 balls.
- For overnight rolls, after shaping, cover the rolls and refrigerate for 8-12 hours. The next morning, let them finish proofing at room temperature if needed before baking.

free resource
Get All 3 Sourdough Bake Schedules
Bake beautiful bread that fits Your life - not the other way around
How to Make Sourdough Kaiser Rolls (Austrian Kaisersemmeln)
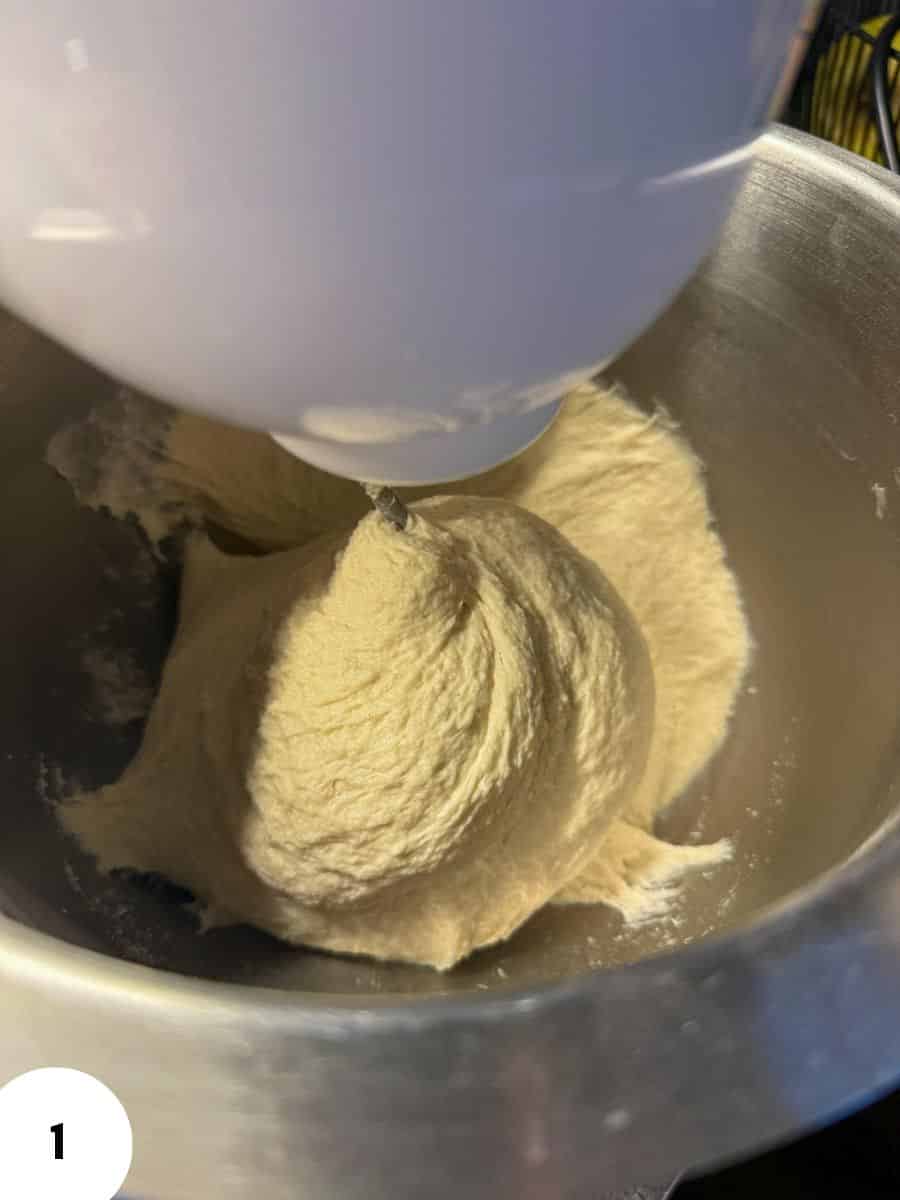
Step 1: Combine the water, sourdough starter, and sugar in a large mixing bowl. Add the flour, salt, and softened butter. Mix until combined, then knead by hand or with a stand mixer for approximately 8-10 minutes, until the dough is smooth, elastic, and slightly tacky (Image 1). In the bowl of a stand mixer, it should just almost pull away from the sides of the bowl (but not quite) - if it's far from it, add flour until it does!
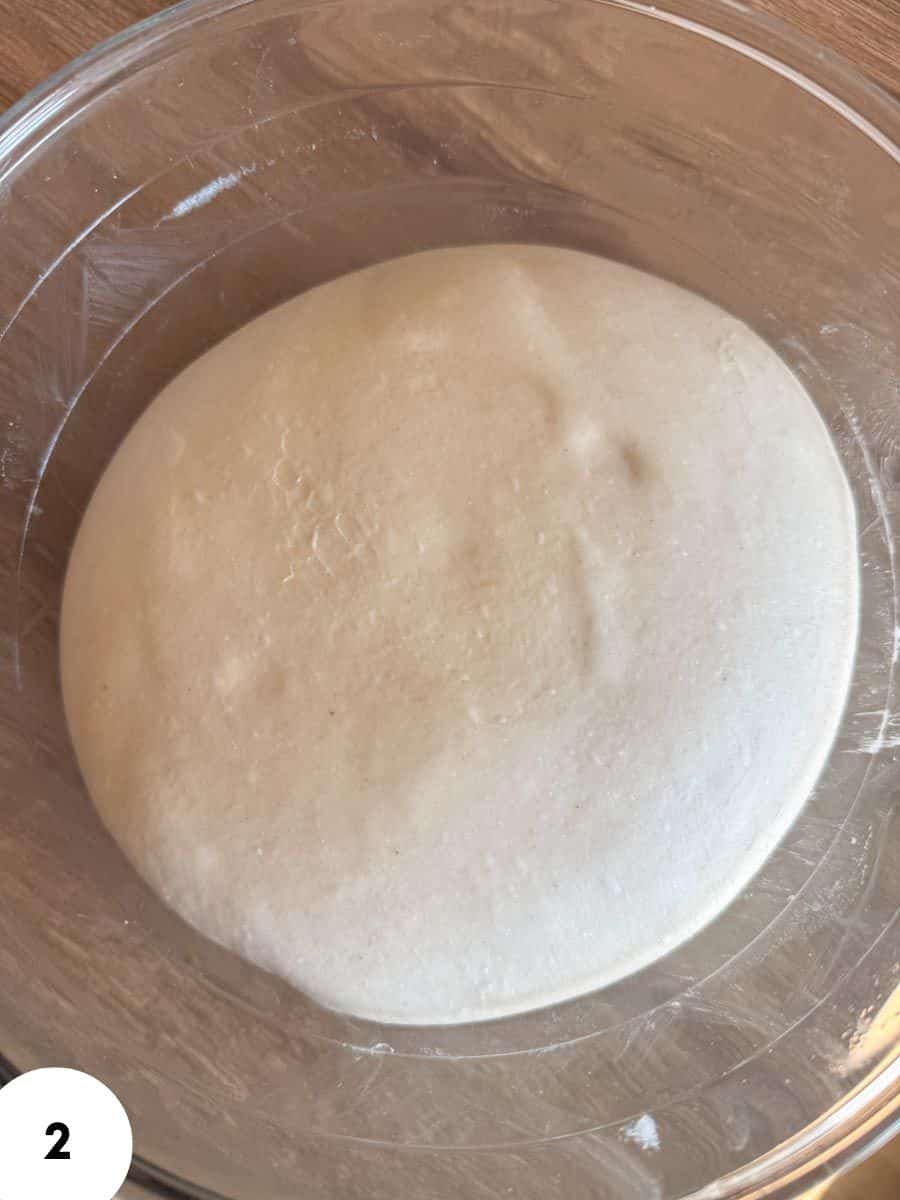
Step 2: Transfer the dough to a bowl (Image 2) where you plan to bulk ferment it, cover, and let rise at room temperature until visibly it's full of small bubbles and increased in volume by about 40%. This should take around 5-7 hours at 75-77°F (24-25°C), depending on your starter and room temperature.
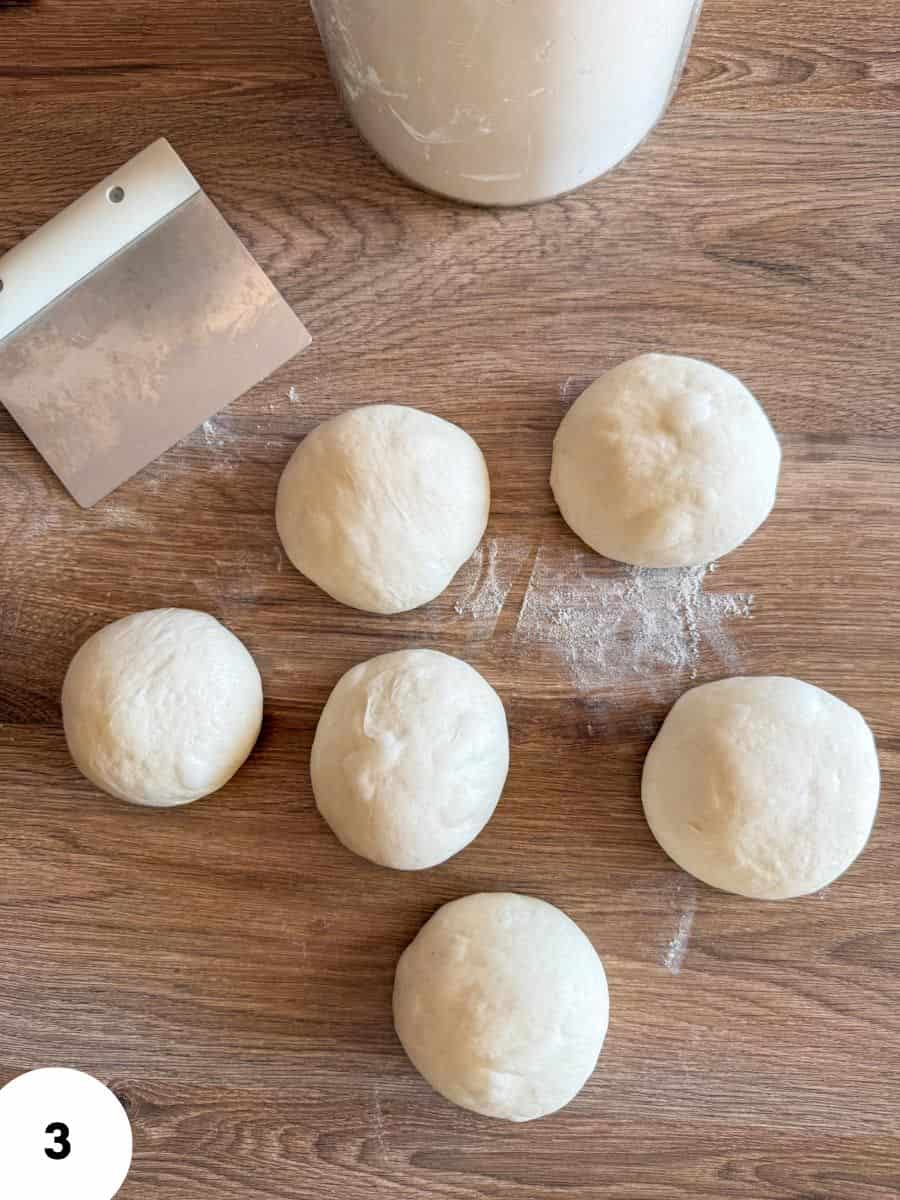
Step 3: Turn the dough onto your counter and divide it into 6 pieces. Shape each piece into a ball (Image 3), cover, and let rest for 15-20 minutes to relax the gluten.
Step 4: On an unfloured or lightly floured surface, roll each piece into a rope approximately 18-20 inches (45-50 cm) long. I like to do this in turns, so te gluten has time to relax. Meaning I'll roll one rope a bit, then the next one, and the next, and then I'll come back and roll the first one some more, and the next, and the next…
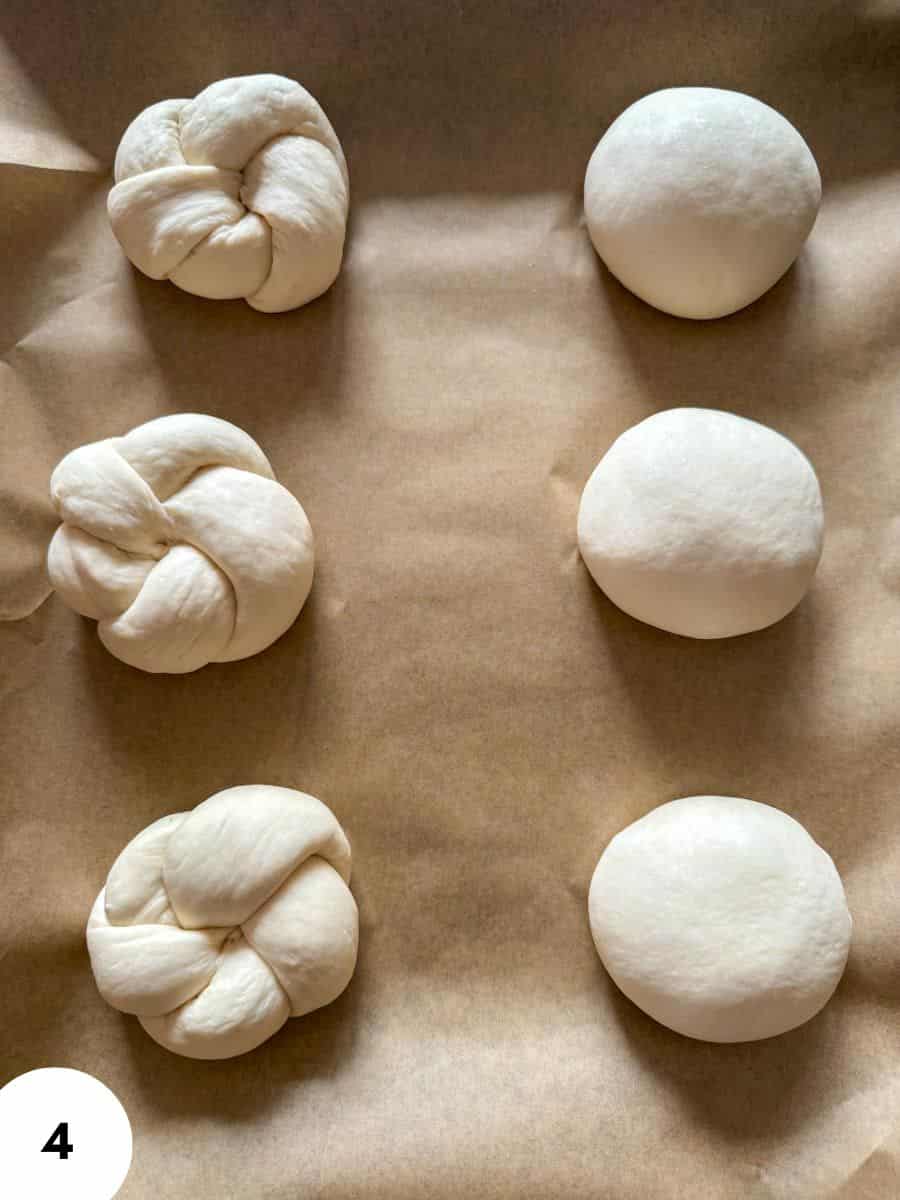
On each rope, tie a loose knot in the center. Bring one free end over the loop and tuck it into the center, then wrap the other end underneath and up through the center. Tuck the ends securely to create the characteristic five-part Kaiser shape. See the video below for this step!
OPTIONAL: you can also just leave the dough balls as they are, and you'll be scoring the signature kaiser roll design onto them later.
Place the shaped rolls (or just rolls if you decided to score them instead of shape them) on a parchment-lined baking sheet, leaving enough space between them to rise (Image 4).
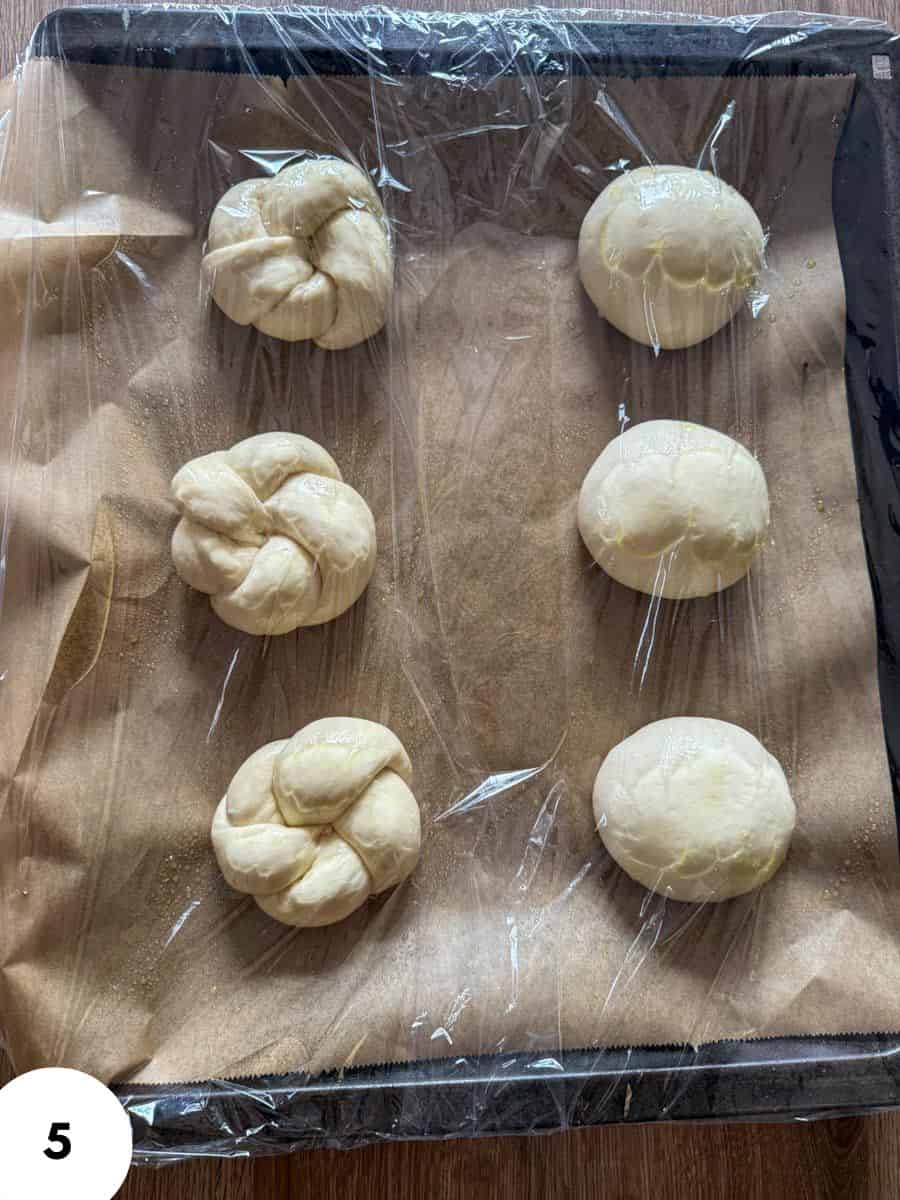
Step 5: Lightly oil their tops (I like to use olive oil spray for this part! Alternatively, you can lightly brush them with oil too), cover with plastic wrap (Image 5), and place a second baking sheet directly on top. Let its weight gently press down on the rolls as they rise, encouraging them to expand outward rather than upward.
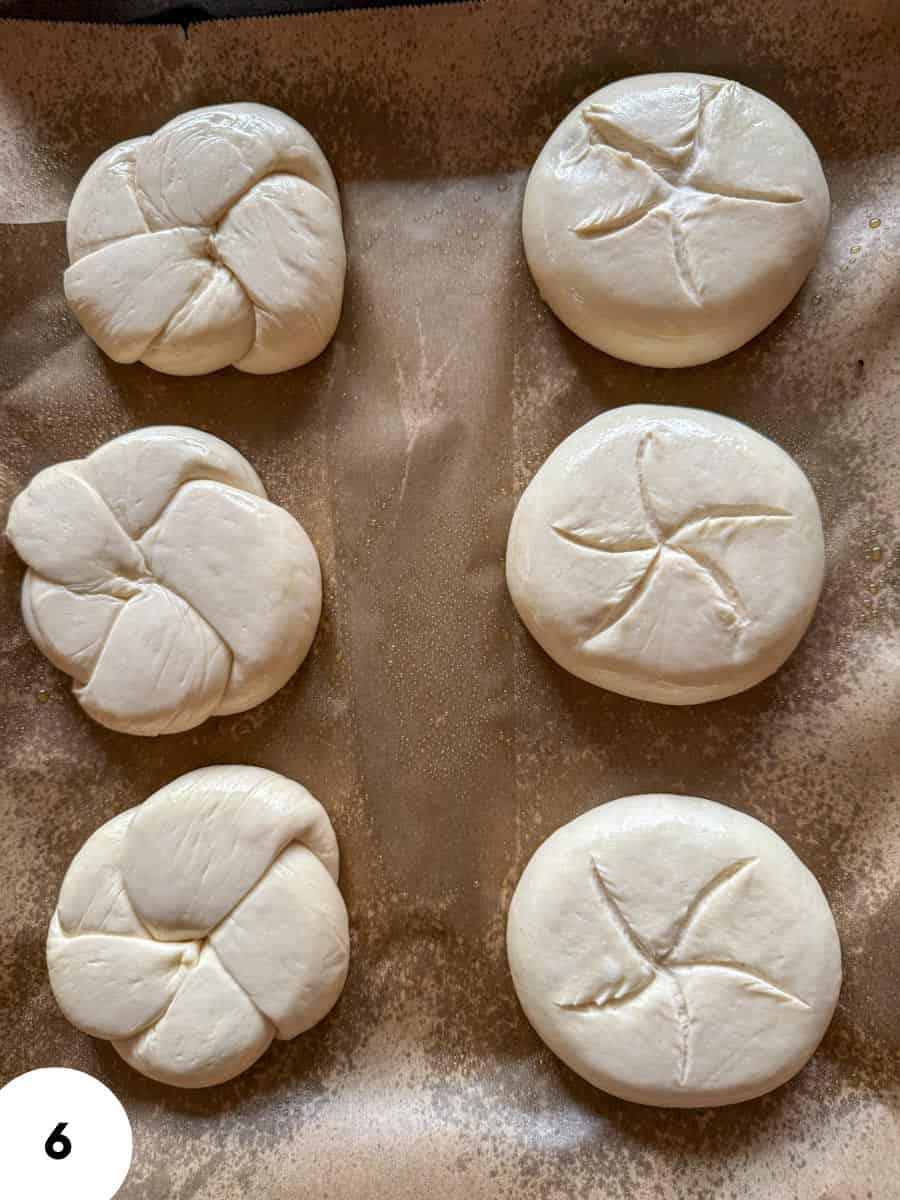
Step 6: Let the rolls rise for about 2-4 hours, until noticeably puffy. Carefully remove the top baking sheet and plastic wrap (Image 6).
At the end of the second rise, If you decided not to shape the rolls, but score them, grab a bread lame or a sharp knife and draw the Kaiser roll design onto them.
Step 7: Preheat the oven to 425°F (220°C), placing a small empty metal baking pan on a lower rack for steam.
Place the rolls in the oven and carefully pour some very hot water into the preheated metal pan.
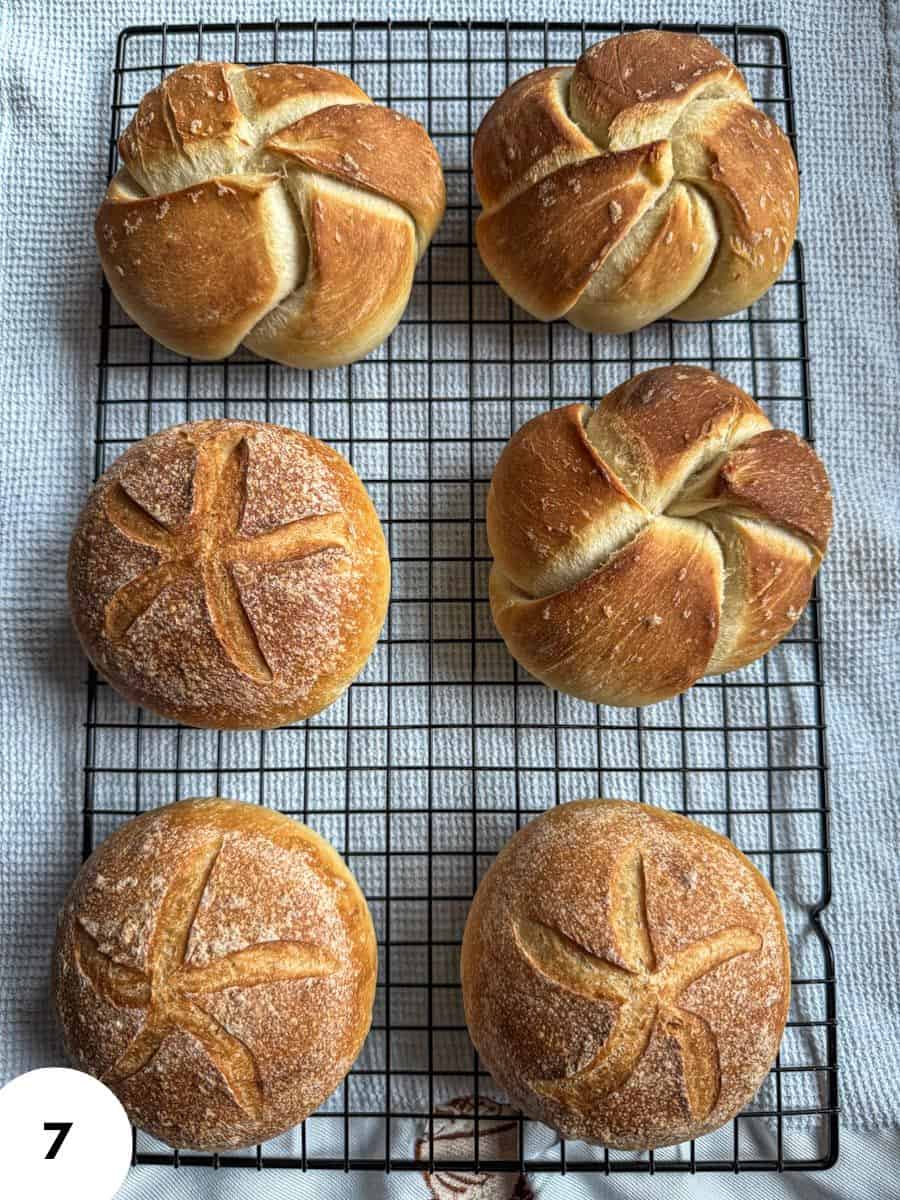
Bake for 10 minutes, then remove the steam pan, reduce the temperature to 410°F (210°C), and bake for another 10-15 minutes, until golden brown.
Transfer to a wire rack and allow to cool before slicing (Image 7).
Hint: Work quickly when shaping these, as the dough will gradually be tightening, and you'll need to make a not and seal it before that happens. It really helps to watch the video a few times right before you shape them! 🙂
Recipe Timeline
OPTION 1: Same-Day Variation
- 7:00 a.m.: feed your sourdough starter
- 8:00 a.m.: mix and knead the dough.
- 8:15 a.m.-1:15 p.m.: let the dough bulk ferment.
- 1:15 p.m.: divide the dough and let them rest.
- 1:35 p.m.: shape the rolls.
- 1:50-4:00 p.m.: cover and let the rolls rise.
- 4:00 p.m.: preheat the oven and prepare the steam pan.
- 4:15 p.m.: bake the rolls.
- 4:40 p.m.: transfer the rolls, cool, and serve.
OPTION 2: Overnight Variation - Chill Before Shaping
- day 1, morning or afternoon: mix and knead the dough, then let it bulk ferment until it has increased in volume by about 40%.
- day 1, evening: cover the dough and refrigerate it overnight before shaping.
- day 2, morning: take the dough out of the refrigerator and divide it into 6 pieces. Let them rest for 15-20 minutes, then shape into Kaiser rolls.
- day 2, morning: cover and let the shaped rolls rise until noticeably puffy. Cold dough may need extra time to warm up and proof.
- day 2, late morning: bake at 425°F (220°C) for 10 minutes with steam, then reduce to 410°F (210°C) and bake for another 10-15 minutes.
Another overnight option: Shape the Kaiser rolls on Day 1, cover them well, and refrigerate for 8-12 hours. The next morning, let them finish proofing at room temperature if needed, then bake as directed. This option is especially handy when you want freshly baked rolls for breakfast without shaping the dough first thing in the morning.
💭Crucial Success Tips
This dough needs to almost not stick to the bowl of a hand mixer after the mixing time is up. If it doesn't, add more flour. Because it'll be better to end up with a dough that is slightly too stiff but still shapable, than to end up with a dough you won't be able to shape! So err on the side of the making the dough stiffer at least for the first time you're making these, and then you can play around with a wetter dough next time.
Can I Add Yeast? (Optional section!!)
Option A: Just a Pinch (Long Fermentation)
Add 1 g (about ⅓ teaspoon) instant yeast with the flour, keeping the 150 g active sourdough starter and all other ingredients the same.
Knead the dough until smooth and elastic, then let it bulk ferment at room temperature. Since the yeast speeds up fermentation, check the dough earlier than usual. Once it has increased in volume by about 40% and shows small bubbles, cover and refrigerate it overnight.
Rough timeline: Mix the dough in the afternoon, let it become puffy, and refrigerate overnight. The next morning, divide and shape the rolls, let them rise until noticeably puffy, and bake as directed.
This option keeps the overnight fermentation while giving the dough a little help from instant yeast.
Option B: Faster Version (Active Starter or Discard)
Add 3 g (about 1 teaspoon) instant yeast with the flour. You can use 150 g active sourdough starter or sourdough discard made with equal weights of flour and water. Keep the other ingredients the same.
Knead until the dough is smooth and elastic, then let it rise at room temperature for about 1½-3 hours, checking for a noticeable increase in volume and small bubbles. Refrigerate the dough for at least 2 hours before dividing and shaping. After shaping, let the rolls rise until noticeably puffy before baking.
Rough timeline: Mix in the morning, let the dough rise for 1½-3 hours, chill for at least 2 hours, then shape and proof the rolls before baking.
Skip the original 5-7-hour bulk fermentation for this option. The commercial yeast provides most of the extra lift, so the dough will rise faster, even when using sourdough discard.
My tip: Don't rely on the clock alone. Even with added yeast, wait until the shaped rolls look puffy before baking. This helps you get softer rolls with a lighter texture.
Which Grains Can I Use?
This Sourdough Kaiser Rolls recipe uses all-purpose flour with around 11-12% protein. I recommend starting with this flour because it helps create soft rolls while giving the dough enough strength to hold its traditional Kaiser shape.
- All-purpose flour: The original recipe uses 525 g of all-purpose flour. Choose one with around 11-12% protein for a good balance of softness and structure.
- Bread flour: You can replace the all-purpose flour with bread flour. The rolls may turn out a little chewier, and the dough may feel slightly firmer.
- A mix of bread flour and all-purpose flour: Try using half of each for a balance of softness and chewiness. Keep an eye on the dough, as different flour brands absorb water differently.
- Whole wheat flour: You can replace up to about 20% of the white flour with whole wheat flour for a nuttier flavor. The rolls may be a little denser, and you might need to adjust the water slightly.
- Freshly milled flour: Freshly milled flour can behave differently depending on the grain and how finely it's milled. Start by replacing a small portion of the all-purpose flour and adjust the water as needed. A full fresh-milled flour substitution will require more testing to get the same soft texture.
Baking with freshly milled flour? The grain and how finely it's milled can change how the dough handles. My fresh-milled flour guide explains what to watch for. A full fresh-milled swap, including spelt or einkorn, needs its own adjustments.
For cinnamon recipes already written for freshly milled hard white wheat, try my whole grain sourdough cinnamon rolls or sourdough star bread.
Recipe FAQs
Absolutely! Shape the dough into tight balls and let them complete the second rise. Then use a bread lame or sharp knife to score five curved lines from the center outward, creating the traditional Kaiser star pattern. This is a simple option if you're still getting comfortable with shaping dough.
Yes. After shaping, cover the rolls well and refrigerate them for 8-12 hours. In the morning, check their appearance and let them finish proofing at room temperature if they're not yet noticeably puffy. Once they're ready, bake as directed. Fermentation can continue slowly in the refrigerator, so the results may vary with your fridge temperature and starter activity.
The dough may have been too soft, the knots may not have been secured tightly, or the rolls may have overproofed. Make sure the dough is smooth and elastic, tuck the ends securely when shaping, and avoid letting the rolls rise until they become overly fragile. If shaping feels difficult, round rolls with scored tops are a good alternative.
How To Store Sourdough Kaiser Rolls (Austrian Kaisersemmeln)
Let the rolls cool completely on a wire rack. Store them in a bread bag or an airtight container at room temperature for about 2-3 days. Keep in mind that a tightly sealed container can soften the crust.
Once completely cool, place the rolls in a freezer-safe bag or airtight container and freeze for up to 3 months for the best quality. You can freeze them whole or slice them first if you plan to use them for sandwiches.
Other Delicious Sourdough Bread Recipes
- Sourdough Kaiser Rolls (Austrian Kaisersemmeln)

- Fresh Milled Buckwheat Sourdough Rolls
- Einkorn Sourdough Bread for Beginners (50% Fresh Milled)
- The Easiest Fresh Milled Einkorn Sourdough Bread (Loaf Pan Method)
If you tried these sourdough kaiser rolls (austrian kaisersemmeln) or any other recipe on my blog please leave a 🌟 star rating and let me know how it went in the 📝 comments below! Happy Baking!
Sourdough Kaiser Rolls (Austrian Kaisersemmeln)
Ingredients
- 525 g all-purpose flour preferably 11-12% protein
- 290 g lukewarm water
- 150 g active sourdough starter 100% hydration, at or near peak
- 25 g unsalted butter softened
- 10 g sugar
- 12 g fine sea salt
- Some oil for brushing the rolls
Instructions
- Combine the water, sourdough starter, and sugar in a large mixing bowl. Add the flour, salt, and softened butter. Mix until combined, then knead by hand or with a stand mixer for approximately 8-10 minutes, until the dough is smooth, elastic, and slightly tacky. In the bowl of a stand mixer, it should just almost pull away from the sides of the bowl (but not quite) - if it's far from it, add flour until it does!
- Transfer the dough to a bowl where you plan to bulk ferment it, cover, and let rise at room temperature until visibly it's full of small bubbles and increased in volume by about 40%. This should take around 5-7 hours at 75-77°F (24-25°C), depending on your starter and room temperature.
- Turn the dough onto your counter and divide it into 6 pieces. Shape each piece into a ball, cover, and let rest for 15-20 minutes to relax the gluten.
- On an unfloured or lightly floured surface, roll each piece into a rope approximately 18-20 inches (45-50 cm) long. I like to do this in turns, so te gluten has time to relax. Meaning I'll roll one rope a bit, then the next one, and the next, and then I'll come back and roll the first one some more, and the next, and the next…On each rope, tie a loose knot in the center. Bring one free end over the loop and tuck it into the center, then wrap the other end underneath and up through the center. Tuck the ends securely to create the characteristic five-part Kaiser shape. See the video for this step!OPTIONAL: you can also just leave the dough balls as they are, and you'll be scoring the signature kaiser roll design onto them later.Place the shaped rolls (or just rolls if you decided to score them instead of shape them) on a parchment-lined baking sheet, leaving enough space between them to rise.
- Lightly oil their tops (I like to use olive oil spray for this part! Alternatively, you can lightly brush them with oil too), cover with plastic wrap, and place a second baking sheet directly on top. Let its weight gently press down on the rolls as they rise, encouraging them to expand outward rather than upward.
- Let the rolls rise for about 2-4 hours, until noticeably puffy. Carefully remove the top baking sheet and plastic wrap.At the end of the second rise, If you decided not to shape the rolls, but score them, grab a bread lame or a sharp knife and draw the Kaiser roll design onto them.
- Preheat the oven to 425°F (220°C), placing a small empty metal baking pan on a lower rack for steam.Place the rolls in the oven and carefully pour some very hot water into the preheated metal pan.Bake for 10 minutes, then remove the steam pan, reduce the temperature to 410°F (210°C), and bake for another 10-15 minutes, until golden brown.Transfer to a wire rack and allow to cool before slicing.