Chewy Chocolate Chip Cookie Cups
These Chewy Chocolate Chip Cookie Cups are great any time of year, birthday parties, school events, or weekend baking fun. They have a broad appeal, whether you're craving chocolate chip cookies in a new form or need a simple treat on the fly.
These cookie cups are great any time of year, birthday parties, school events, or weekend baking fun. They have a broad appeal, whether you're craving chocolate chip cookies in a new form or need a simple treat on the fly.
This idea comes from the crowd-favorite Sourdough Discard Chocolate Chip Cookies found on Stretch and Folds-same comforting feel, different format. They also go well with Chocolate Chip Skillet Cookie for a double-cookie treat spread, ideal for cookie platters or family bake days.
Jump to:
- Important Ingredients
- Substitutions & Variations
- How to Make Chocolate Chip Cookie Cups
- Baking Schedule
- 💭Crucial Success Tips
- Recipe FAQ
- How To Store Chocolate Chip Cookie Cups
- Other Delicious Recipes
- Chewy Chocolate Chip Cookie Cups
- Other Dessert Recipes You'll Love
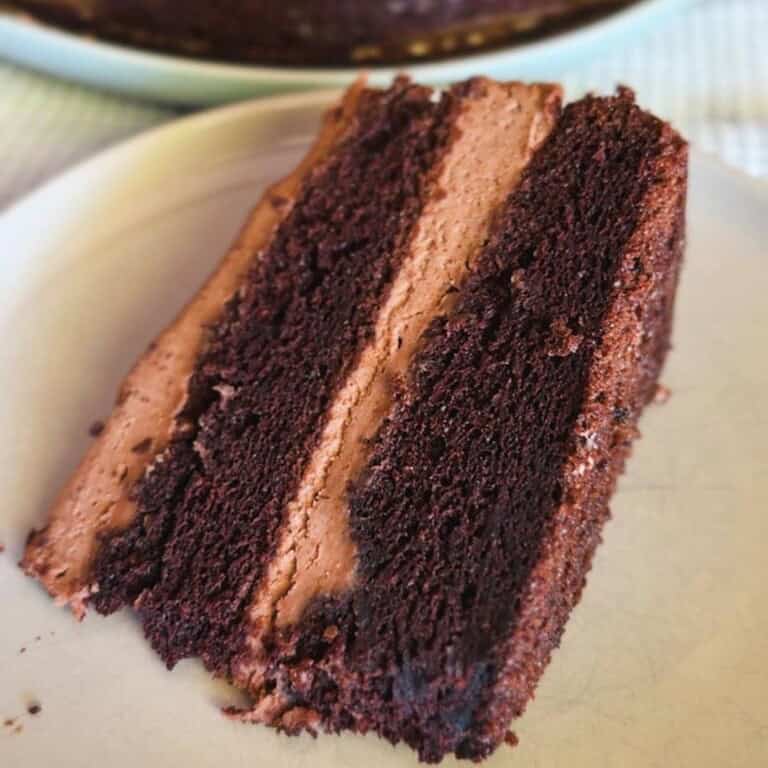
- Rich Sourdough Chocolate Cake with with Chocolate Mascarpone Frosting
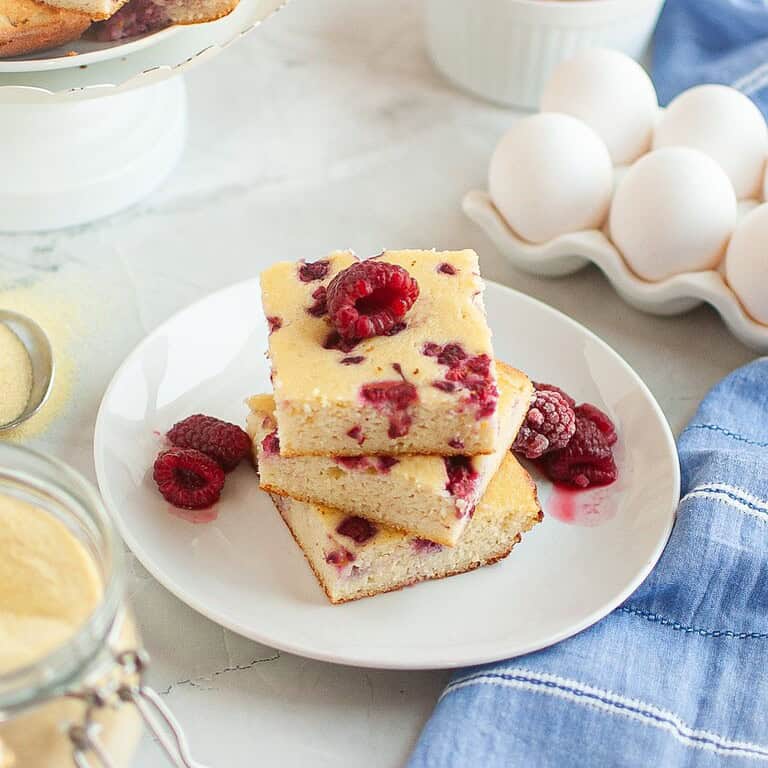
- Simple Summer Cake Bars with Berries
- Chocolate Coconut Puffed Rice Clusters
Important Ingredients
- Chocolate chip cookie dough for ease and consistency.
- Frosting to fill the cups.
- Decorative sprinkles for color and fun.
See recipe card for quantities.
Substitutions & Variations
- Option dairy-free: Use plant-based cookie dough and frosting.
- Gluten-free: Look for gluten-free ready-to-bake dough.
- Flavor twist: Try colored frosting or seasonally-themed sprinkles.
- Kid-friendly tweak: Let kids stir candy pieces into the fattened dough before baking.
How to Make Chocolate Chip Cookie Cups
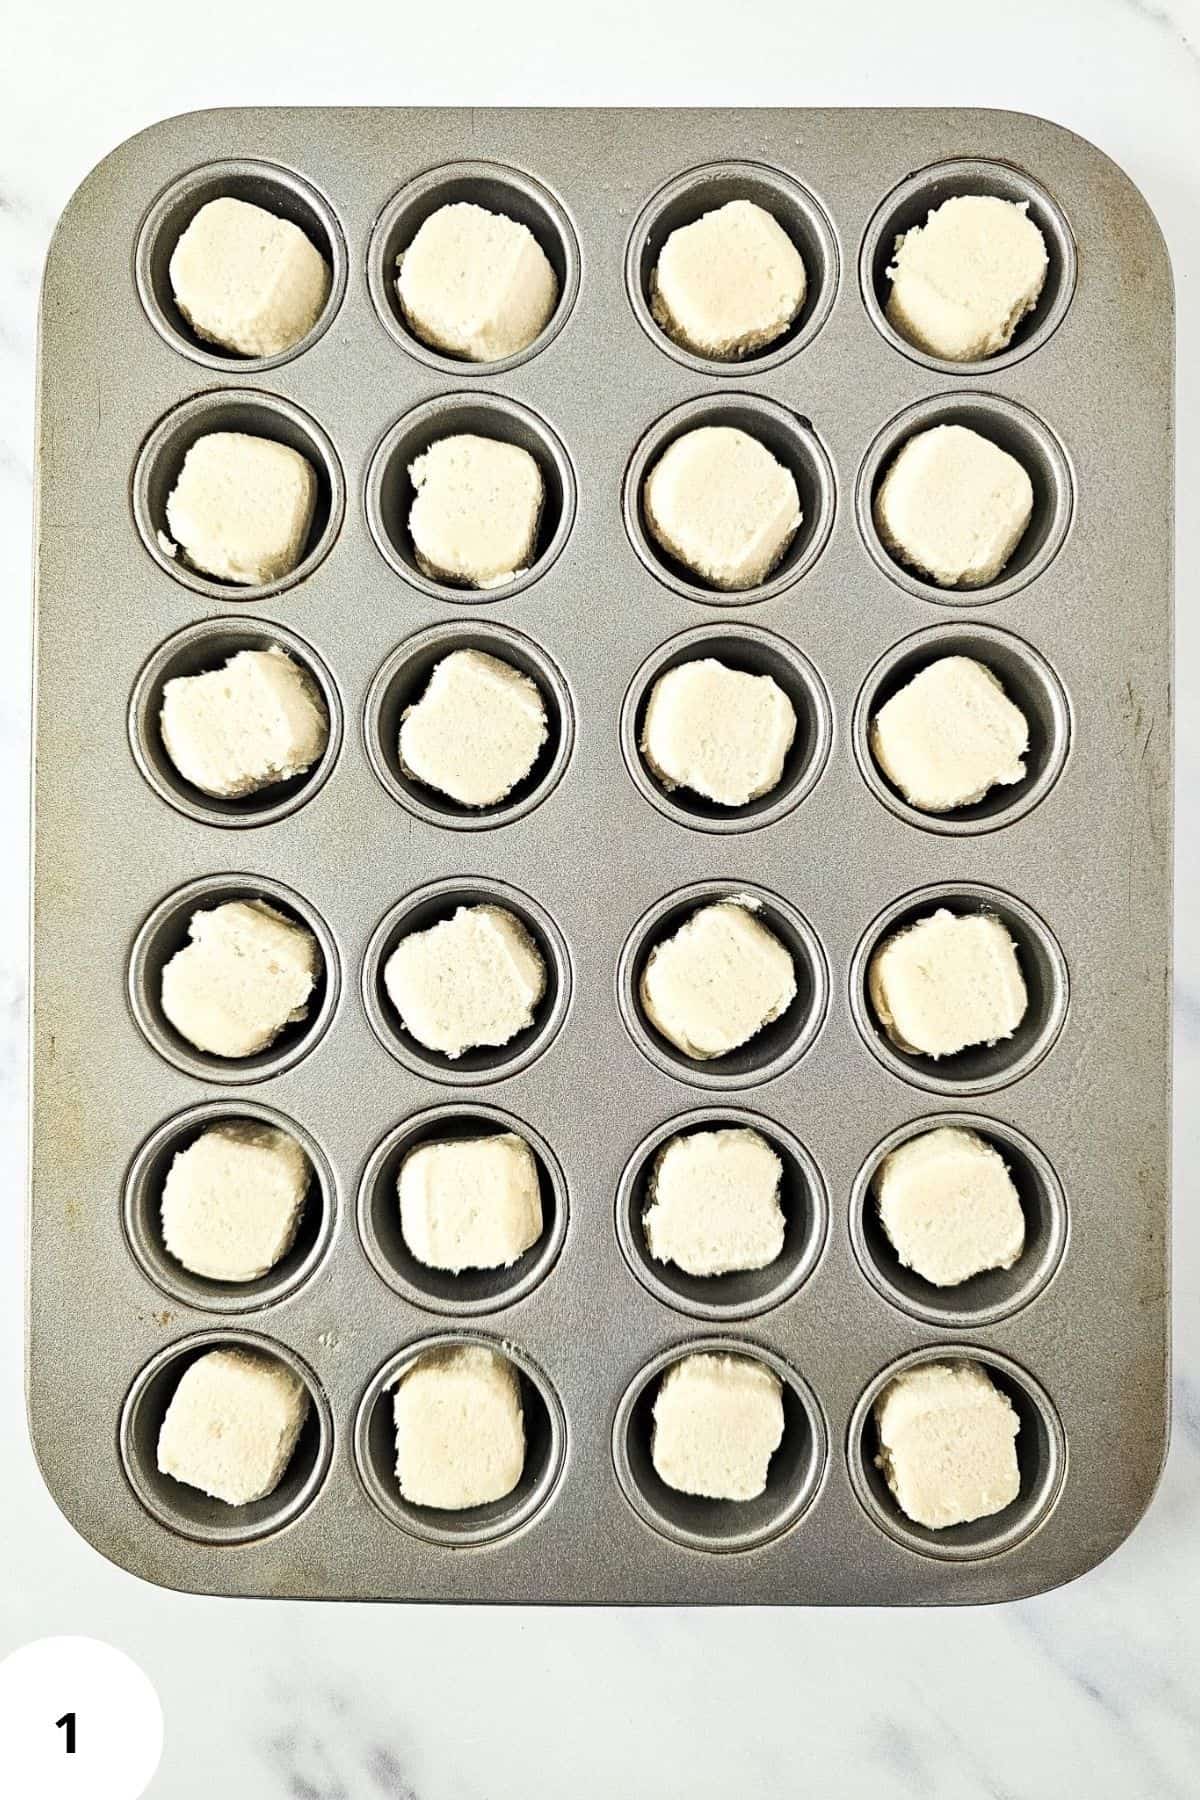
Step 1: Preheat your oven to 350°F. Lightly spray a mini muffin pan with nonstick cooking spray so the cookies don't stick. Place one piece of cookie dough into each muffin cup. Bake for 15 minutes, or until the cookies puff up and turn golden.
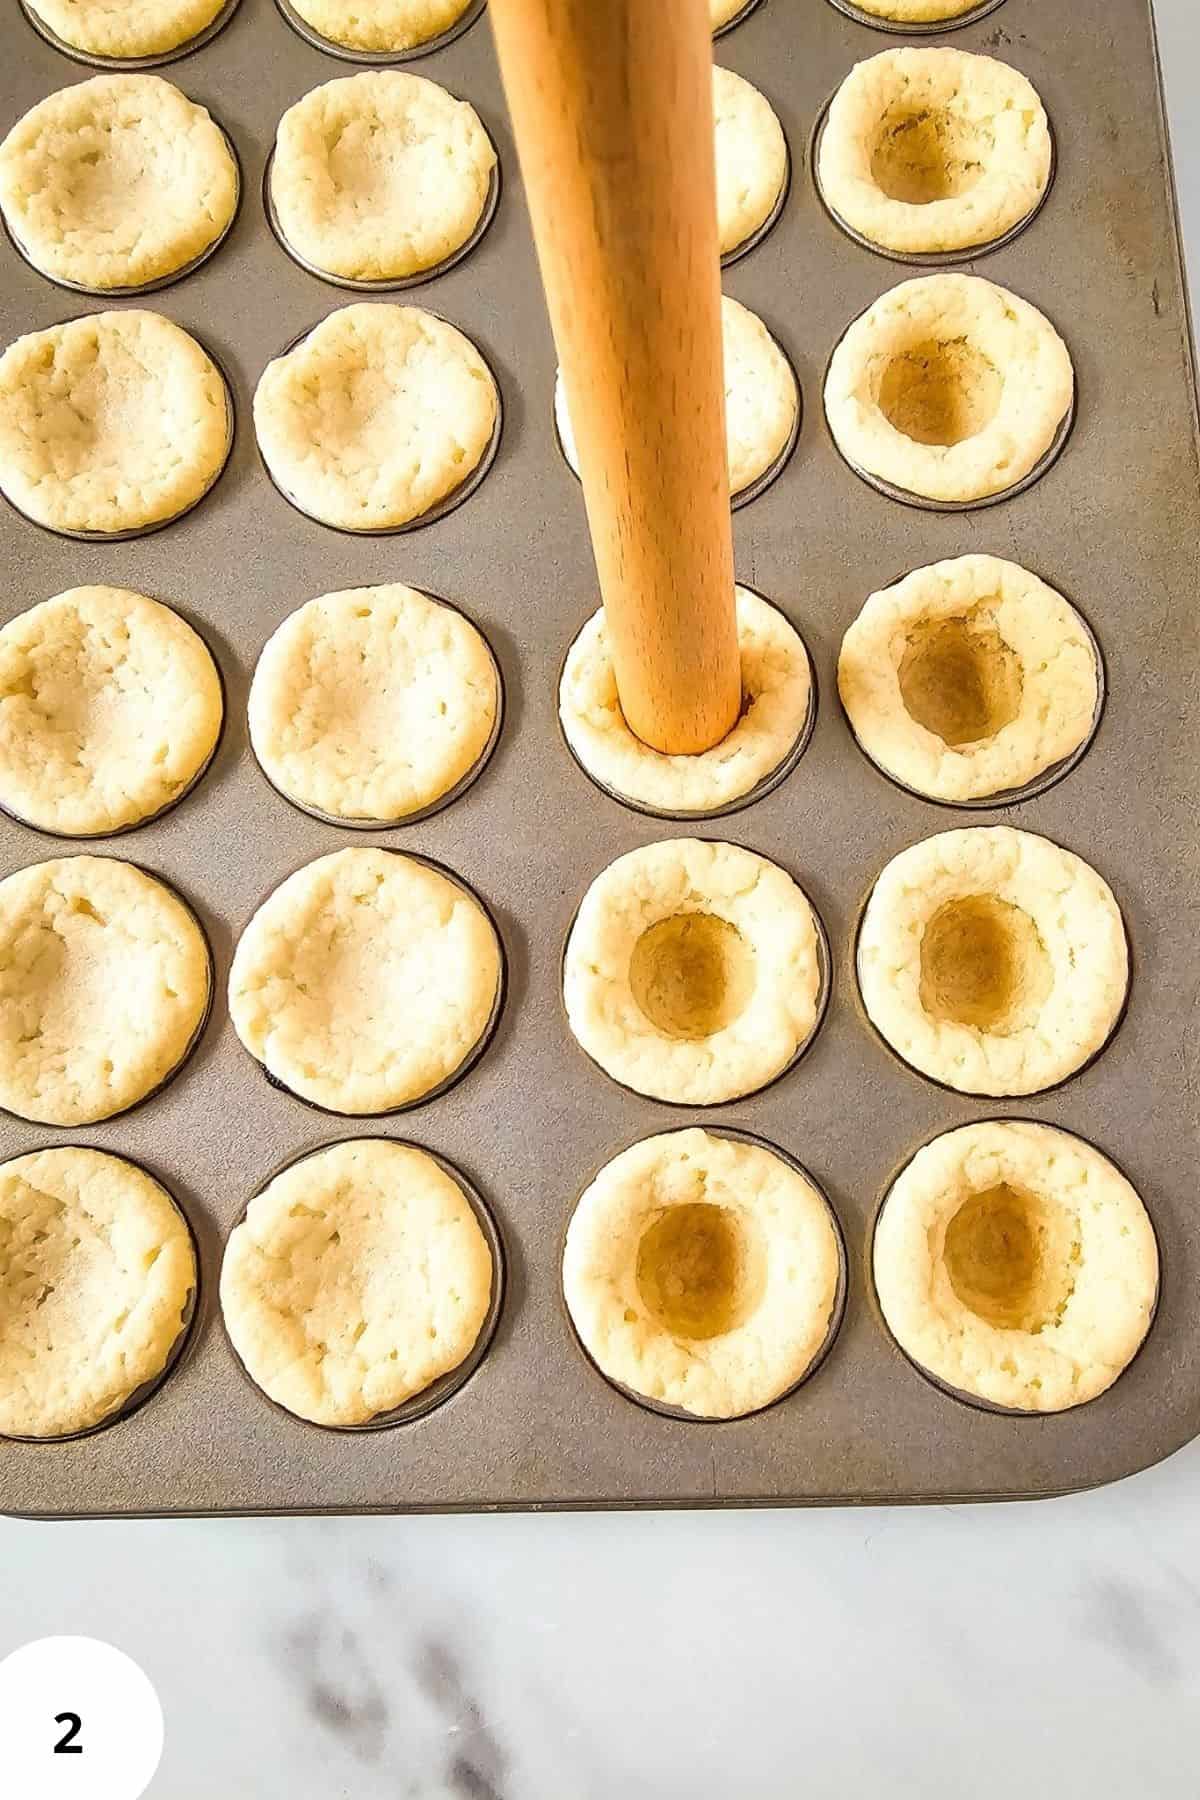
Step 2: While the cookies are still warm, gently press down the center of each cookie using a muddler or the back of a small spoon to make a cup shape. Put the pan in the fridge for 20 minutes. This helps the cookies firm up and makes them easier to take out of the pan.
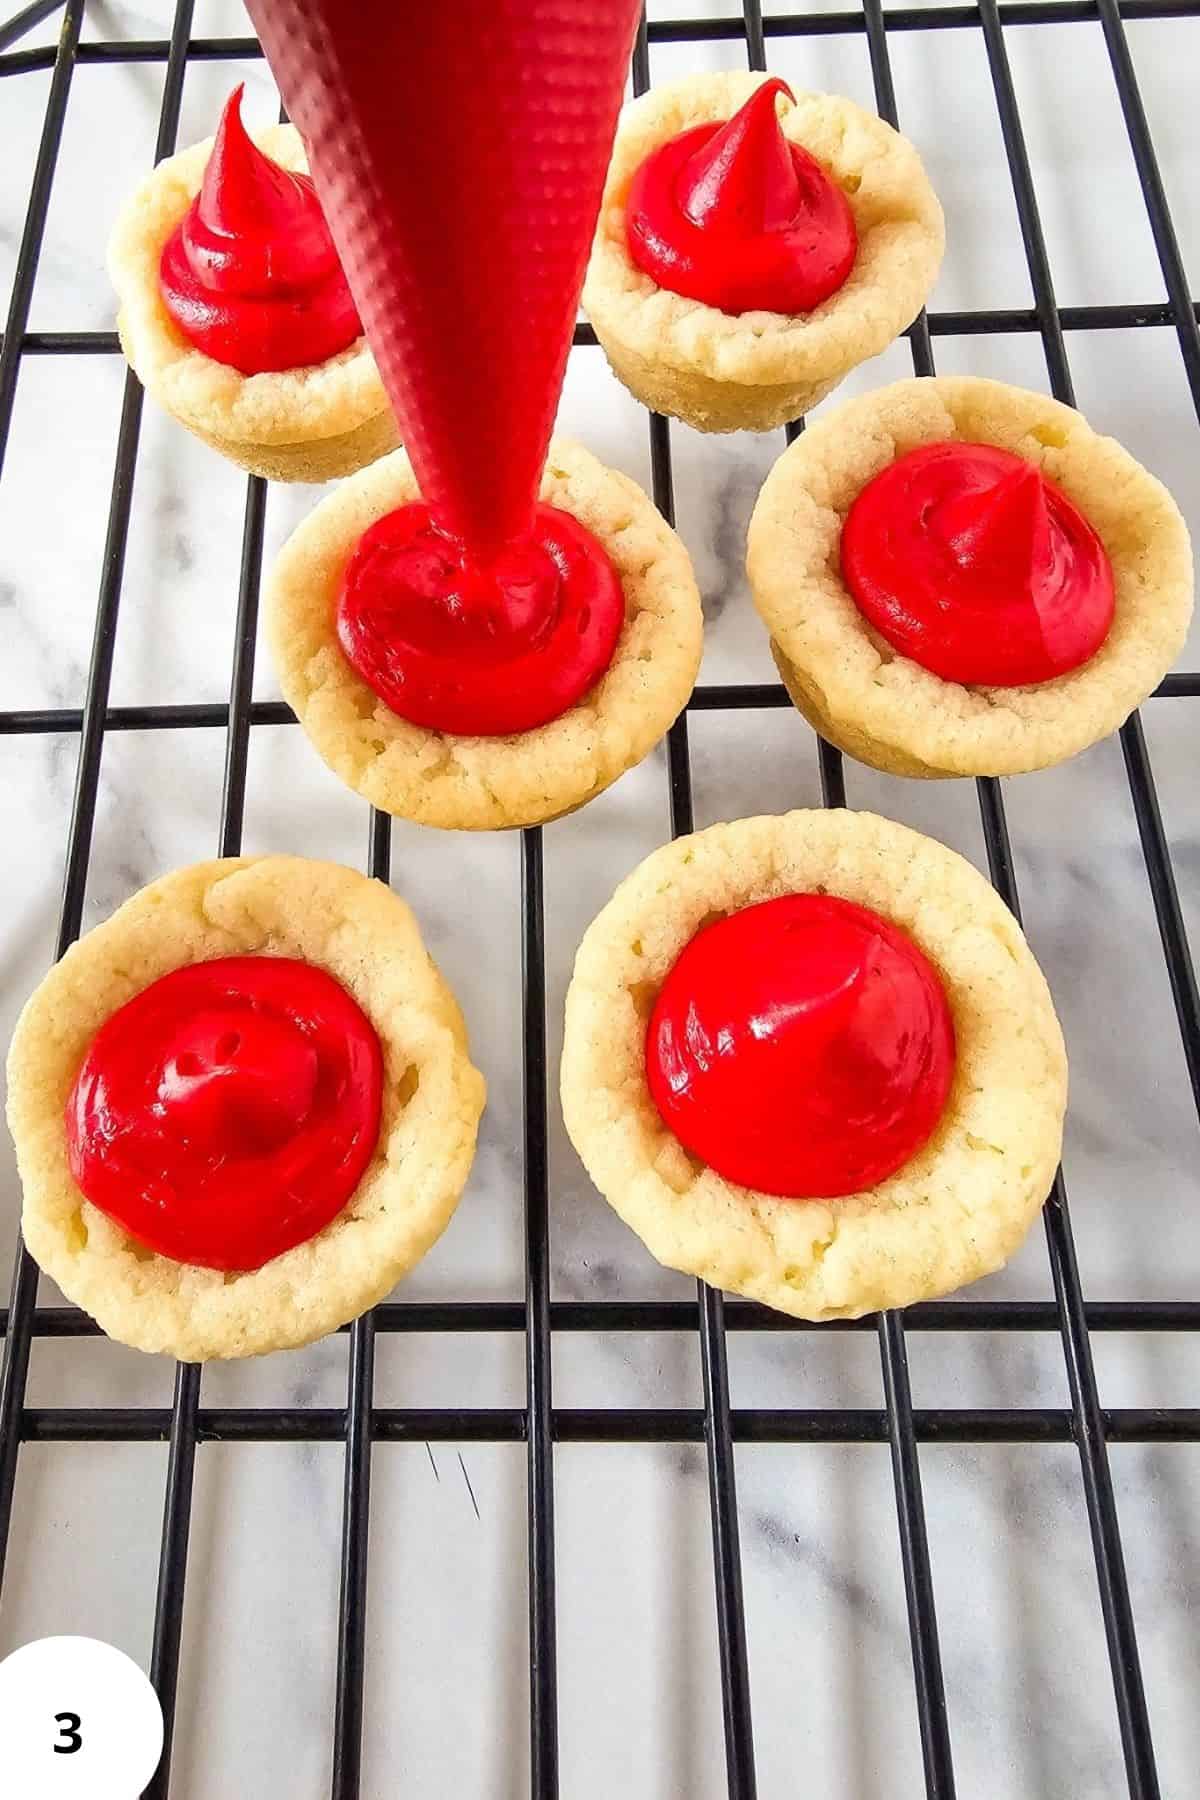
Step 3: Once chilled, carefully take the cookie cups out of the pan. Use a piping bag or spoon to add a small amount of frosting into each cookie cup.
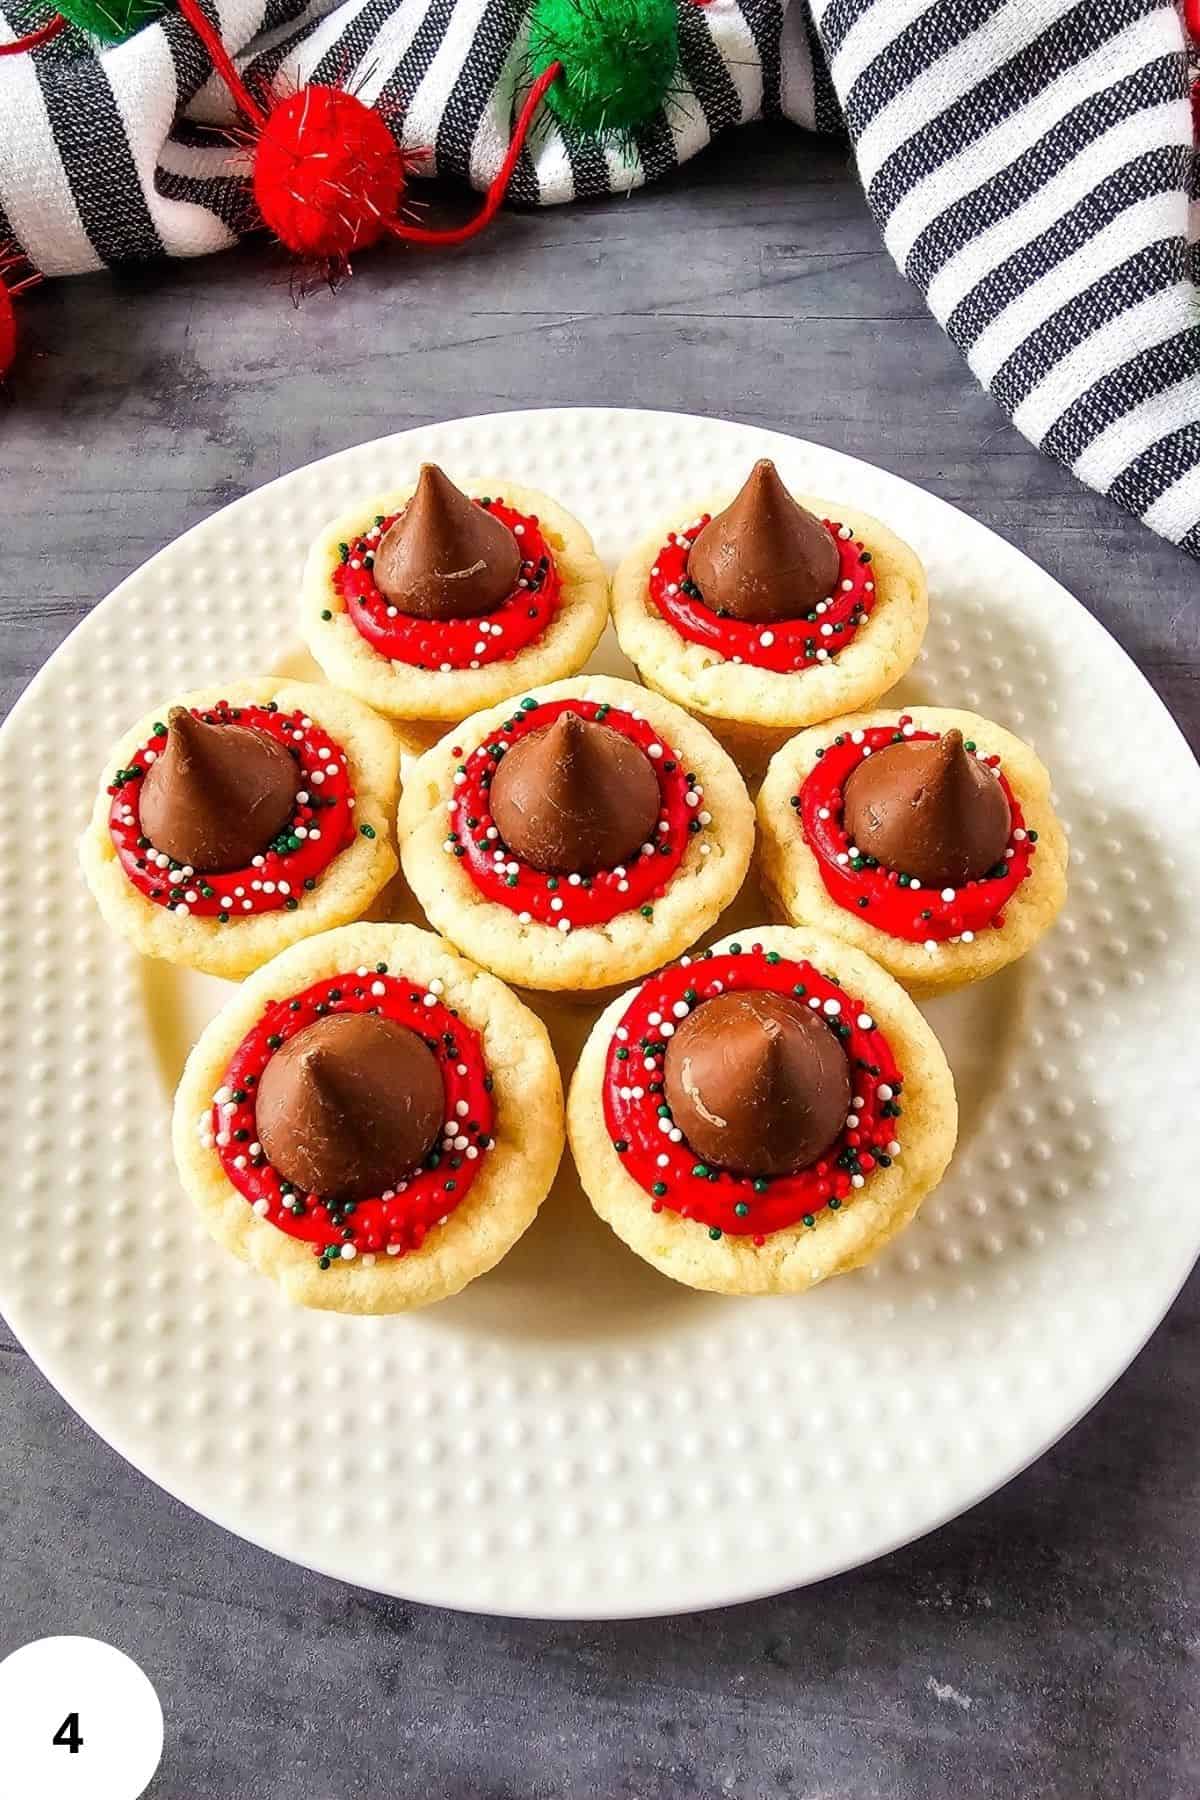
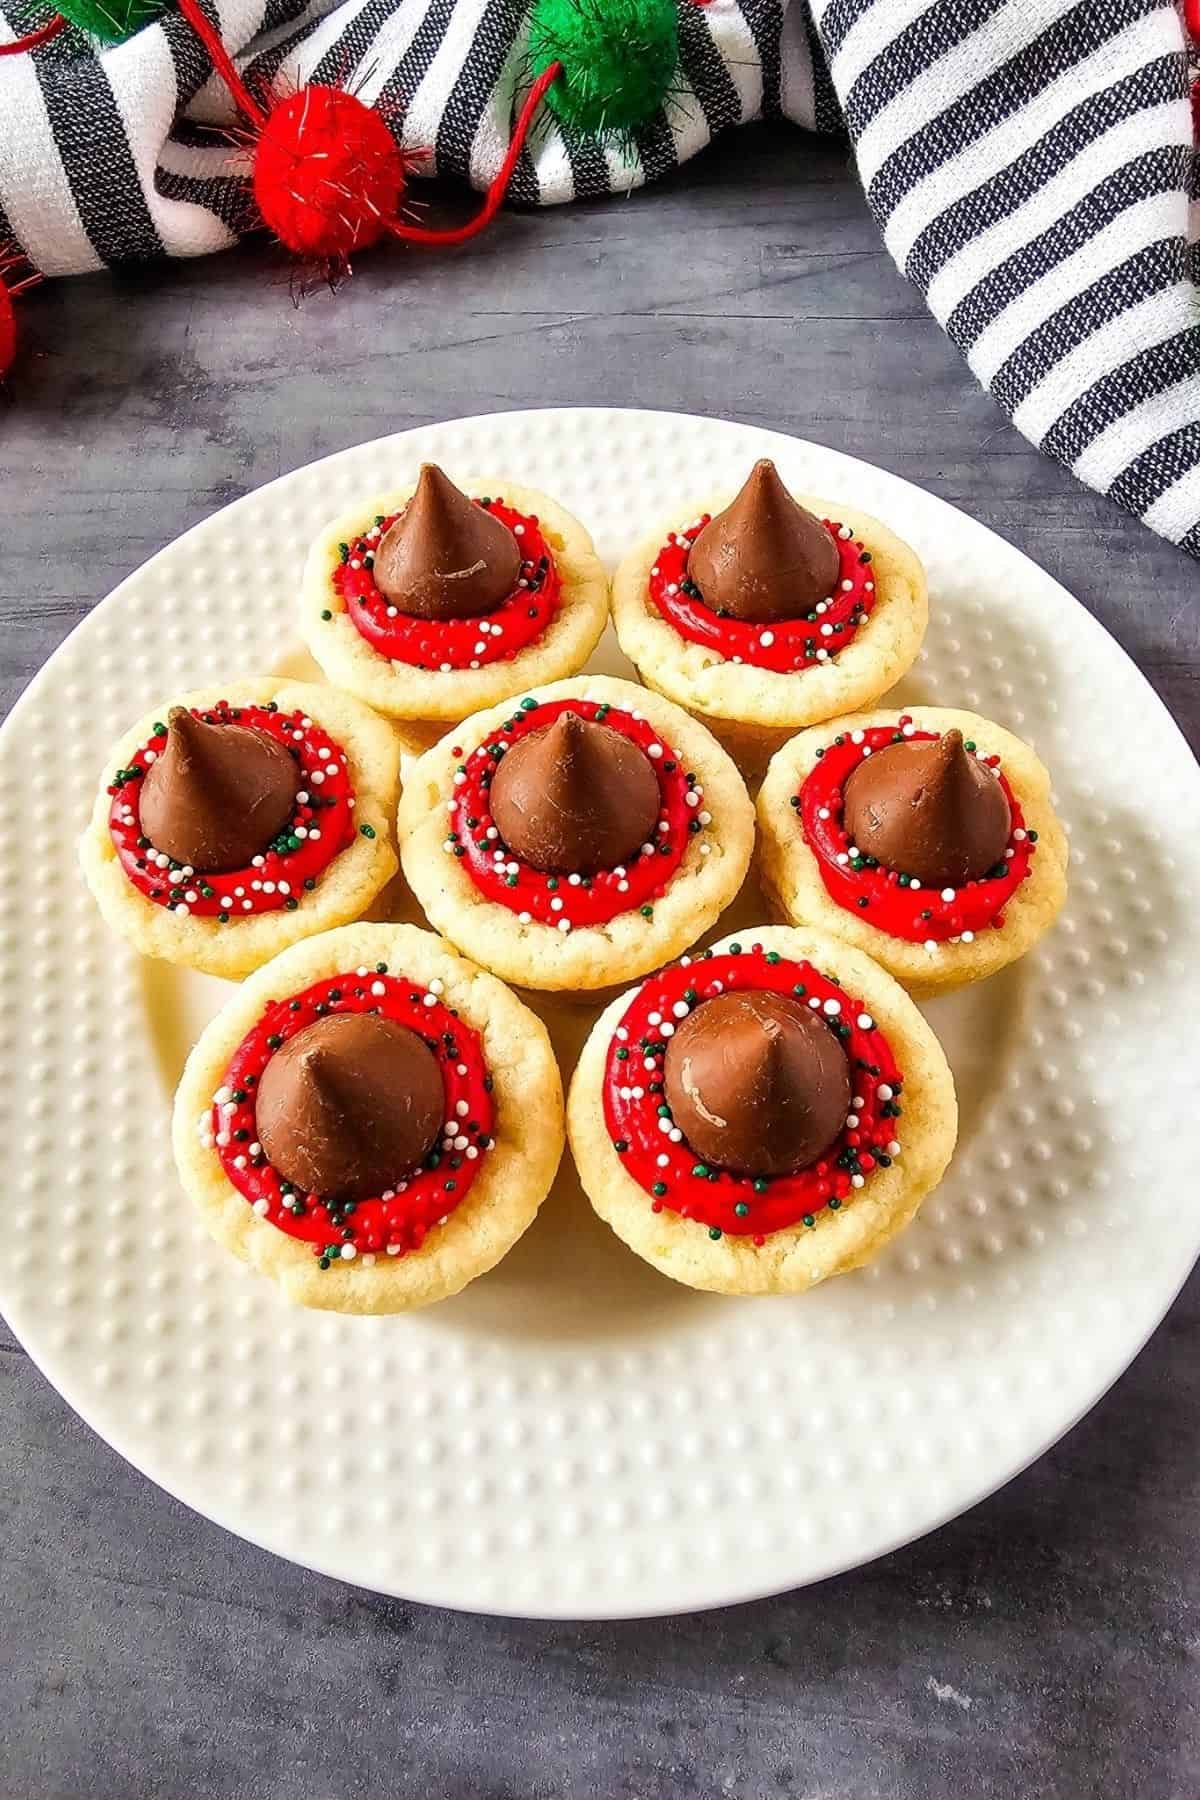
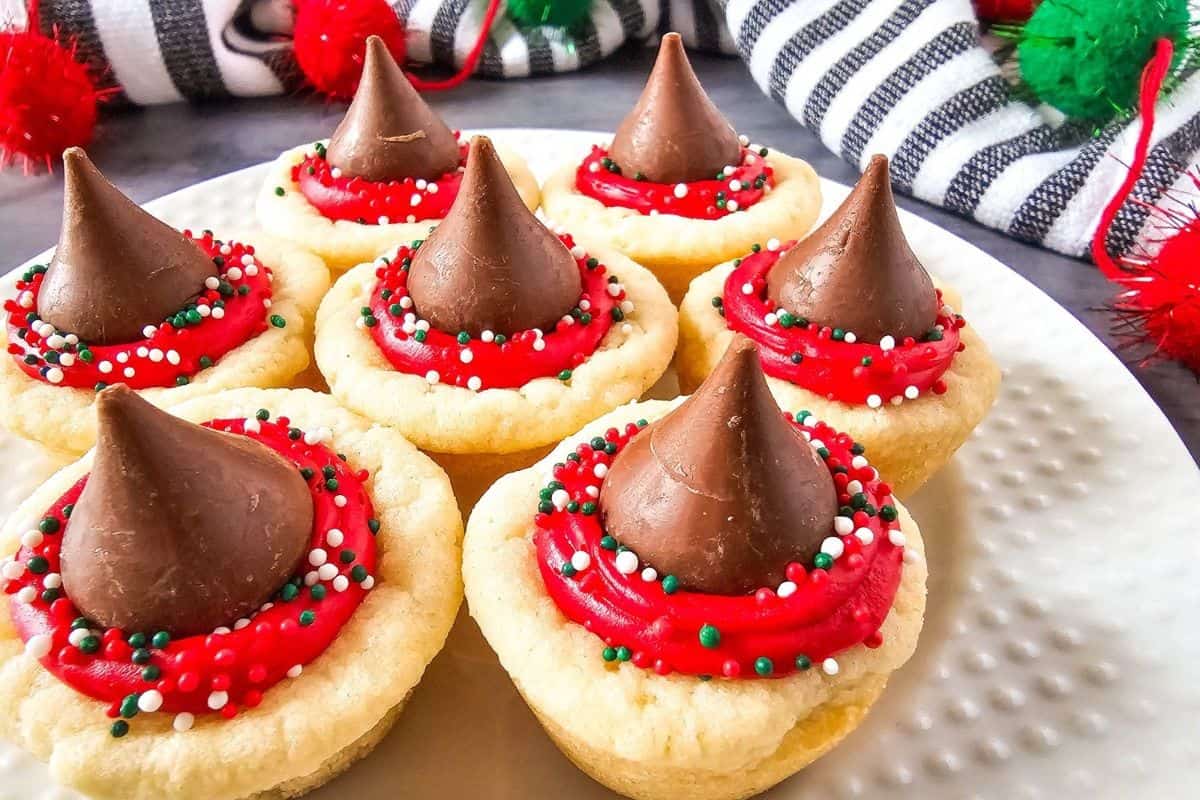
Step 4: Sprinkle red, green, and white nonpareils on top for a festive look. Finish by placing a Hershey's Kiss in the center of each cookie.
Hint: Chilling the cups helps them release cleanly. Use room-temperature frosting to fill more easily.
Baking Schedule
Insert baking schedule here.
💭Crucial Success Tips
Press the centers while the cookies are warm to make clean wells. Chill before filling to keep their shape. Use sturdy frosting for a neat finish.
Recipe FAQ
Yes. Freeze until firm, then thaw and fill when you're ready to serve.
Yes, just ensure it's portioned to fit mini muffin cups and that the cookie stays soft.
How To Store Chocolate Chip Cookie Cups
Store in an airtight container at room temperature for up to 2 days. Refrigerate for a firmer texture, or freeze for up to a month.
Other Delicious Recipes
- Neapolitan-Style Sourdough Pizza Dough

- Sourdough Semolina Pizza Dough (Crispy, Chewy, and Full of Flavor)
- Traditional Ričet (Barley and Bean Stew with Smoked Meat)
- Italian Semolina Sourdough Bread


If you tried these Cookies or any other recipe on my blog please leave a 🌟 star rating and let me know how it went in the 📝 comments below! Happy Baking!

Chewy Chocolate Chip Cookie Cups
Ingredients
- 16 oz Sugar Cookie Dough Ready-to-Bake Refrigerated, like Pillsbury, 24 pieces,
- ⅔ cup frosting red
- nonpareils red, green, and white
- 24 chocolate Hershey's kisses, unwrapped
Instructions
- Preheat your oven to 350°F. Lightly spray a mini muffin pan with nonstick cooking spray so the cookies don't stick. Place one piece of cookie dough into each muffin cup. Bake for 15 minutes, or until the cookies puff up and turn golden.
- While the cookies are still warm, gently press down the center of each cookie using a muddler or the back of a small spoon to make a cup shape. Put the pan in the fridge for 20 minutes. This helps the cookies firm up and makes them easier to take out of the pan.
- Once chilled, carefully take the cookie cups out of the pan. Use a piping bag or spoon to add a small amount of frosting into each cookie cup.
- Sprinkle red, green, and white nonpareils on top for a festive look. Finish by placing a Hershey's Kiss in the center of each cookie.