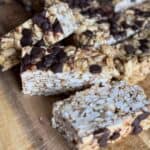
Healthy, Homemade Chewy Granola Bars with Rice Cereal
These Chewy Granola Bars with Rice Cereal are perfect for having easy, homemade snacks on hand for busy days. They're sweet, crunchy, almost dessert like, and they have the right balance of chewy and crisp, and my kids love them as an after-school snack. You can make a big batch to last the whole week (or two), which is always a plus!

This recipe makes 20 bars, and I personally love making these granola bars during the back-to-school season for healthy snacks! They're also perfect for adding to holiday gift baskets or as a homemade treat for events like Easter or Thanksgiving. Since they're so easy to make in batches, I always have a batch ready for parties, picnics, or even to pack for road trips!
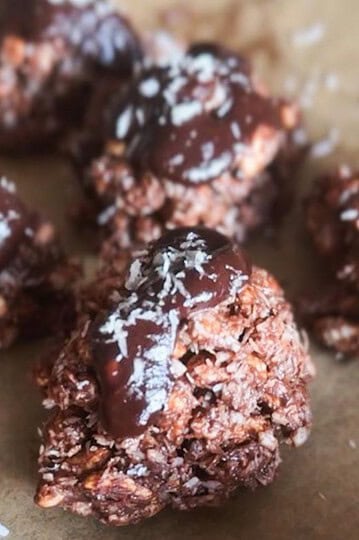
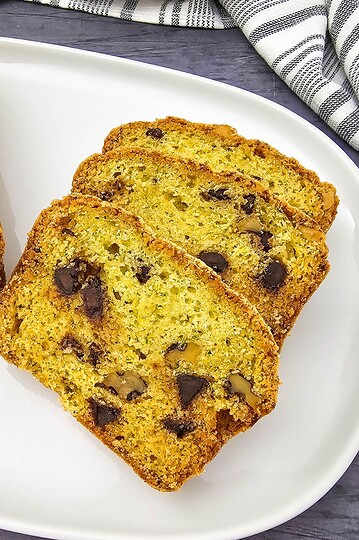
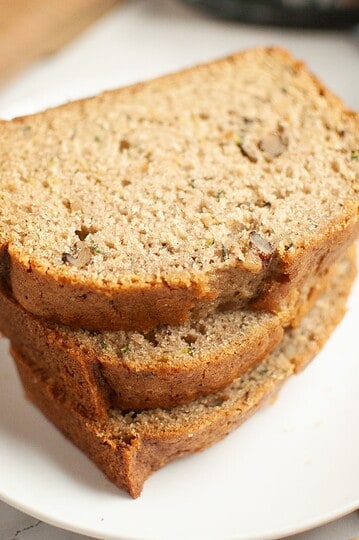
If you're looking for more delicious homemade snacks, be sure to check out my chocolate coconut puffed rice clusters (they include puffed rice cereal too!), Sourdough Discard Key Lime Ricotta Cookies and Sourdough Discard Banana Bread! Both are the best ways to use sourdough discard!

Ingredients

- Butter: Adds richness and helps bind the ingredients together for a smooth, chewy texture. You can use coconut oil too (if you like the taste...I don't so much").
- Honey: Provides natural sweetness and a sticky consistency, helping to hold the bars together.
- Brown Sugar: Brings a deep, molasses-like sweetness that complements the honey.
- Peanut/Almond Butter: Adds creaminess and a nutty flavor, balancing the sweetness of the other ingredients.
- Cinnamon: Adds a warm, cozy spice that enhances the overall flavor of the bars.
- Vanilla Extract: Gives a hint of sweetness and depth, rounding out the flavor profile.
- Sea Salt: Enhances all the other flavors and brings a subtle balance to the sweetness.
- Oats: Provide a hearty, chewy texture and make the bars more filling.
- Rice Cereal: Adds crunch and lightness, giving the bars their signature crispy texture.
- Mixed Seeds: Adds extra crunch, nutrients, and a slight earthy flavor.
See recipe card for quantities.
How to Make Chewy Granola Bars with Rice Cereal

In a medium pot over medium heat, melt the butter, honey, and brown sugar, stirring until it starts to bubble. Take it off the heat. Stir in the peanut or almond butter, cinnamon, vanilla extract, and salt until fully combined.

Add the oats, then the rice cereal and seeds. Mix until evenly coated. Transfer to a parchment-lined loaf pan (9x13).

Sprinkle chocolate chips on top. Fold the parchment over and press down firmly.

Refrigerate for 1-2 hours until firm, then slice into bars. Store in an airtight container in the fridge.

Serve and enjoy!
Tip: Add your favorite nuts, seeds, or dried fruits for extra variety.
Hint: For the best texture, make sure to firmly press the mixture into the pan before refrigerating. This will help the bars set properly and hold together when you slice them, and really give them that grocery store bar quality.
Substitutions & Variations
- If you don't have peanut butter, you can use peanut butter, almond butter, or cashew butter depending on your taste or allergies.
- For seeds, you can swap the mixed seeds for sunflower seeds, chia seeds, or pumpkin seeds.
- For other add-ins, throw in some dried fruit like raisins or cranberries, or even sprinkle some chocolate chips into the mixture for a bit of extra sweetness. I'm a big can of adding quinoa cereal too, to bump up the protein content a bit!
- Instead of honey, you can use maple syrup or even agave syrup. Honey is just something I always have on hand, that's why I usually use that.
💭Crucial Success Tips
- Don't Rush the Cooling Process: Let the bars set in the fridge for at least an hour or two. If you skip this, they might fall apart when you try to slice them.
- Press Firmly: When pressing the mixture into the pan, use a little extra pressure to make sure everything sticks together well. A flat-bottomed glass or spoon works great for this!
FAQ
Yes! Chocolate chips, dried fruit, or even coconut flakes are great add-ins. Feel free to get creative with what you have on hand.
Yes! You can replace the honey with maple syrup or agave nectar.
Rice cereal gives the bars their signature crunch, but you can substitute it with other cereals like cornflakes or oat flakes if you prefer.
Puffed rice cereal is mainly used to add a light, crispy texture to recipes without making them heavy, which is why it works so well in no-bake granola bars, chocolate clusters, and treats like Rice Krispies treats; it helps balance out ingredients like oats or nut butter so the final result feels a bit more like a treat and less dense, and it also stretches the batch, which is always helpful when you're making snacks ahead for the week.
On its own, puffed rice cereal is pretty neutral. It's low in fat and easy to digest, but also low in fiber and protein, so it's not something that will keep you full for long; that said, it's not really the ingredient to worry about, since the overall recipe matters more, and when you combine it with things like oats, seeds, or nut butter, you end up with a much more balanced snack.
If you have a box sitting in your pantry, there's actually a lot you can do with it. You can make quick chocolate clusters by mixing it with melted chocolate, roll it into peanut butter energy balls, use it as a crunchy topping for yogurt, or turn it into simple no-bake bars by combining whatever nuts, seeds, or dried fruit you have on hand and pressing it into a pan; it's one of those ingredients that makes homemade snacks feel easy instead of complicated.
Chewy Granola Bars with Rice Cereal
Equipment
- 1 Loaf pan
Ingredients
- 57 grams butter ¼ cup
- 60 grams honey ¼ cup
- 50 grams brown sugar ¼ cup
- 1 tablespoon peanut or almond butter
- 1 teaspoon cinnamon
- 2 teaspoons vanilla extract
- 1 pinch salt
- 135 grams rolled oats 1½ cups
- 50 grams rice cereal 2 cups
- 35 grams mixed seeds ¼ cup
Instructions
- In a medium pot over medium heat, melt the butter, honey, and brown sugar, stirring until it starts to bubble. Take it off the heat. Stir in the peanut or almond butter, cinnamon, vanilla extract, and salt until fully combined.
- Add the oats, then the rice cereal and seeds. Mix until evenly coated. Transfer to a parchment-lined loaf pan (9x13).
- Sprinkle chocolate chips on top. Fold the parchment over and press down firmly.
- Refrigerate for 1-2 hours until firm, then slice into bars. Store in an airtight container in the fridge.
- Serve and enjoy!
Notes
- Add your favorite nuts, seeds, or dried fruits for extra variety.
Nutrition
How To Store Chewy Granola Bars with Rice Cereal
Keep these bars in the fridge, put them in an airtight container for up to 2 weeks. They're perfect for grab-and-go snacks!
You can also freeze them for up to 3 months. Just thaw them in the fridge for a few hours when you're ready to enjoy them.


Rice cereal takes the bars to the next level.