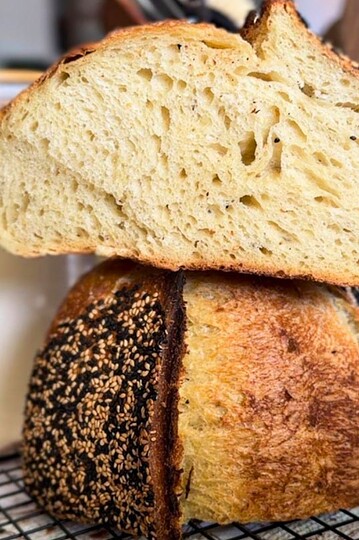
Chia Seed Sourdough Bread Recipe - Fast Version
Why the fast version? Because we're not presoaking chia seeds or doing any other kind of preparation for this bread apart from feeding our starter beforehand. The result is a delicious sourdough loaf that is just a tad more interesting and rich in fiber with the addition of chia seeds!

If you happen to toast this bread, you'll be pleasantly surprised: chia seeds add a nice added crunch!
If you like making your everyday bread more interesting, but not overrun by strong flavors, also check out my quinoa sourdough, Mediterranean cheese & olive sourdough and sourdough potato chunk bread!
Jump to:
As an Amazon Associate, I earn from qualifying purchases. This post may contain affiliate links, which means I make a small commission at no extra cost to you. See my full disclosure here.
Ingredients
A few tablespoons of chia seeds and a splash of milk is all you need to make this chia sourdough bread besides your starter, flour, water, and salt.
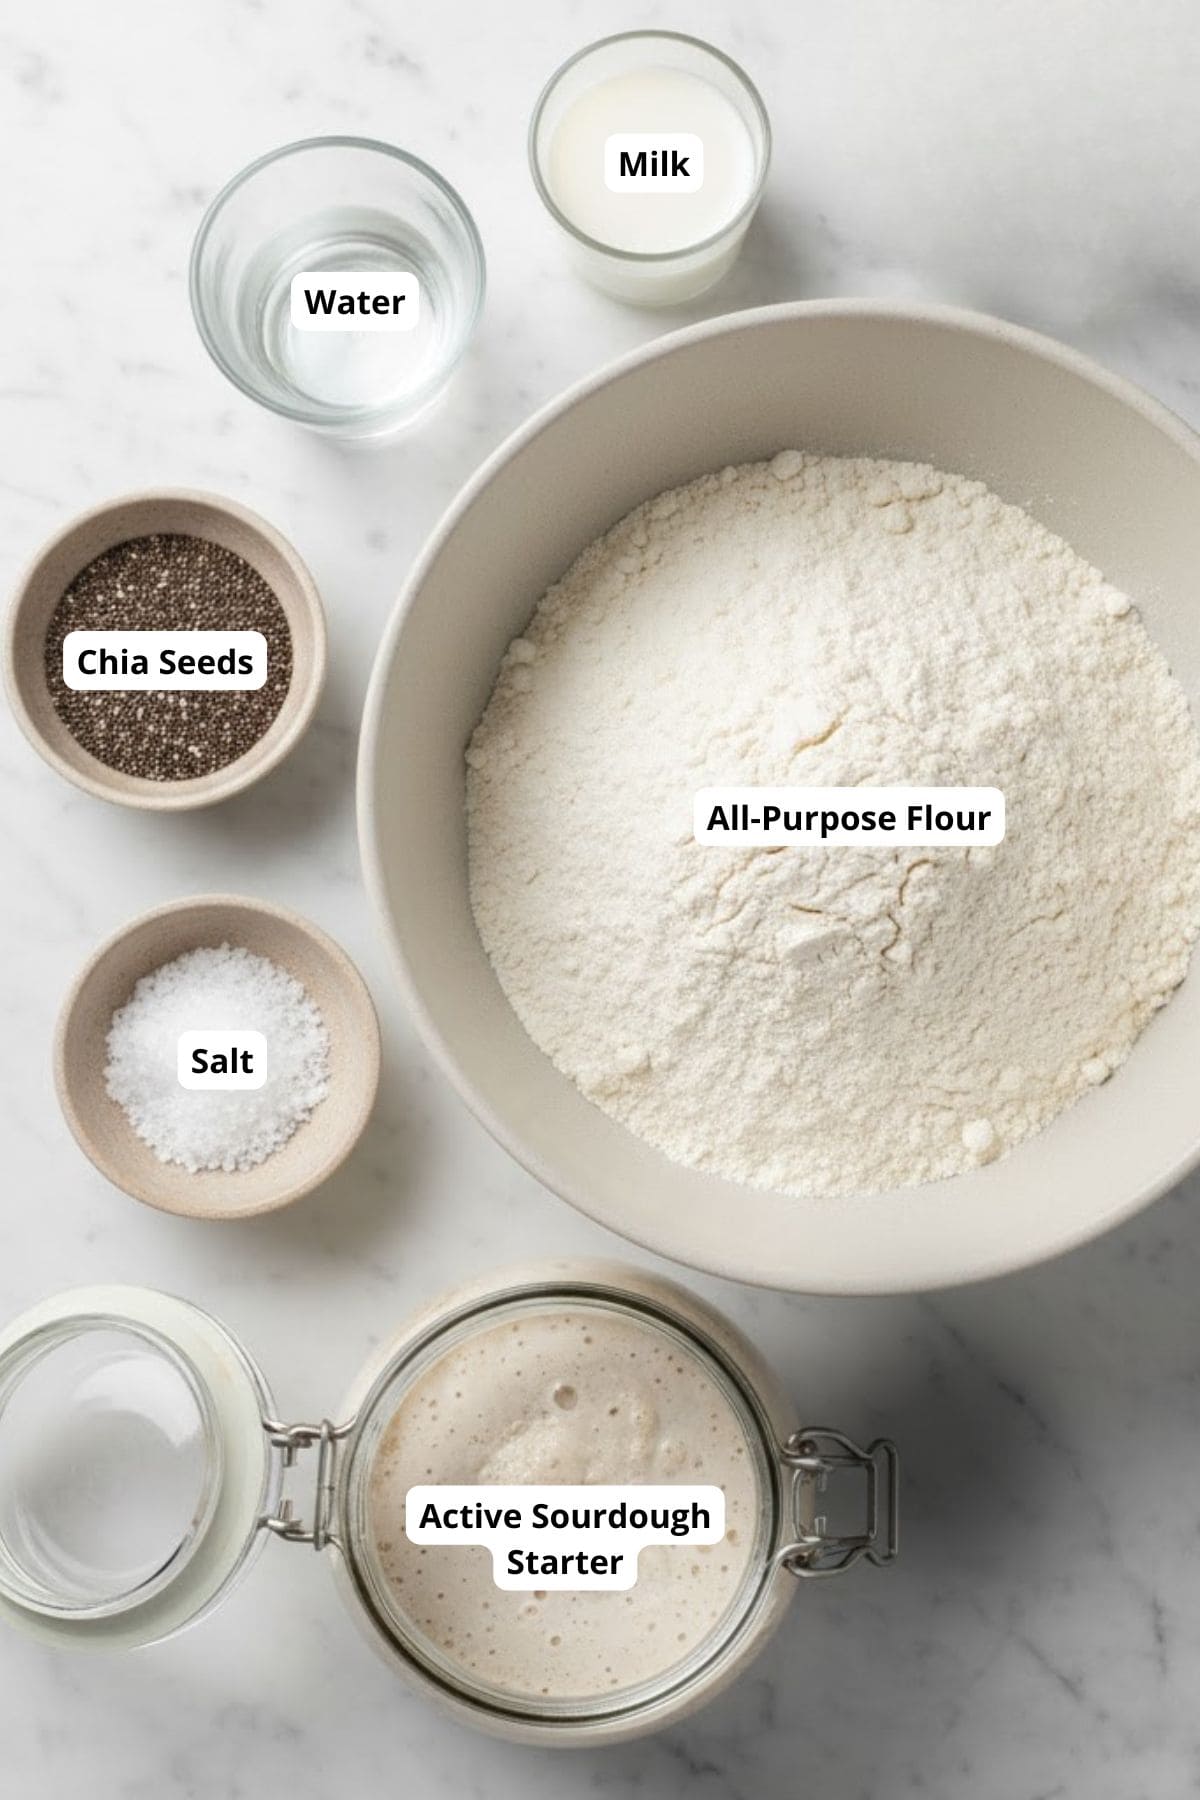
- active sourdough starter: make sure to use an active starter, so I recommend you feed it about 8-14 hours before making this bread. You know your starter best, so try to start your bread-making process when it reaches its peak or shortly after!
- water: you don't need to use filtered water, but if your tap water is not suitable for sourdough for some reason, of course, go ahead and use the same water you feed your starter with!
- salt: it enhances the overall flavor. I like to use real salt without unnecessary additives.
- all-purpose flour: this is supposed to be a soft white bread recipe that everyone loves, so all-purpose flour is the best choice for achieving this!
- chia seeds
- milk: I find that using part milk, and part water in my sourdough makes the crumb even softer and more tender, which is what I'm after for this bread.
See recipe card for quantities.
How to Make Chia Sourdough Bread

Mix water, milk, salt, and chia seeds in a mixing bowl. Add your starter and mix so that the starter can disperse in the water.

Add the flour and mix the dough. The dough should be very sticky and impossible to handle at this point (after the chia seeds soak up some liquid, you'll be able to handle it easily!).
Wait at least 30 minutes for the flour and the chia seeds to soak up the liquid (autolyse).

Now the bulk ferment starts. In the first two hours of the bulk ferment, do 3 - 6 sets of stretch and folds or coil folds every 20 - 40 minutes. I try to go for 6 sets if I have the time, but the difference between 3 and 6 is minimal, so 3 sets are ok too.
The time for bulk ferment will depend a lot on the temperature of your kitchen, but since we used quite a lot of starter in the dough, the bulk ferment will probably last around 6 - 9 hours at room temperature (read more about the timing sourdough proofing).

After the first rise (bulk fermentation), shape your dough into a loaf. The easiest thing to do that is to start with a lightly floured work surface. Stretch the dough a bit on that surface, then pinch together the opposite ends (up and down), and repeat in the other direction (left and right).
Put the loaf into a tea towel-lined banneton basket (and lightly flour that tea towel for good measure!) with the seam side up. Cover with something airtight and let it rise for the second time - about 2 hours at room temperature or overnight in the fridge.
Turn your dough on a piece of parchment paper or a bread mat, score it, move it into a preheated dutch oven, and bake in a preheated oven at 460°F (238°C) for 30 minutes. Remove the lid and continue baking for an extra 10 minutes at 440°F (227°C) to achieve a lovely golden brown color.
Remove the bread from the oven and cool on a cooling rack. This prevents the underside of the dough from becoming soggy.
Hint: whenever you have a hard time with your dough sticking to your fingers, wet your hands. Read more about how to handle sticky dough! Also, doing coil folds instead of the stretch and fold method can be a bit easier as long as the dough is very sticky. I usually do about 2 sets of coil folds and then proceed with stretch and folds!
Substitution Notes
- all-purpose flour - use whole wheat flour in amounts up to 20% for the extra kick of fiber (if you use more than that, you'll have to play with hydration again, so to follow this recipe, don't go over 20%). You can also use rye flour (but only up to 10%!) for an earthier taste.
- milk - if you don't want to use milk in your bread, you can just substitute it with water. The bread will still be very soft.
Variations & Add-ins
- multi-seeded sourdough bread - instead of just chia seeds, play around and add in kinds of seeds as well: sunflower seeds, flax seeds, poppy seeds, pumpkin seeds, and hemp seeds are just my suggestions, but use what you like and have at home. Just make sure to add only a small amount, or you'll have to play around with adding some extra liquid otherwise (read more about sourdough hydration).
Tools You'll Need
- mixing bowl
- measuring cups and spoons or a kitchen scale
- dough scraper
- banneton basket or a bowl that is similarly shaped
- tea towel
- razor blade or sharp knife
- parchment paper or bread mat
- dutch oven
- cooling rack (optional)
💭Crucial Success Tips
- The dough needs to be very sticky at first, so don't be tempted to add more flour, as that will lead to dense bread! I promise the dough comes together when the liquid gets soaked up by chia seeds and the flour.
- Instead of letting your dough double during a bulk rise, aim for a 75% increase in rise instead. Letting the dough double can quickly lead to over fermentation and there's no coming back from that. After a 75% increase in size, the dough is nicely fermented and still has some power to rise during the second rise.
- To achieve the scoring to stand out more, try to do the second rise in the fridge. Scoring into a cold dough is less messy and the design tends to be clearer and more pronounced.
- Last but not least: your starter needs to be active. I know sourdough discard can lift your bread just as well, but the timings for that will be different. For this recipe, use your starter as close to its peak as possible.
FAQ
Yes! There is no need to wait for the dough to come to room temperature before baking it.
They are a great source of fiber and contain quite a large amount of omega-3 fatty acids. Since you can barely notice there there taste-wise, they are one of the things that make your bread more nutritious without it tasting overwhelmingly "healthy".
Yes, you can, but keep in mind that the bread might not come out as soft. Bread flour contains more gluten, so the bread will have a stronger structure. That means it might rise more and be a bit chewier.
More Sourdough Recipes
Looking for other recipes like this? Try these:
📖Printable Recipe

Chia Seed Sourdough Bread
Jump to VideoEquipment
- 1 Mixing bowl
- 1 Measuring cups and spoons or a kitchen scale
- 1 Dough scraper optional
- 1 banneton basket or a bowl that is similarly shaped
- 1 razor blade or sharp knife
- 1 parchment paper or bread mat
- 1 Cooling rack optional
Ingredients
- 200 grams water
- 80 grams milk whole is best
- 100 grams sourdough starter
- 300 grams all-purpose flour
- 20 grams chia seeds
- 6 grams salt
Instructions
- Mix water, milk, salt, and chia seeds in a mixing bowl. Add your starter and mix so that the starter can disperse in the water.
- Add the flour and mix the dough. The dough should be very sticky and impossible to handle at this point (after the chia seeds soak up some liquid, you'll be able to handle it easily!).
- Wait at least 30 minutes for the flour and the chia seeds to soak up the liquid (autolyse).
- Now the bulk ferment starts. In the first two hours of the bulk ferment, do 3 - 6 sets of stretch and folds or coil folds every 20 - 40 minutes. I try to go for 6 sets if I have the time, but the difference between 3 and 6 is minimal, so 3 sets are ok too.
- The time for bulk ferment will depend a lot on the temperature of your kitchen, but since we used quite a lot of starter in the dough, the bulk ferment will probably last around 6 - 9 hours at room temperature (read more about the timing sourdough proofing).
- After the first rise (bulk fermentation), shape your dough into a loaf. The easiest thing to do that is to start with a lightly floured work surface. Stretch the dough a bit on that surface, then pinch together the opposite ends (up and down), and repeat in the other direction (left and right).
- Put the loaf into a tea towel-lined banneton basket (and lightly flour that tea towel for good measure!) with the seam side up. Cover with something airtight and let it rise for the second time - about 2 hours at room temperature or overnight in the fridge.
- Turn your dough on a piece of parchment paper or a bread mat, score it, move it into a preheated dutch oven, and bake in a preheated oven at 460°F (238°C) for 30 minutes. Remove the lid and continue baking for an extra 10 minutes at 440°F (227°C) to achieve a lovely golden brown color.
- Remove the bread from the oven and cool on a cooling rack. This prevents the underside of the dough from becoming soggy.
Video
Notes
- whenever you have a hard time with your dough sticking to your fingers, wet your hands. Read more about how to handle sticky dough!
- doing coil folds instead of the stretch and fold method can be a bit easier as long as the dough is very sticky. I usually do about 2 sets of coil folds and then proceed with stretch and folds.
- The dough needs to be very sticky at first, so don't be tempted to add more flour, as that will lead to dense bread! I promise the dough comes together when the liquid gets soaked up by chia seeds and the flour.
- To achieve the scoring to stand out more, try to do the second rise in the fridge. Scoring into a cold dough is less messy and the design tends to be clearer and more pronounced.
- Last but not least: your starter needs to be active. I know sourdough discard can lift your bread just as well, but the timings for that will be different. For this recipe, use your starter as close to its peak as possible.
- Instead of letting your dough double during a bulk rise, aim for a 75% increase in rise instead. Letting the dough double can quickly lead to over fermentation and there's no coming back from that. After a 75% increase in size, the dough is nicely fermented and still has some power to rise during the second rise.
Nutrition
Baking Schedule
Day 1: Mixing and Bulk Fermentation
- 8:00 AM: Mix water, milk, salt, and chia seeds in a bowl. Add the starter and flour, and mix to a shaggy dough. Let it rest for 30 minutes for autolyse.
- 8:30 AM: Begin the bulk fermentation process. Perform the first set of stretch and folds.
- 9:10 AM: Second set of stretch and folds.
- 9:50 AM: Third set of stretch and folds. (Continue with additional sets every 40 minutes if you have time, up to 6 sets total).
- 2:00 PM - 5:00 PM (Approx.): End of bulk fermentation. This could be earlier or later depending on your kitchen's temperature and the dough's progress.
Day 1: Shaping and Second Rise
- 5:00 PM: Shape the dough into a loaf on a lightly floured surface and place it into a tea towel-lined banneton with the seam side up.
- 5:15 PM: Begin the second rise. Cover the dough and let it rise at room temperature.
- 7:15 PM: If the dough has doubled in size and passes the poke test, it's ready. If not, let it rise for a bit longer.
Optional: Overnight Retard
- 7:15 PM: Instead of a room temperature rise, you can place the shaped dough into the refrigerator for an overnight retard to develop more flavor. If doing this, continue with the next steps the next morning.
Day 2: Baking
- 7:00 AM (Next Day if Retarding): Preheat your oven to 460°F (238°C) with the Dutch oven inside for at least 30 minutes before you plan to bake.
- 7:30 AM: Turn the dough onto parchment paper or a bread mat, score it, and carefully transfer it into the preheated Dutch oven.
- 7:35 AM: Bake at 460°F (238°C) for 30 minutes with the lid on.
- 8:05 AM: Reduce the temperature to 440°F (227°C), remove the lid, and bake for an additional 10 minutes.
- 8:15 AM: Remove the bread from the oven and cool on a rack.
How To Store Chia Seed Sourdough Bread
I usually keep this bread at room temperature in a bread box for about 3 days (its usually gone by then). I avoid plastic bags, since they can turn the bread a bit soggy.
If you decide to freeze it, slice the bread and freeze it in airtight bags for up to 3 months. Reheat slices in the oven or toaster when needed.
Pin it for Later


Tina,
I have been making this recipe for the past several months due to my recent diagnosis of type II diabetes. Have you worked out the "nutrition facts" for it. I need to limit my carbs so knowing the total carbs in the recipe I will be able to come up with a close estimate of the carbs per slice. I bake the bread in "USA" loaf pans so it will be easier to derive the carbs per loaf and slice. I do add other seeds to it as well as additional water but the dough makes a great tasting loaf of sourdough bread. Thanks for sharing this great recipe and process.
Hi John!
Firstly, I’m really glad to hear this recipe has been working well for you, and thank you for sharing why you’re making it. That means a lot to me.
Secondly, I usually don’t publish full nutrition facts because sourdough varies a lot depending on fermentation time, starter, and flour, so exact numbers are hard to guarantee. But you can get a good estimate, and I'll do my best for this one!
So, this loaf contains about 350 g total flour (300 g from the flour + roughly 50 g from the starter). All-purpose flour has about 75 g carbs per 100 g, so the whole loaf comes out to roughly 260–265 g total carbs.
If you slice it into 12 slices, that’s about 21–22 g carbs per slice.
Chia seeds and added seeds contribute mostly fiber, so net carbs may be slightly lower.
Long fermentation can help with blood sugar response, but it doesn’t remove carbs entirely, so calculating per slice like you’re doing is the best approach. So I'd say, try to make this recipe, and see how many slices you usually do. Then divide 265g with a number of those slices and that should give you a good estimate of how many carbs are in one slice!
Thanks so much again for making and trusting this recipe!
What does the milk do? Could I use all water and no milk or is it necessary for this recipe? Thanks you!
Hi Chrisha,
milk provides a tighter crumb, so more little holes instead of a few large ones, and that's what I went for for this bread just because I like how it turns out 🙂 But yes of course, you can use all water for this recipe and it should work just as well!
wonderful recipe and spot on instructions. I took a chance and doubled the recipe. put one in the oven and the other In the refrigerator for overnight ferment. the one I baked came out beautiful, I use a zip up proofer from Amazon and heated every thing to 75 degrees the milk i heated separately. my kitchen is cool 63 degrees l made oblong loafs easier to slice .I back them in a oblong clay Dutch oven.thanks for the wonderful recipe.
Hi Tim,
I enjoy reading comments like yours so much! Thank you for taking the time to comment. Chia bread is a staple at our house too and I'm glad the recipe worked well for you 🙂
Your recipes are always amazing!! Thank you!!
I am so glad you find them helpful! =D