
Sourdough Cinnamon Brown Sugar Bread with Better Swirls

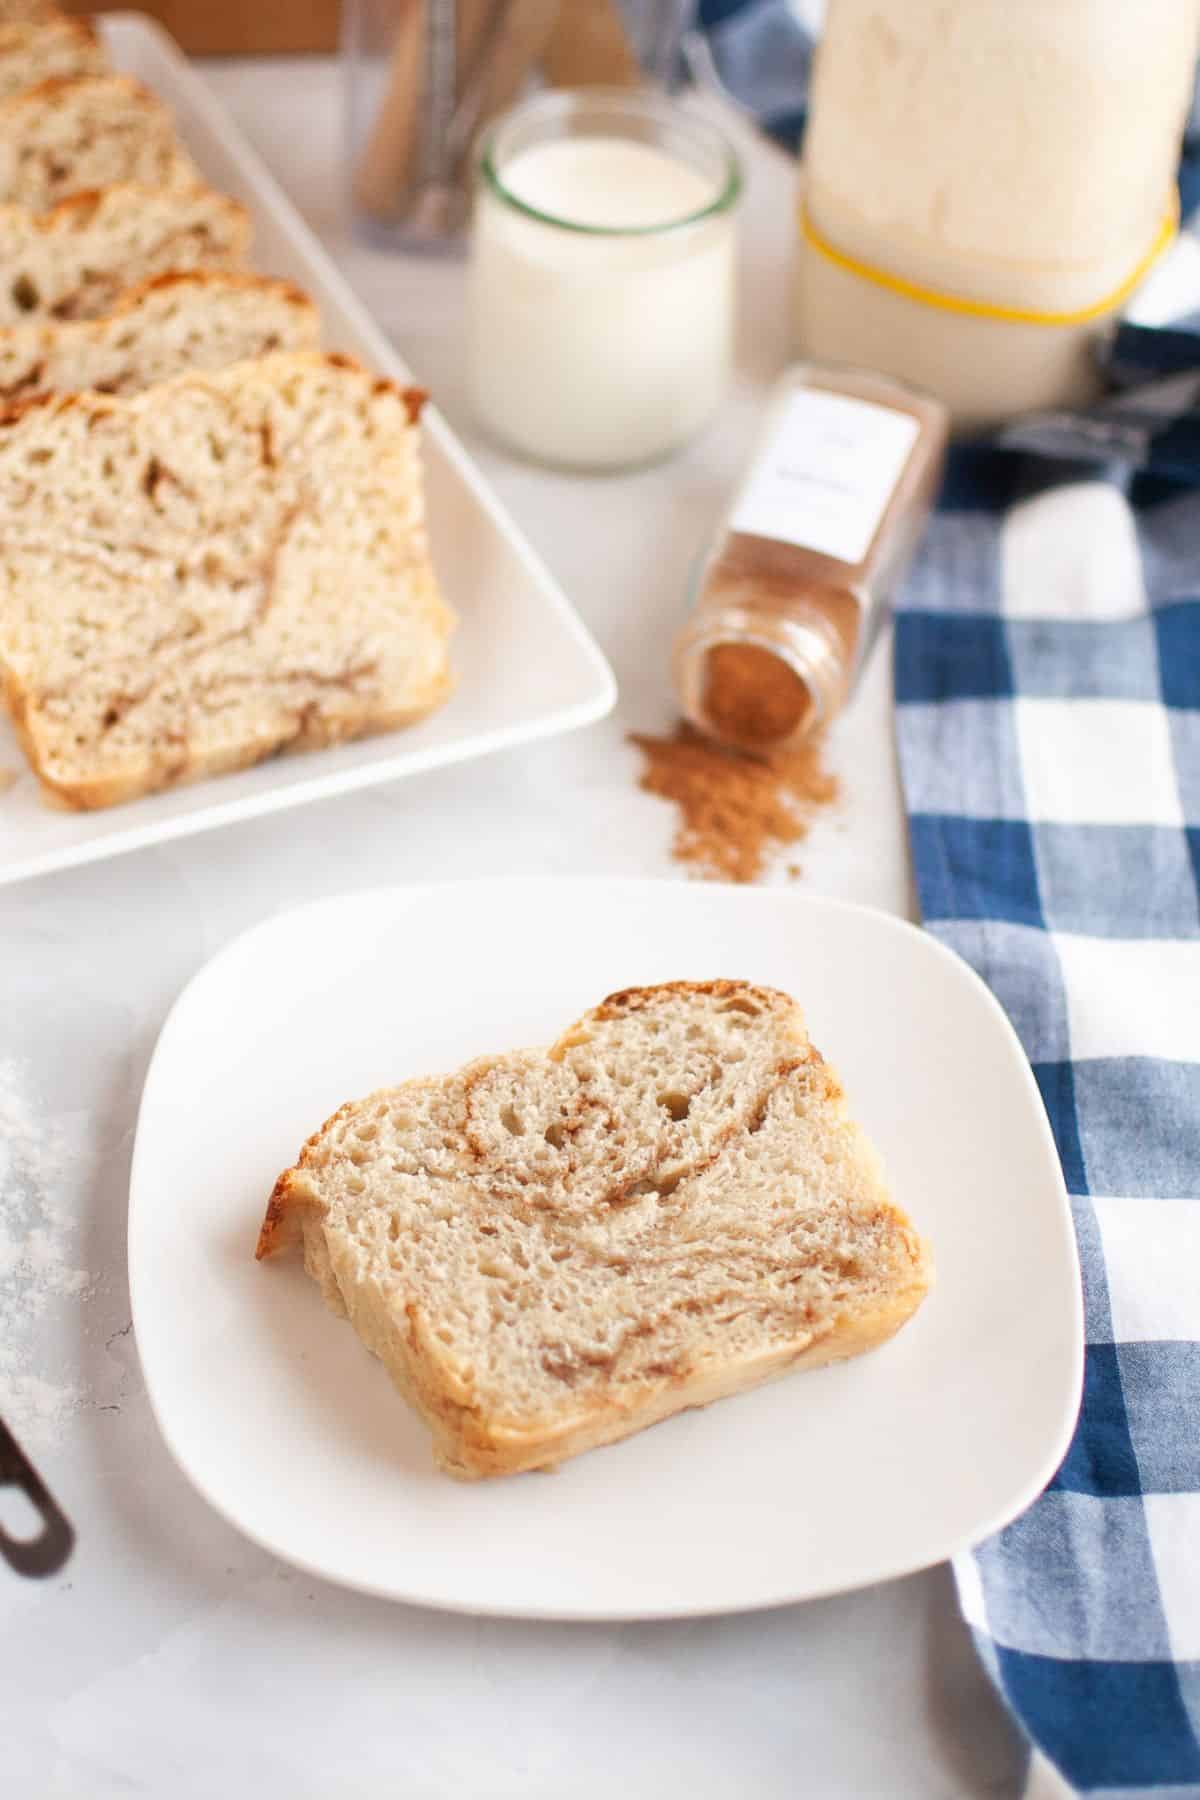
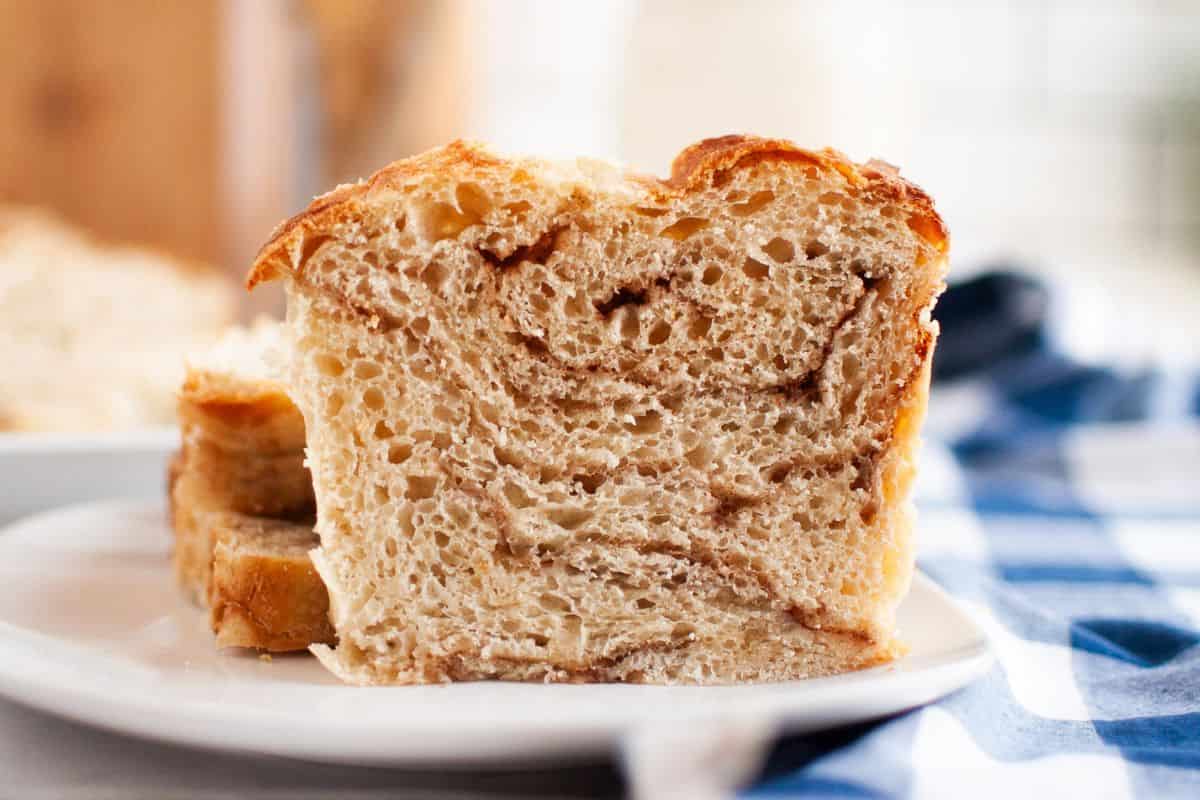
This sourdough cinnamon brown sugar bread has a cinnamon filling folded through the dough before it's rolled into a loaf. You don't need one perfect spiral to get cinnamon throughout the bread. Slicing into it is exciting: every slice looks a little different!
If you like swirly breads, be sure to give my chocolate hazelnut Babka a try too!
Summarize & Adapt This Recipe On:
It tastes great toasted, and leftovers can easily be turned into delicious sourdough French toast or a French toast casserole. If you're a fan of cinnamon, be sure to also check out my sourdough cinnamon rolls and sourdough cinnamon raisin bagel recipes too.
This is the kind of recipe you might want to make a couple of times to get comfortable with the shaping. The swirls don't need to look identical, and you'll get a better feel for the dough each time.

free resource
Get All 3 Sourdough Bake Schedules
Bake beautiful bread that fits Your life - not the other way around
Quick Look
- The loaf: Lightly sweet sourdough with cinnamon and brown sugar folded through each slice.
- Starter: Active, bubbly sourdough starter. The main recipe has no added commercial yeast.
- Method: Stretch and folds, a chill for easier shaping, and a loaf-pan bake.
- Hands-on time: About 30 minutes, spread throughout the process.
- Plan ahead: About 6 hours for the first rise, at least 2 hours chilling, then about 2-4 hours for the final rise. Times vary with your starter and kitchen temperature.
- Baking: About 50 minutes at 400°F (200°C), followed by cooling.
- Yield: 1 loaf, about 10 slices.
- How I serve it: Sliced on its own with coffee, toasted, or turned into French toast.
Jump to:
- Summarize & Adapt This Recipe On:
- Quick Look
- Important Ingredients
- Substitutions & Variations
- How to Make Brown Sugar Cinnamon Sourdough Bread
- Recipe Timeline
- 💭Crucial Success Tips
- Can I Add Yeast?
- Which Grains Can I Use?
- Recipe FAQs
- How To Store Sourdough Cinnamon Brown Sugar Bread
- More Sourdough Recipes
- Brown Sugar Cinnamon Sourdough Recipe with Better Swirls
- Need Help Tweaking This Recipe?
- Other Sourdough Recipes You'll Love
- Fresh Milled Buckwheat Sourdough Rolls
- The Easiest Fresh Milled Einkorn Sourdough Bread (Loaf Pan Method)
- 100% Fresh-Milled Einkorn Sourdough Bread
Important Ingredients
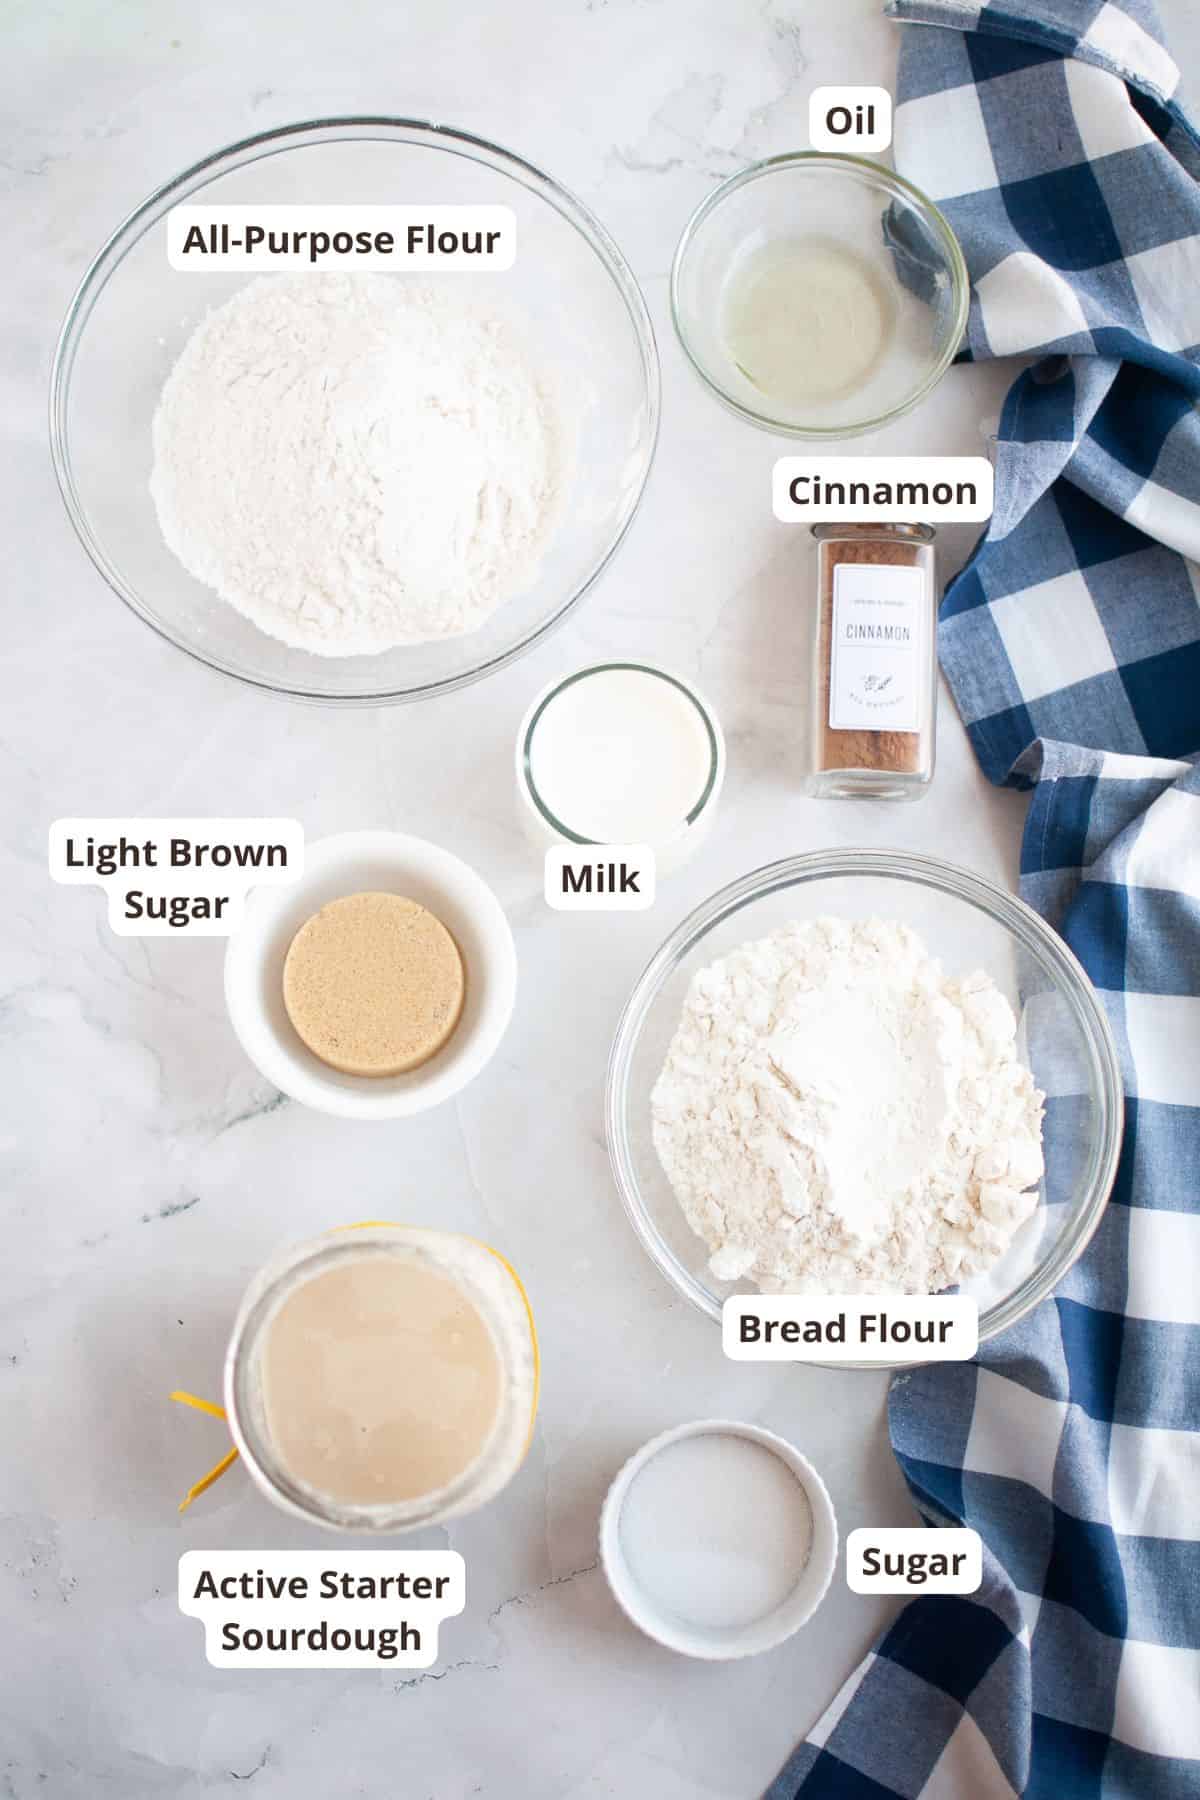
- Active sourdough starter: You'll need your starter bubbly and active. This is what will help the bread rise and become nice and fluffy. As far as sourdough recipes go, a healthy starter is always a good way to start. You can read more about how to make your own sourdough starter here!
- Water: Tap water works well. You can also use warm water to slightly speed up the rising process.
- White sugar: A small amount sweetens the dough. The light brown sugar goes into the cinnamon filling.
- Oil: For the moisture and richness. Make sure you use a neutral flavored oil. Butter can work too, but I prefer oil for this one!
- Bread flour and all-purpose flour: Through trial and error, I found that equal amounts give me the balance I like. Bread flour adds strength for shaping, while all-purpose flour helps keep the loaf soft. You can use only one, but the dough will handle a little differently.
- Cinnamon: To add those warm, spicy notes to the filling and complement the sweetness.
- Light brown sugar: For that caramel-like sweetness that pairs perfectly with cinnamon.
- Heavy cream: To help the filling stick to the dough. You can also use milk or water.
See recipe card for quantities.
Substitutions & Variations
- Don't have light brown sugar? White sugar works just fine for the filling. The color difference is minimal and won't affect the taste much.
- Honey in the dough: If you want to replace the 20 g white sugar, I'd use about 15 g honey, or start with 10 g for less sweetness. Honey adds moisture as well as sweetness. This suggestion is for the dough sugar, not the brown sugar filling.
- Adding raisins: I've added raisins a few times, and I didn't even soak them first. Sprinkle them over the dough after adding the cinnamon sugar. I don't make it this way more often because my kids prefer the cinnamon-only version! You can soak the raisins in water or rum first if you prefer; drain them before adding. For another option, try my sourdough cinnamon raisin bread.
How to Make Brown Sugar Cinnamon Sourdough Bread
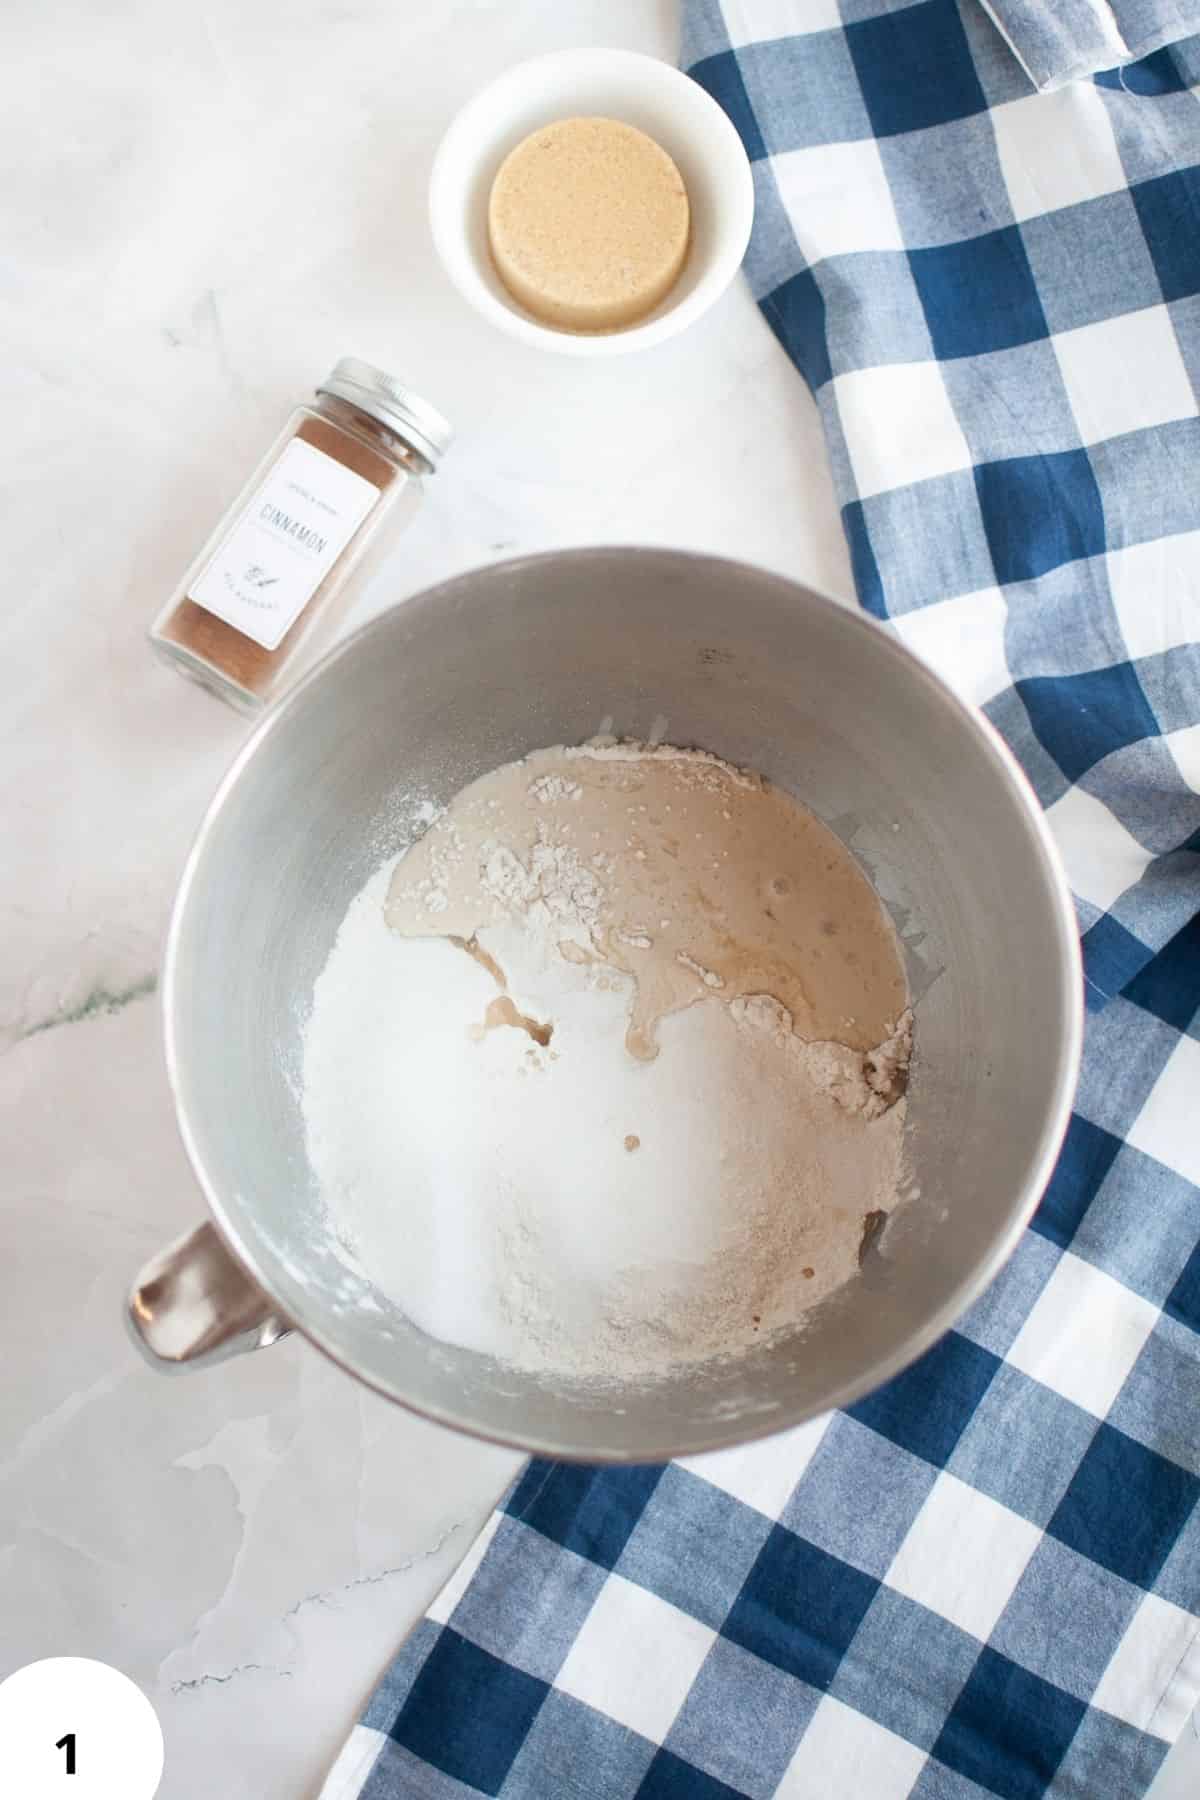
Step 1: Combine your dough ingredients in a large bowl until you get a shaggy (Image 1), soft ball of dough.
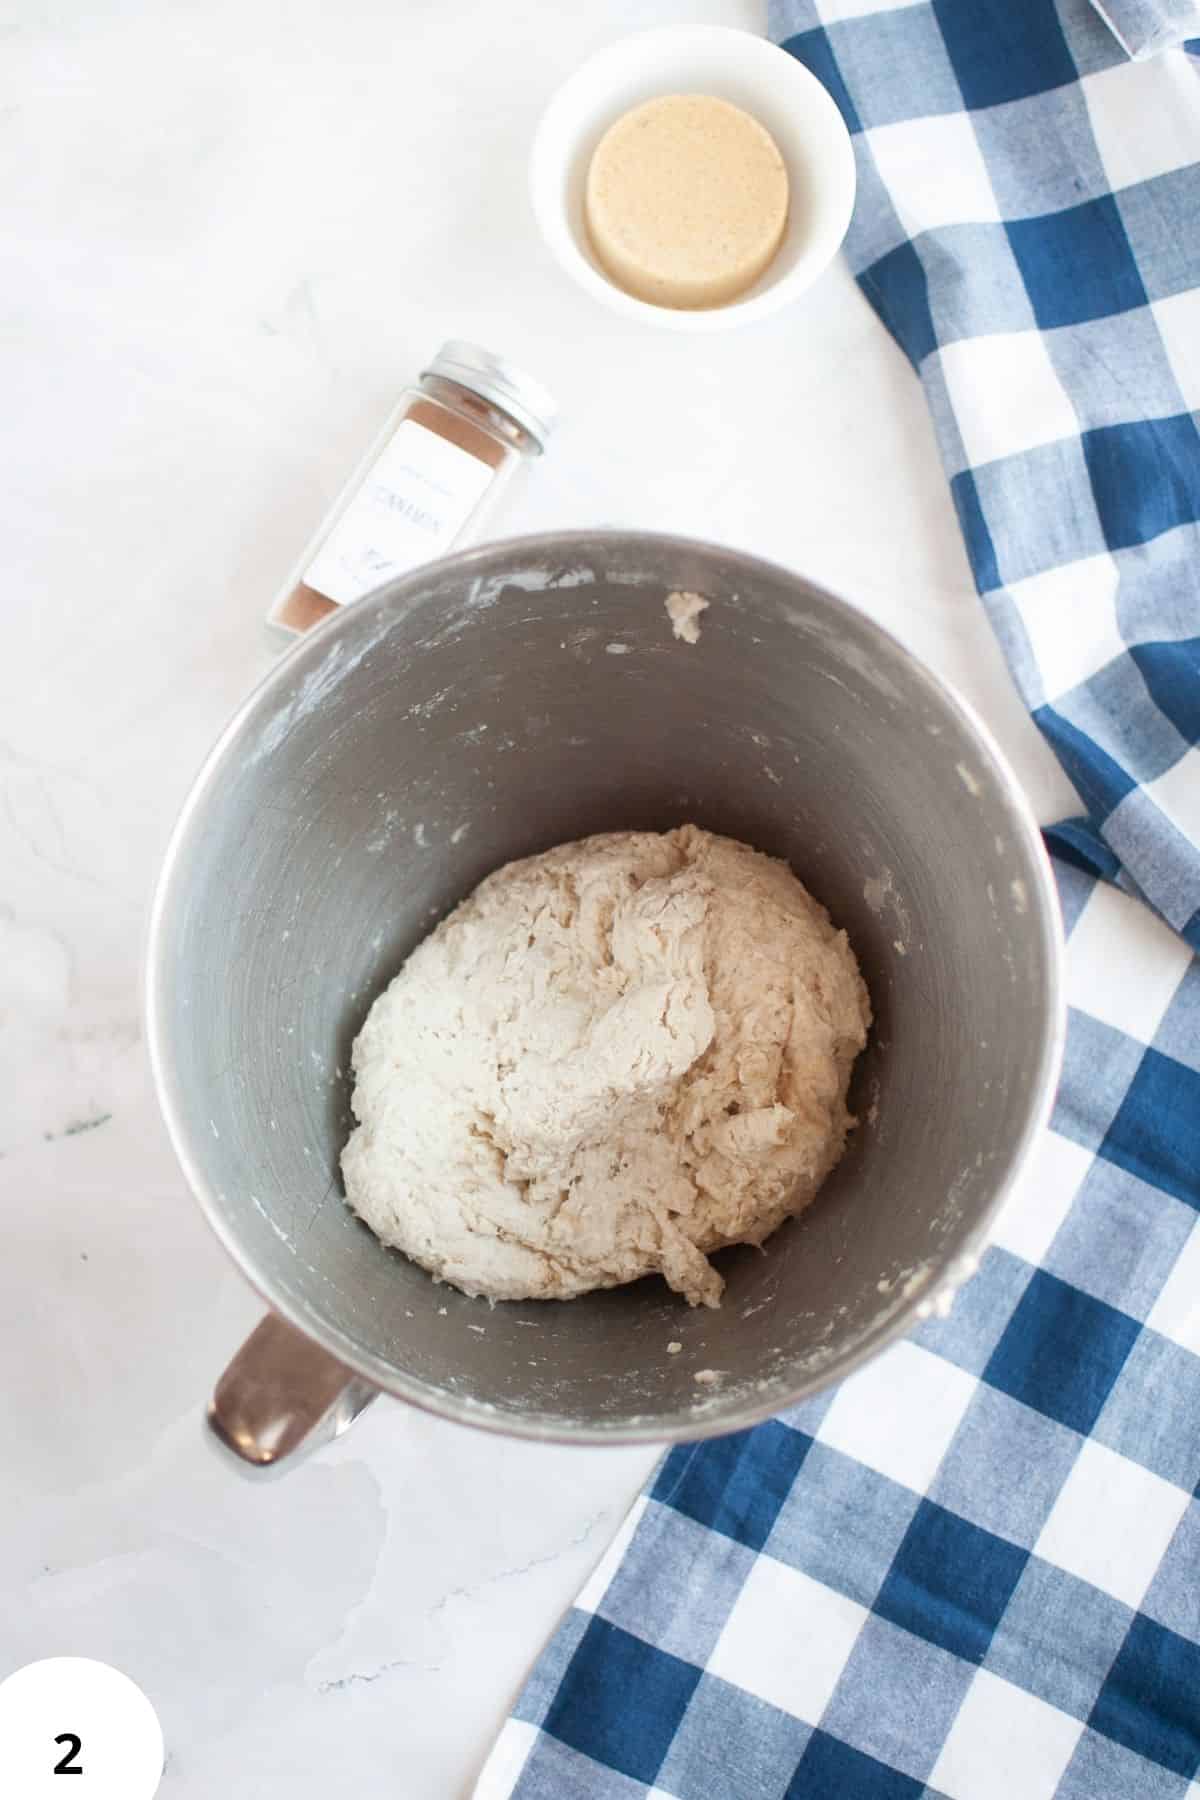
Step 2: Cover with a damp towel and let the dough rest for 30 minutes (Image 2).
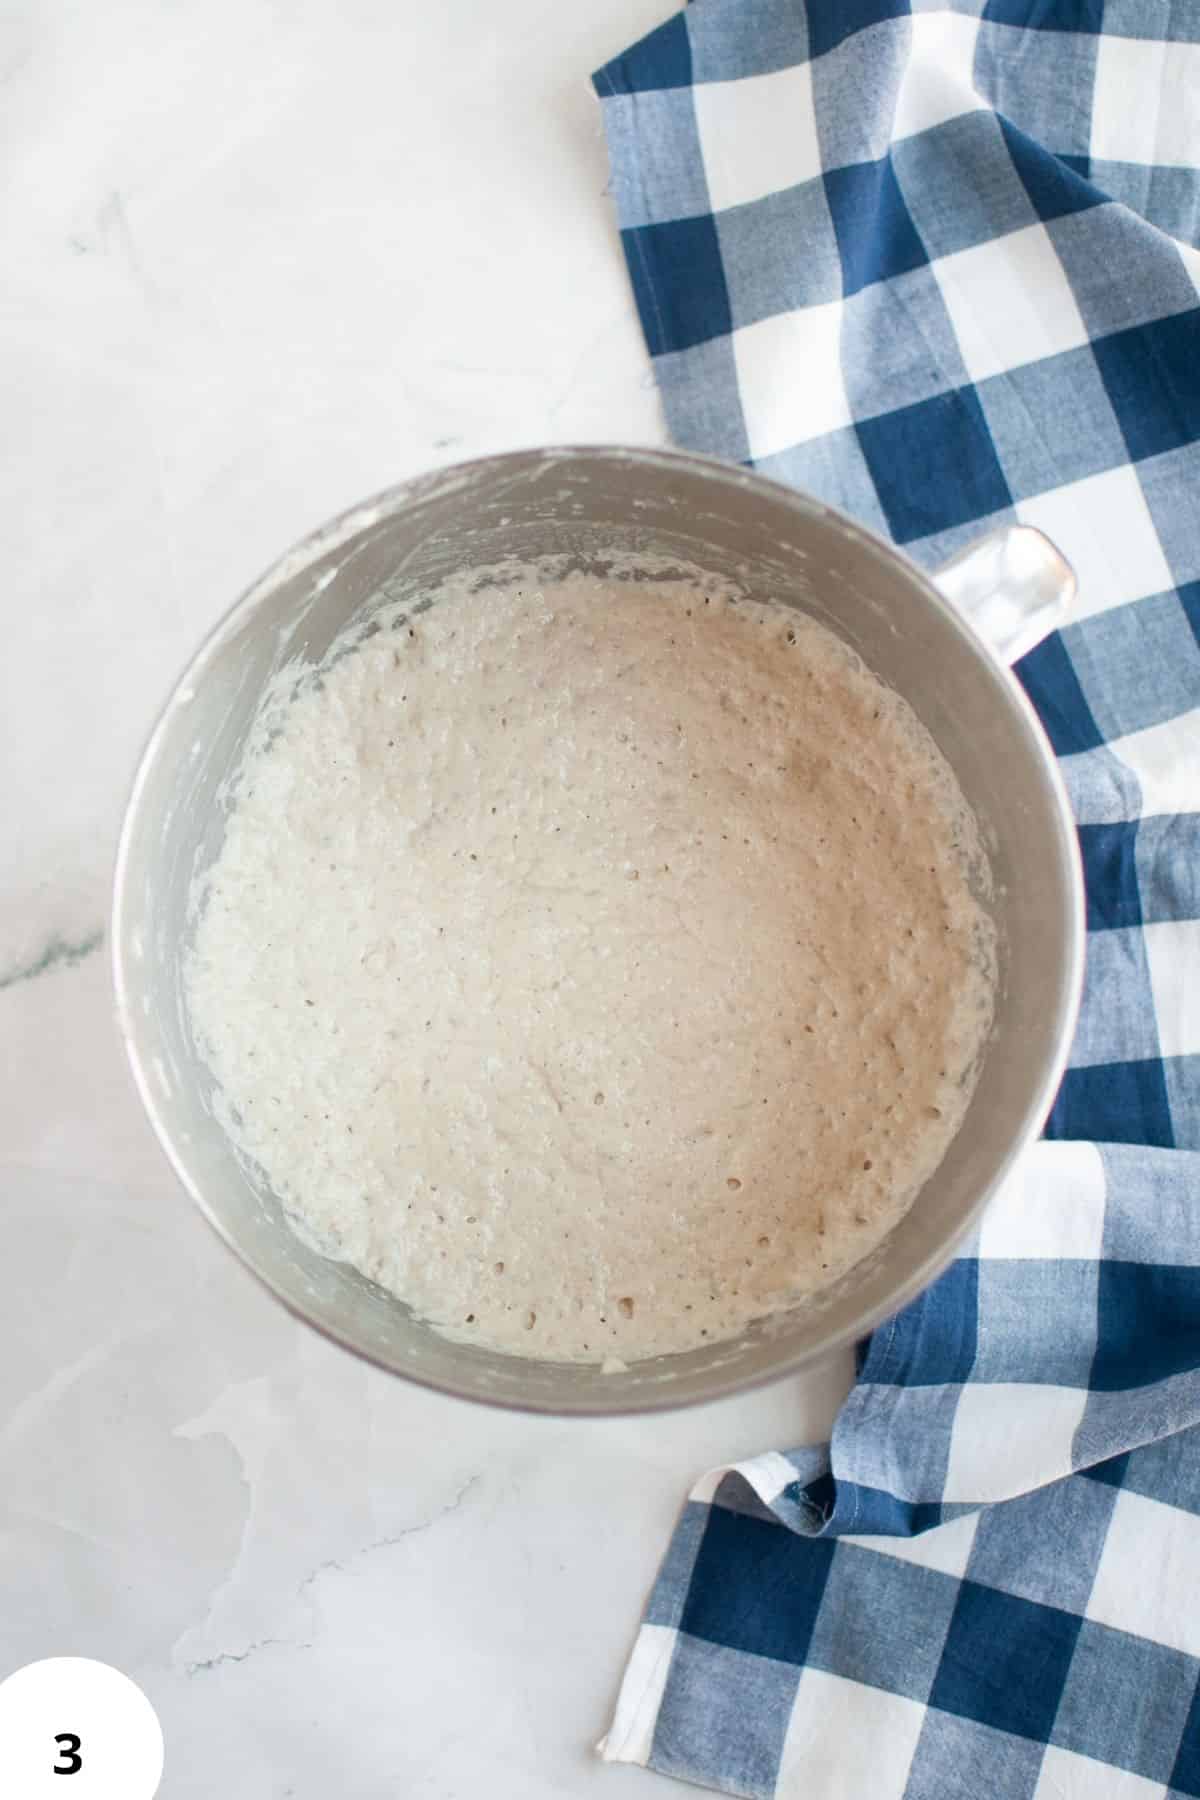
Step 3: Perform 2-3 sets of stretch and folds, about 30 minutes apart. Damp hands help keep the dough from sticking. Cover between sets, then let the dough continue rising until puffy and almost doubled. Allow about 6 hours total from initial mixing, including the rest and stretch and folds. (Image 3)
Cover and refrigerate for at least 2 hours, or overnight, before filling and shaping.
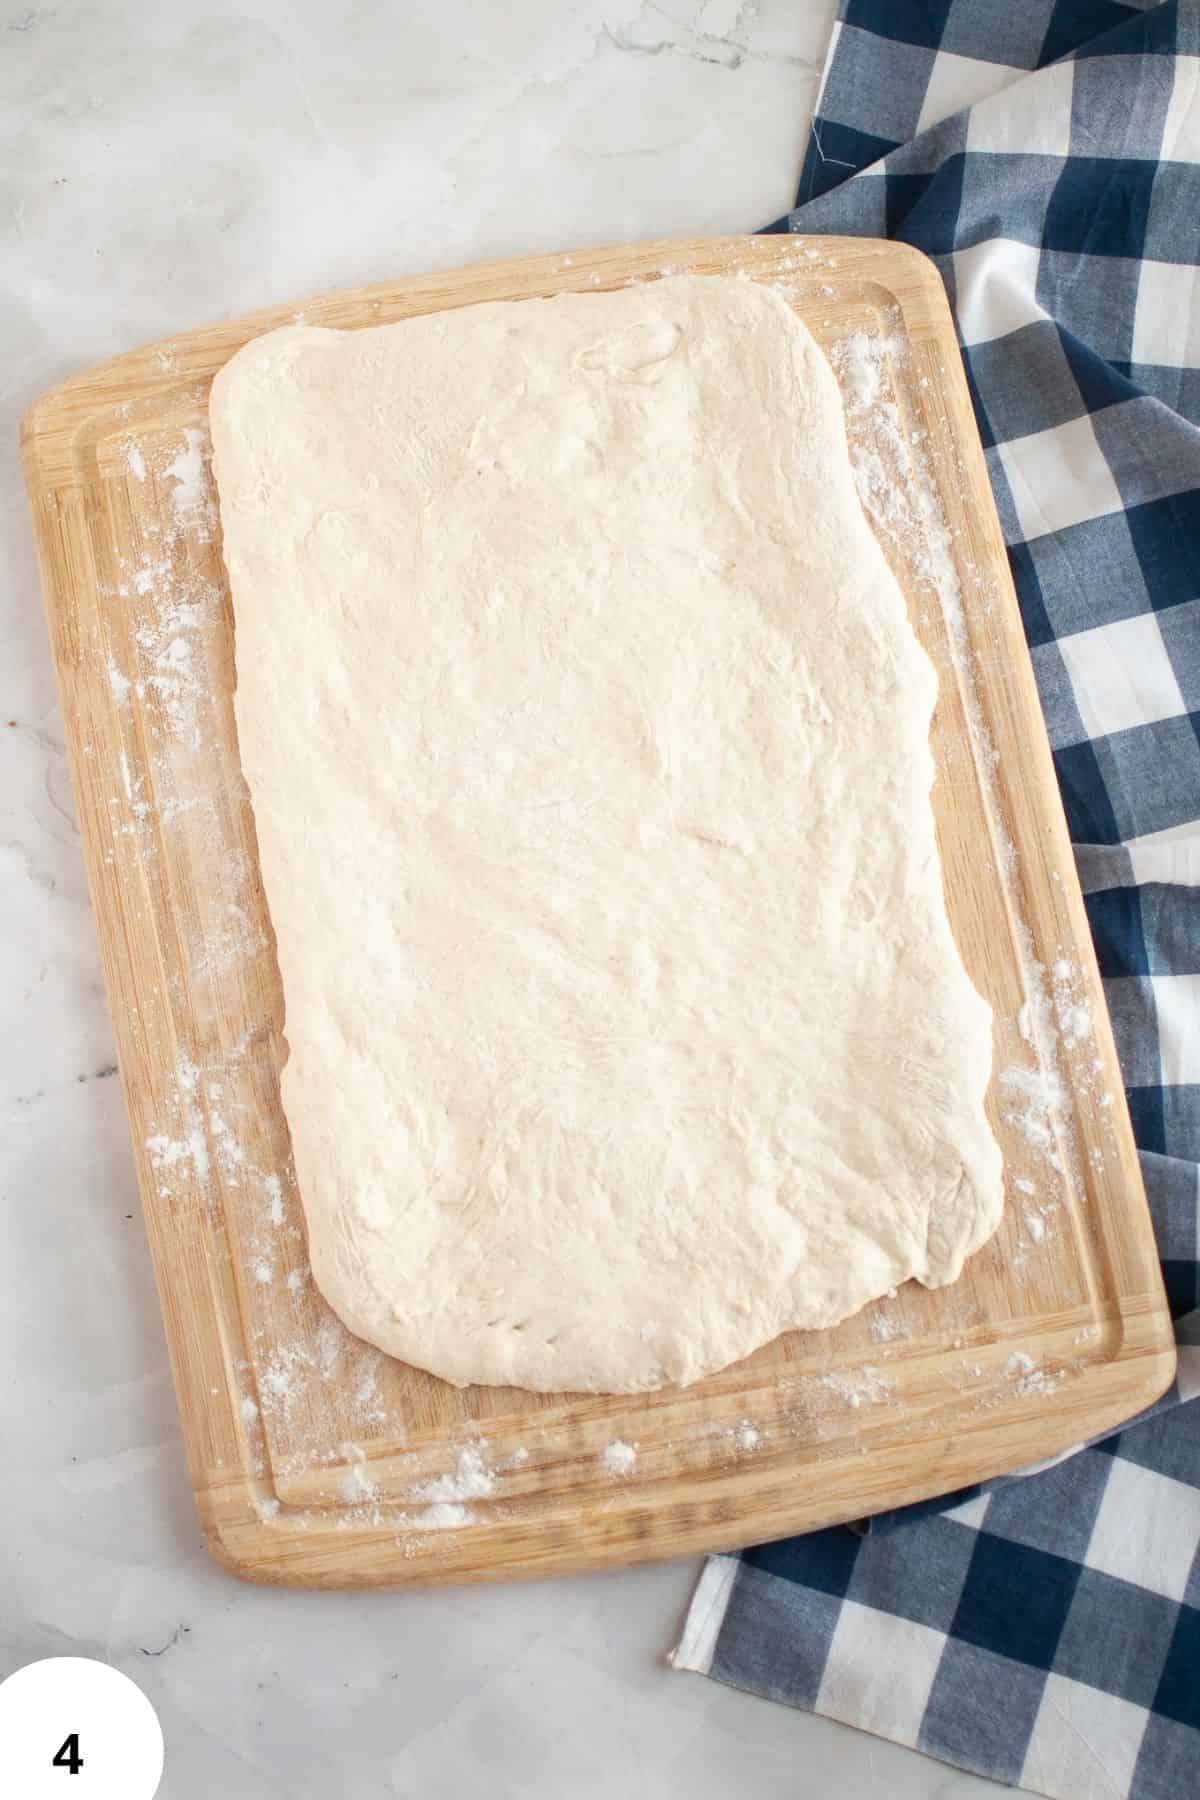
Step 4: Transfer the dough to a lightly floured counter and shape into a rectangle (Image 4).
Step 5: Brush some heavy cream over the dough. You can also use milk or just plain water.
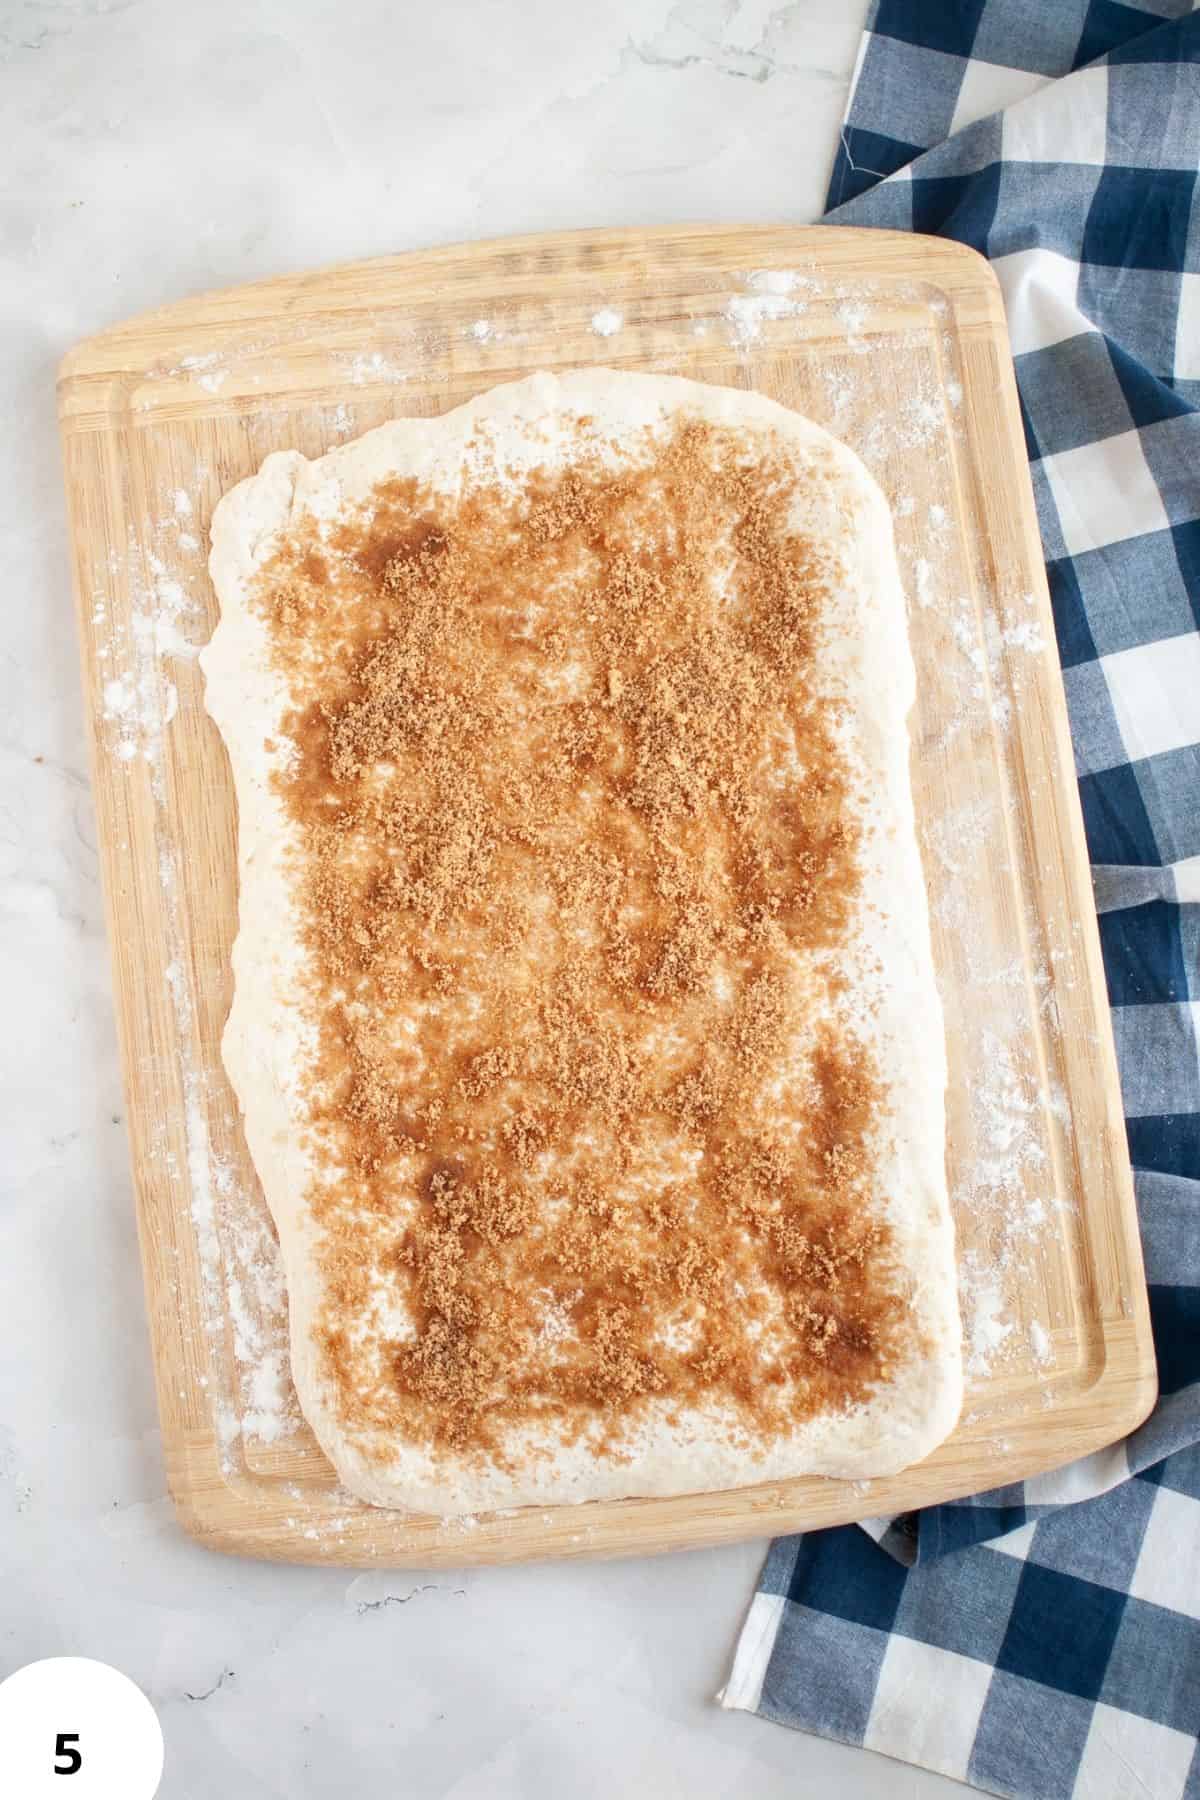
Sprinkle ⅔rd of the cinnamon sugar over the surface, leaving a bit of border around the edges (Image 5).
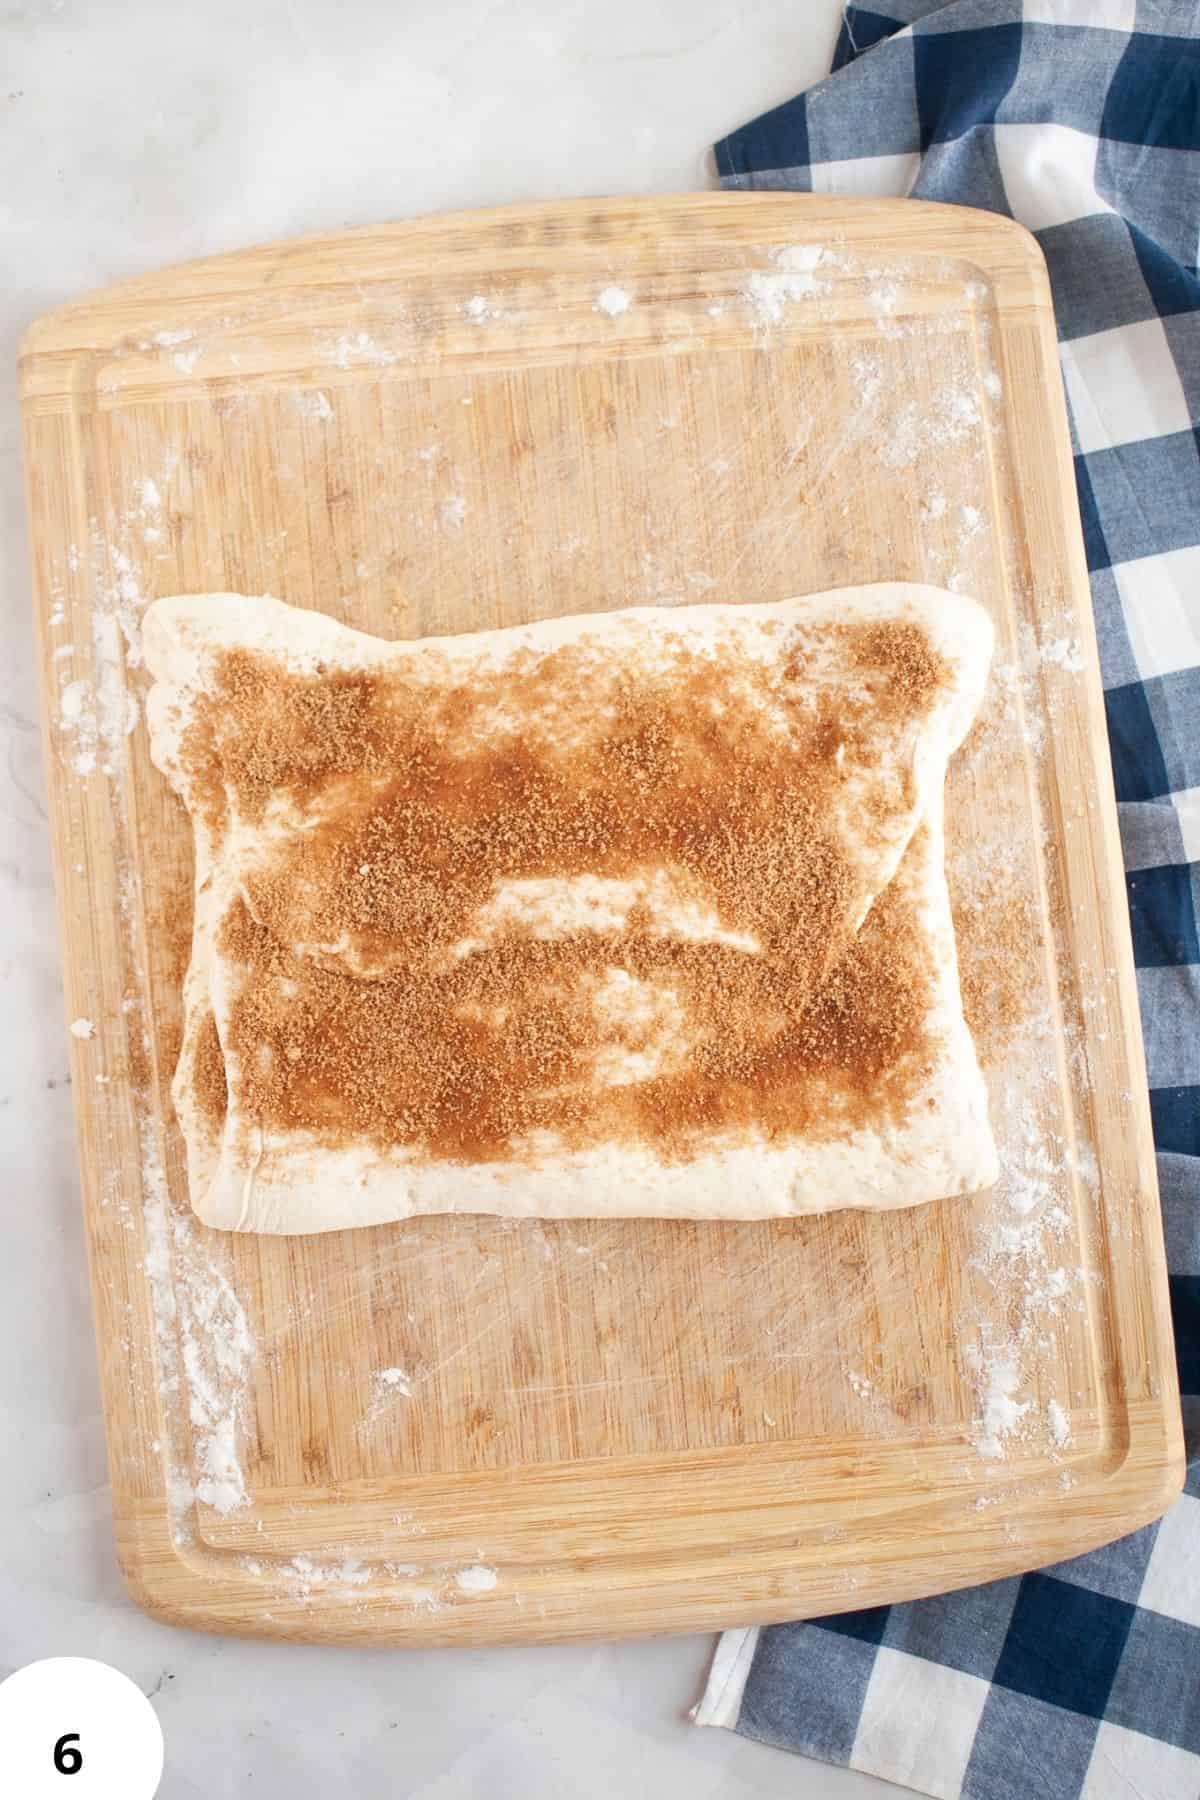
Step 6: Fold the dough, bringing the short sides into the middle, letting them overlap a bit (Image 6).
Sprinkle the rest of the cinnamon sugar over this folded dough.
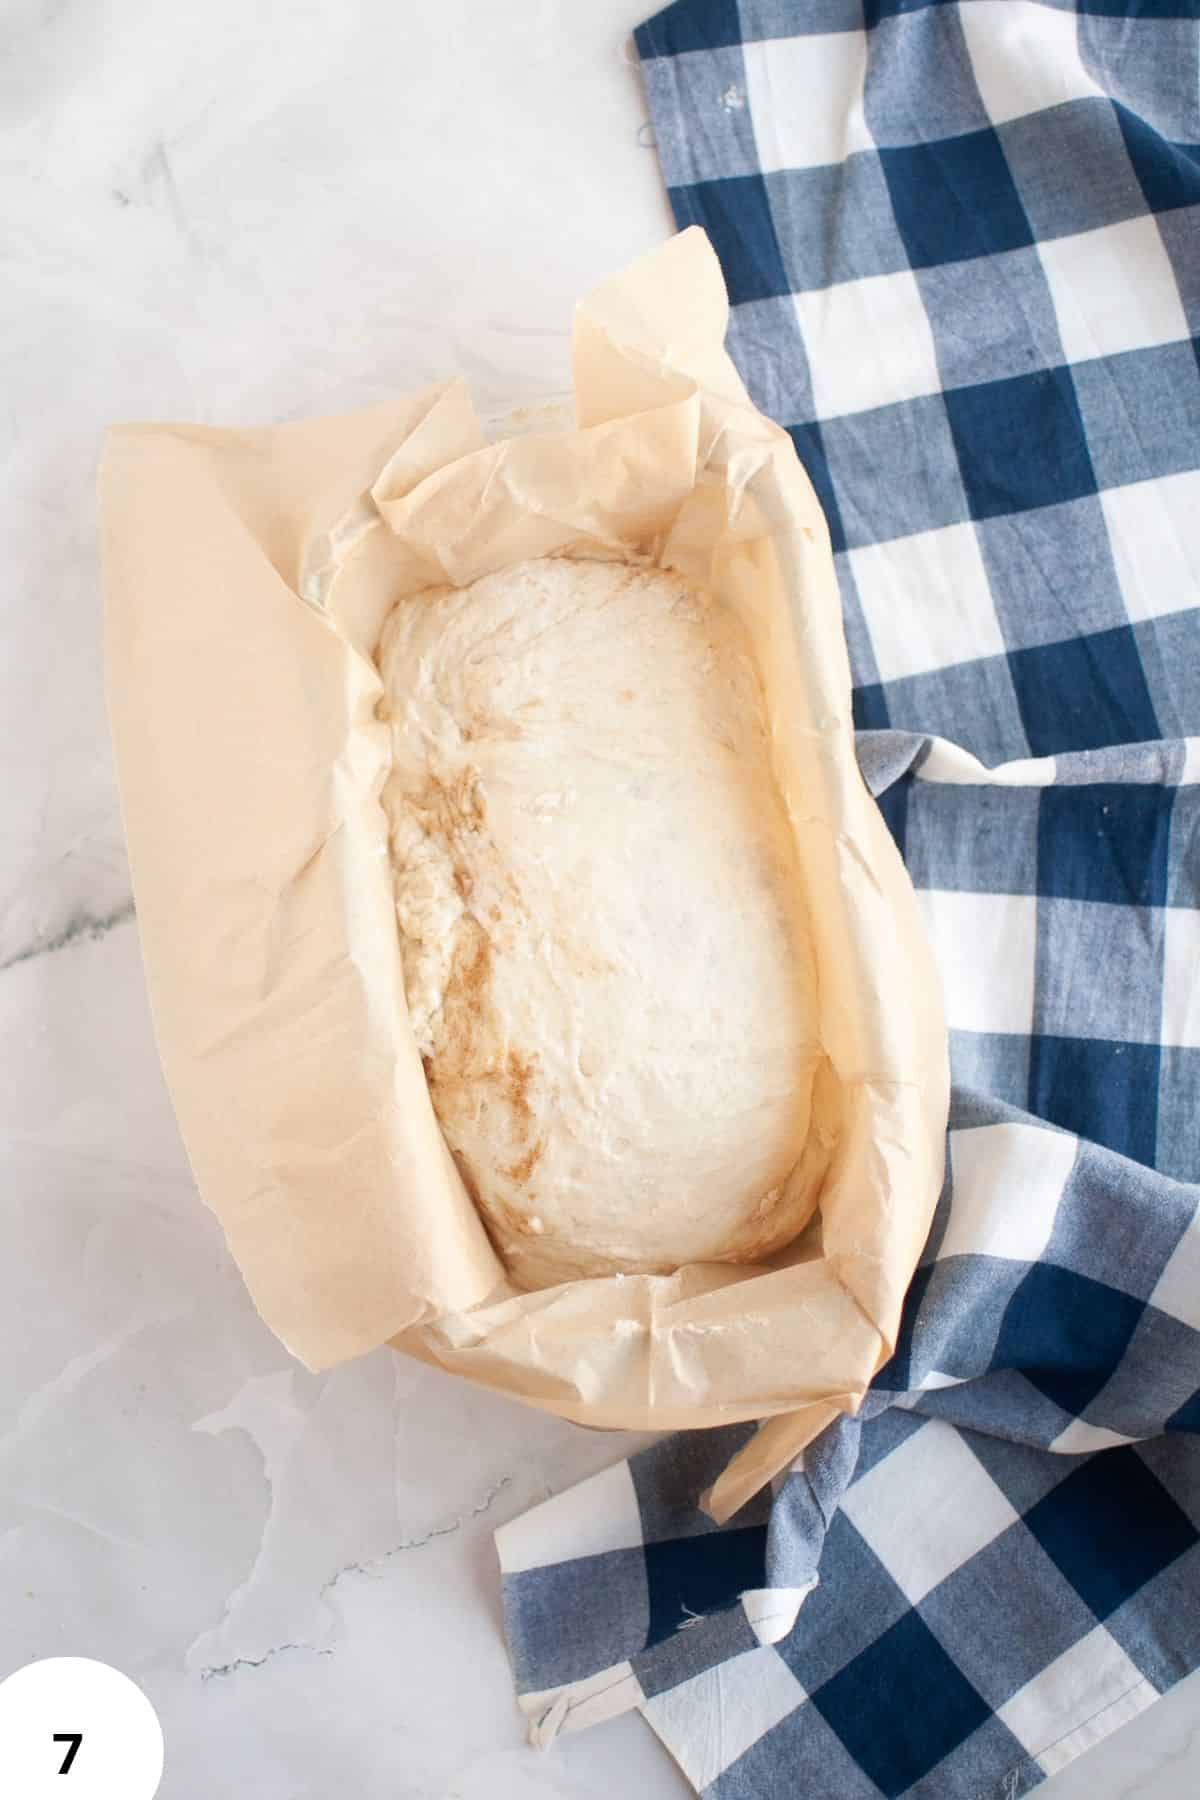
Step 7: Start at the short end and roll the dough up tightly, like you're making a dough log (Image 7). You can help yourself with a bench scraper if the dough wants to stick to the surface.
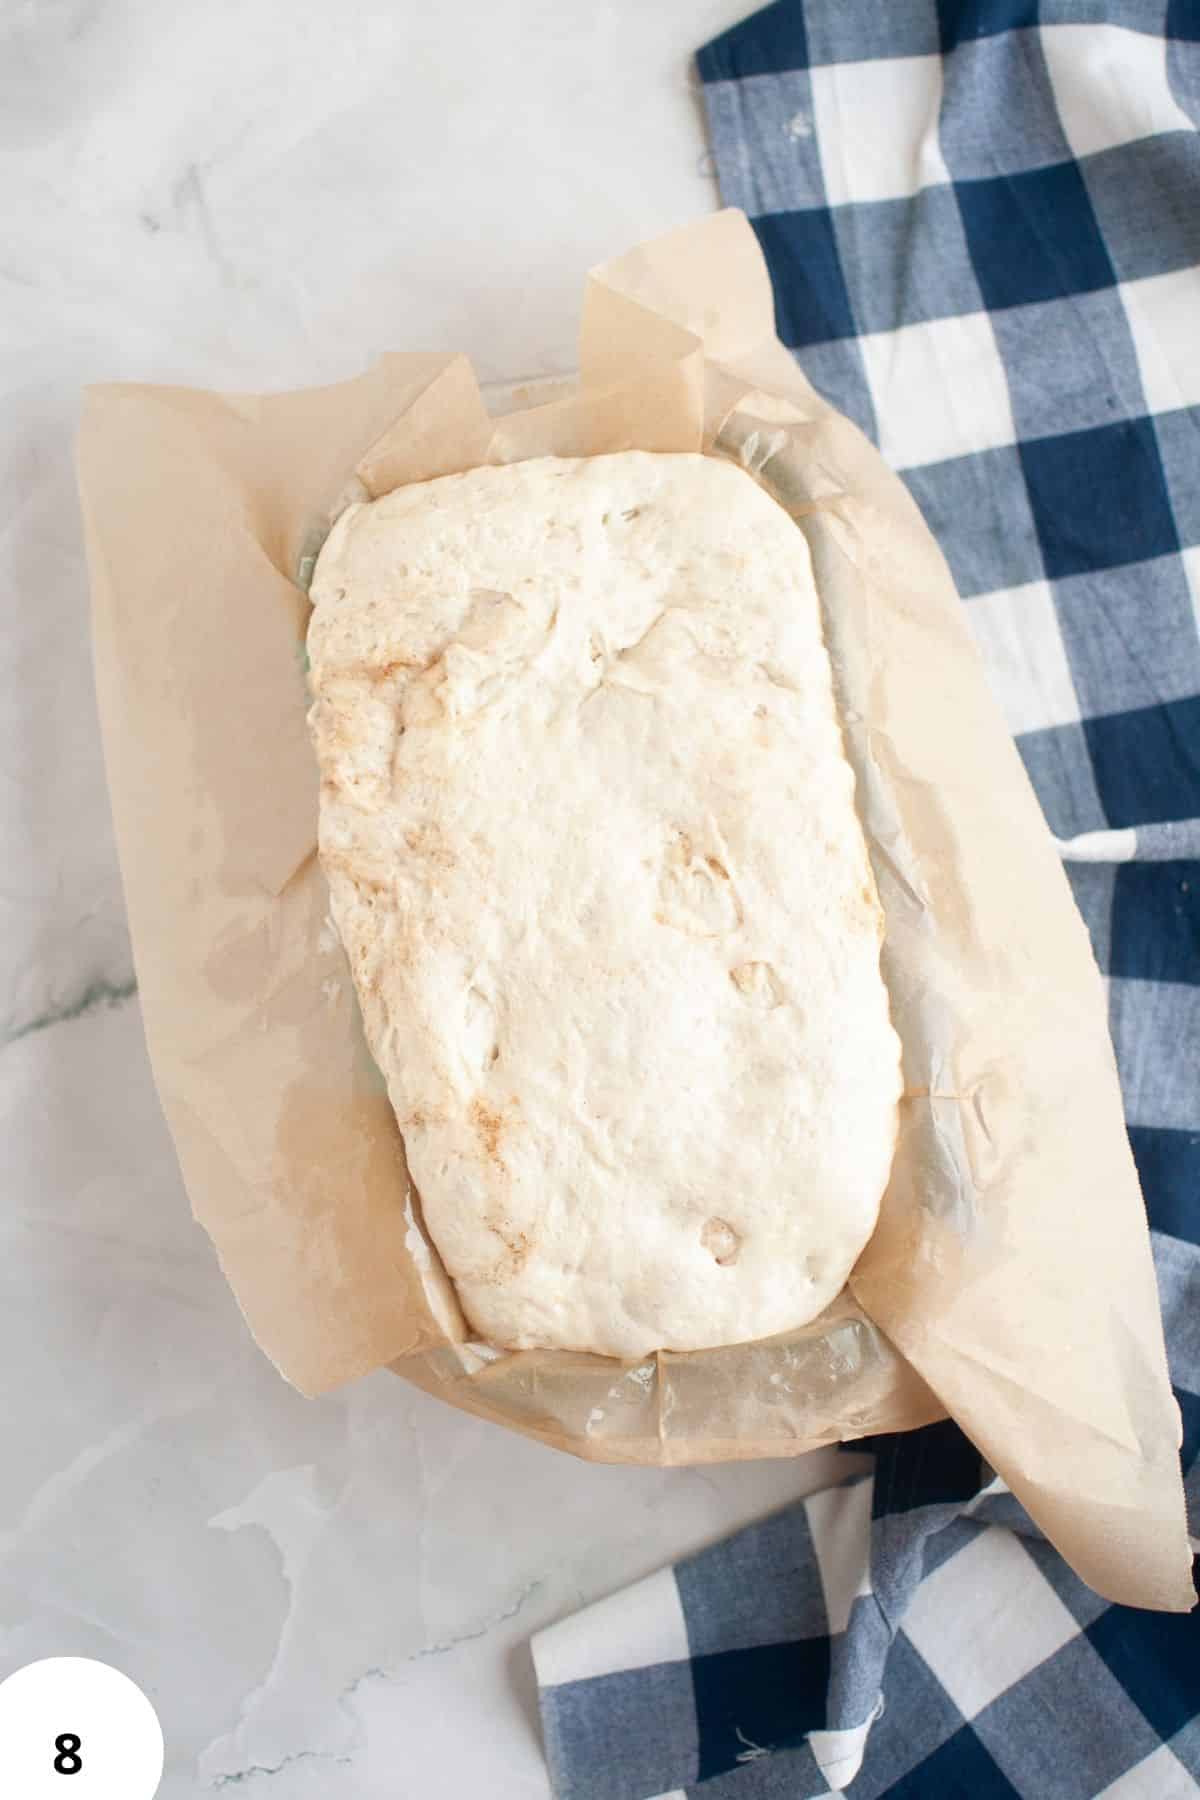
Step 8: Place the log seam-side down in a loaf pan lined with parchment paper and let it rise again for 2-4 hours at room temperature (Image 8). A piece of parchment paper can save you a lot of clean up in case the filling leaks out a bit!
Step 9: Preheat your oven to 400°F (200°C), and add water to a cast iron pan or an oven-safe bowl. Place this in the bottom of the oven.
Score the loaf, brush it with some milk or cream and cover the loaf pan loosely with foil before you pop it in the oven.
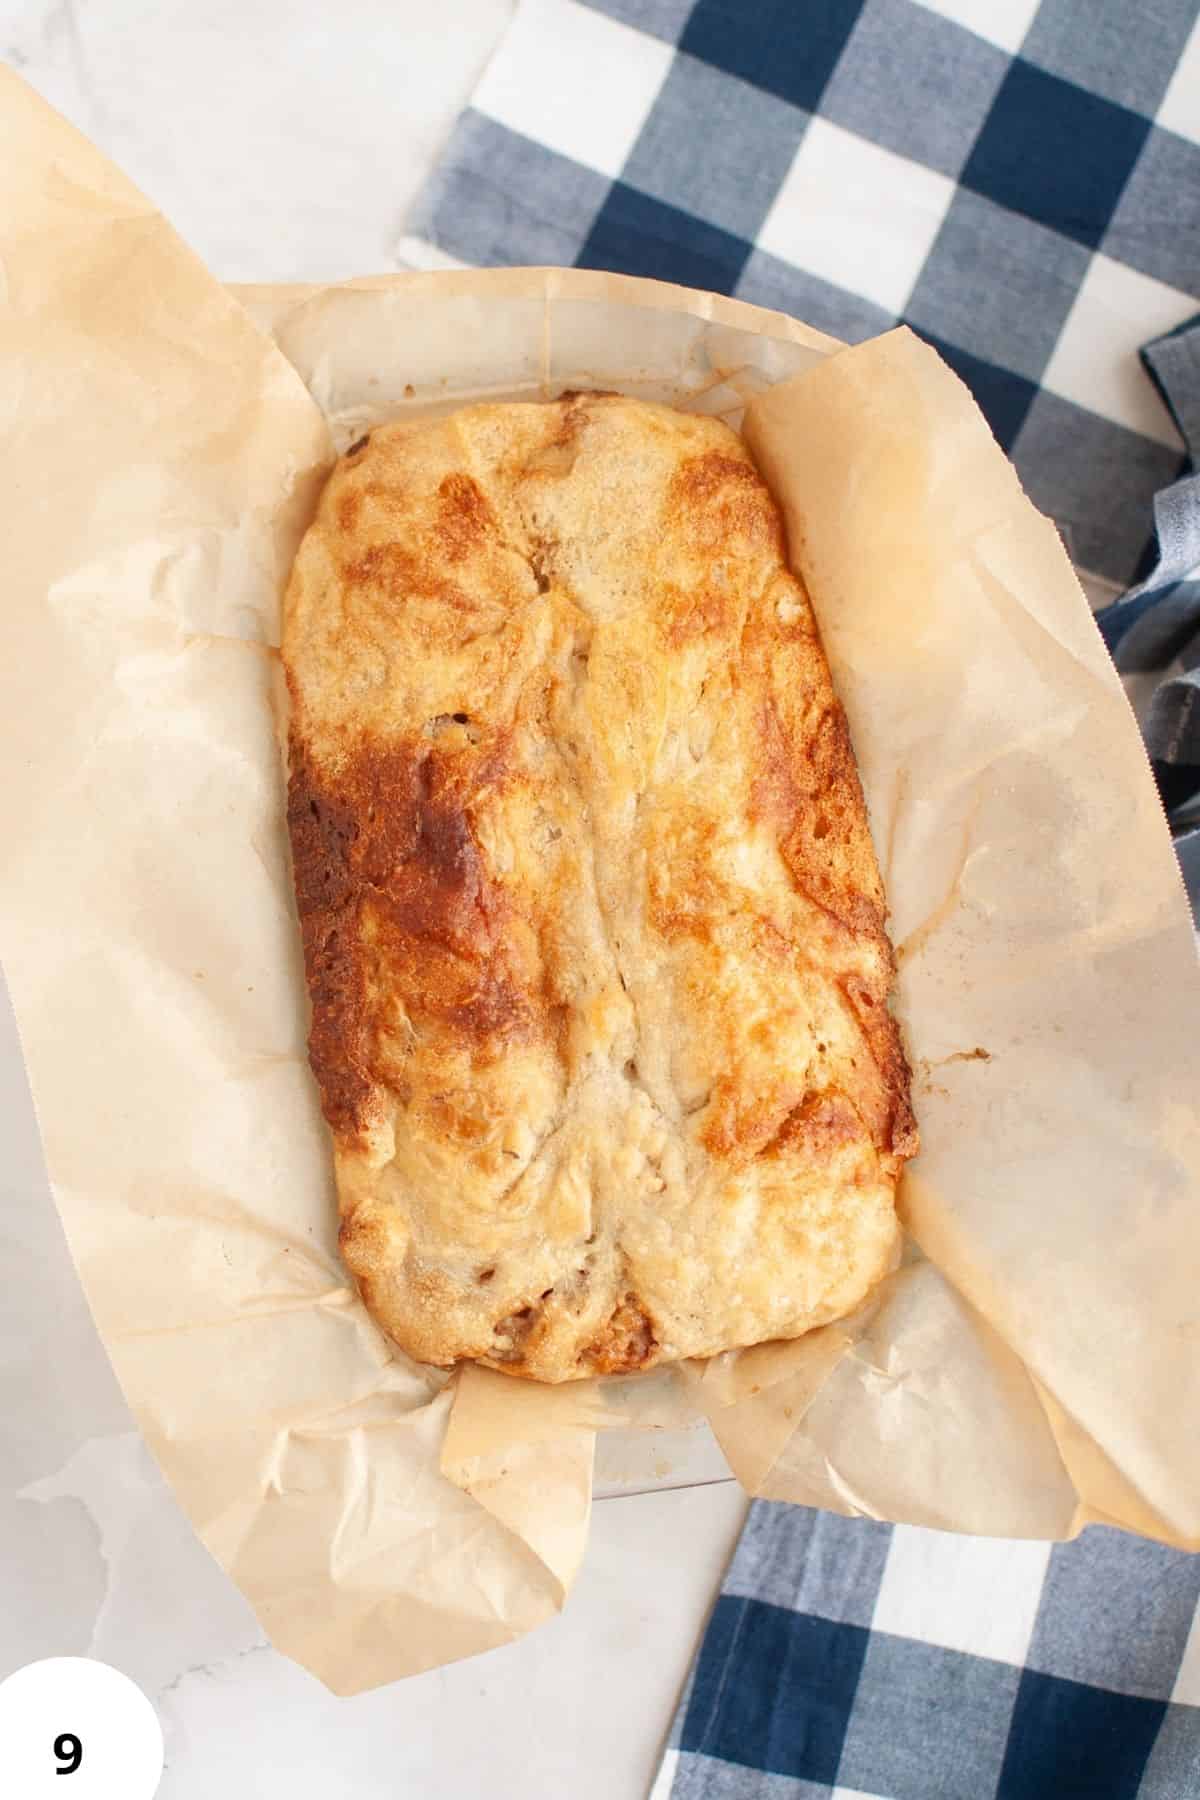
Bake for about 40 minutes, then remove the foil and pop it in again. Bake for an additional 10 minutes or until the top of the loaf is golden brown and crispy (Image 9).
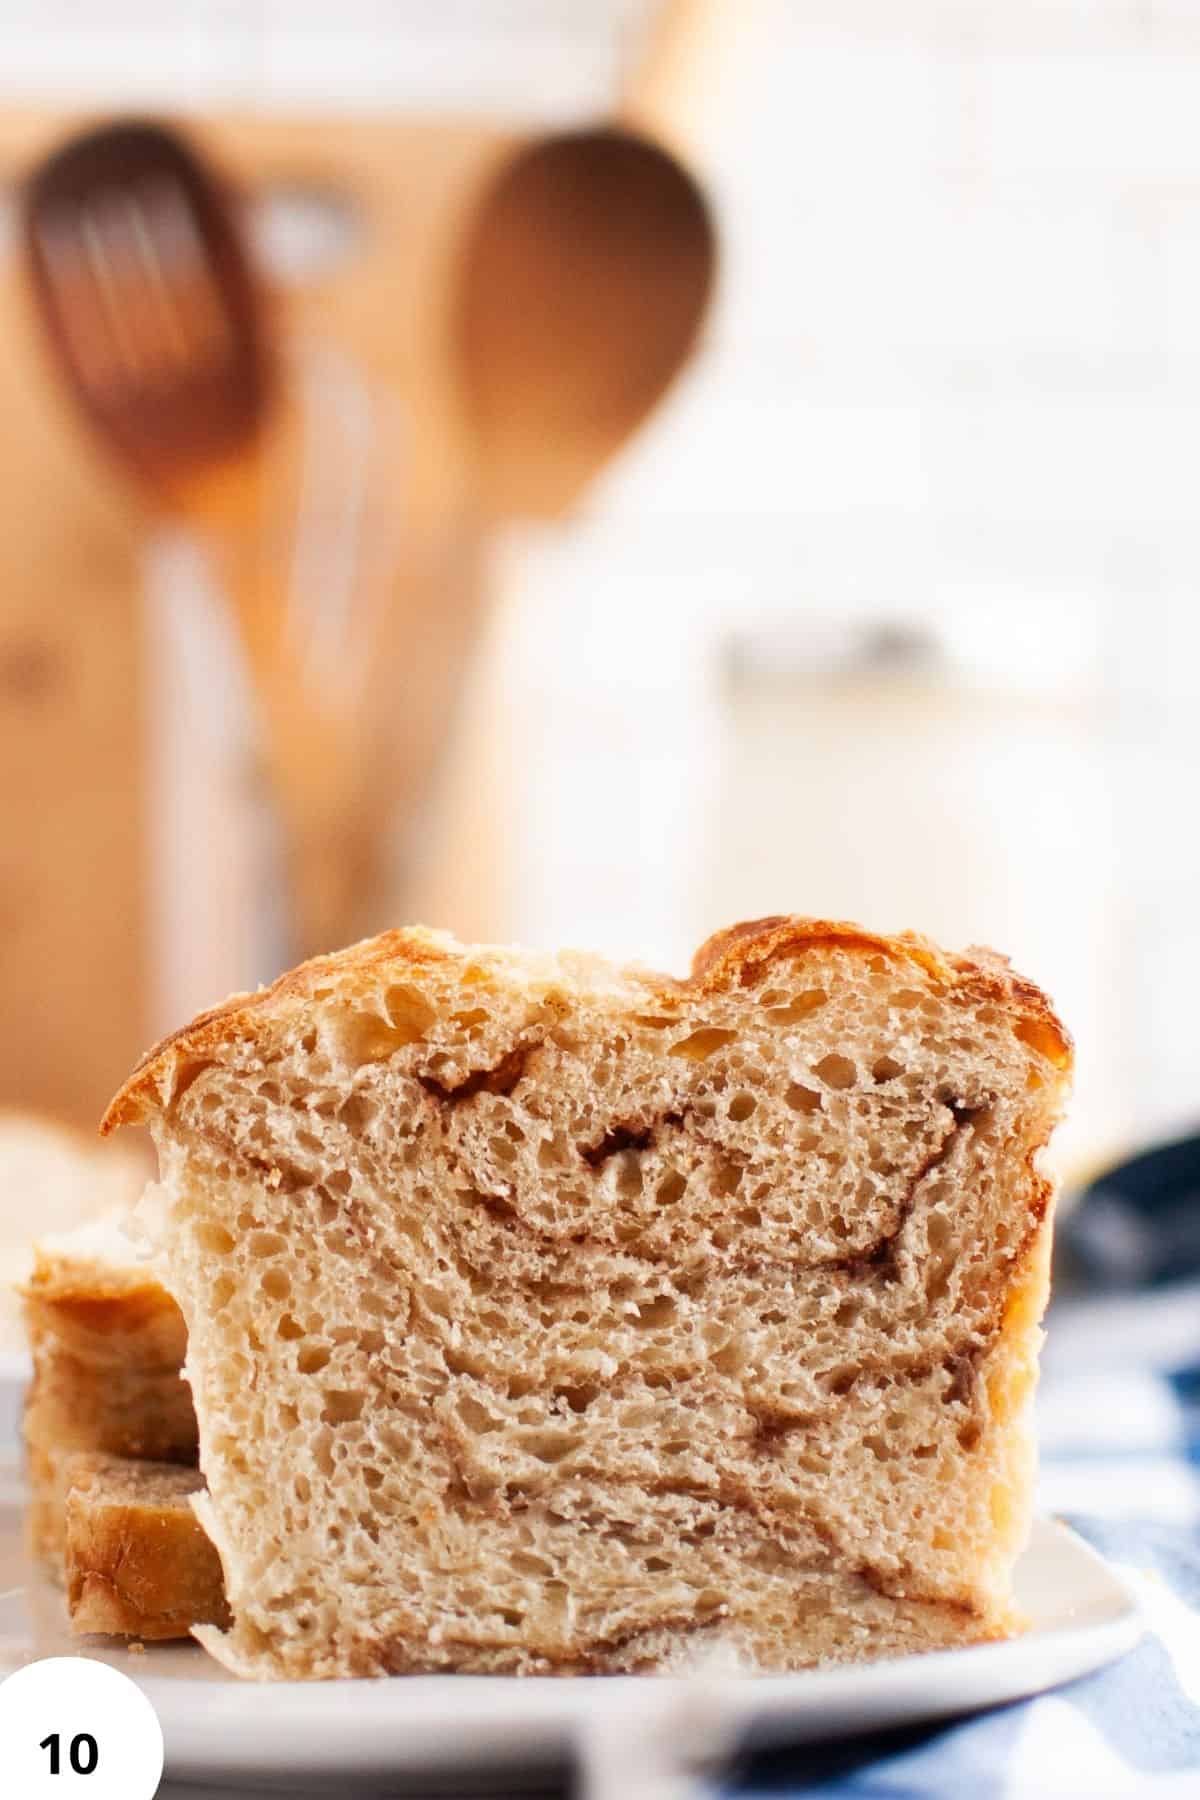
Step 10: Cool completely on a wire rack, slice and serve (Image 10).
Hint: Use your judgment for the stretch and folds. If your dough feel too soft and doesn't have enough structure, do another couple of rounds of stretch and folds.
Recipe Timeline
OPTION 1: Same-Day Variation
- 7:00 a.m.: Mix the dough and let it rest for 30 minutes.
- 7:30-8:30 a.m.: Do 2-3 sets of stretch and folds, about 30 minutes apart. Cover and let the dough continue rising.
- Around 1:00 p.m.: Once the dough is puffy and almost doubled, refrigerate it for at least 2 hours.
- 3:00 p.m.: Add the filling, fold, roll, and place the loaf in the lined pan.
- 3:15 p.m.: Begin the final rise. Allow about 2-4 hours, until the loaf is puffy and noticeably larger.
- Around 5:15-7:15 p.m.: Once the loaf is ready, bake for about 50 minutes. Cool completely before slicing.
OPTION 2: Overnight Variation - Chill Before Shaping
- 2:00 p.m.: Mix the dough and let it rest.
- 2:30-3:30 p.m.: Do the stretch and folds, then cover and let the dough continue rising.
- Around 8:00 p.m.: Once it's puffy and almost doubled, refrigerate the covered dough overnight.
- 8:00 a.m. the next day: Fill and shape the cold dough, then place it in the lined loaf pan.
- Around 8:15 a.m.: Begin the final rise at room temperature. Allow about 2-4 hours, or longer if the dough is still cold and slow to rise.
- Around 10:15 a.m.-12:15 p.m., or later: Once the loaf is ready, bake for about 50 minutes in a preheated oven. Cool completely before slicing.
Another overnight option: After the first rise and at least 2 hours of chilling, fill and shape the loaf, then cover and refrigerate it in the pan overnight. The extra rest can make it tangier. I bake it straight from the fridge when it's properly proofed, and cold dough is easier to score. If it still looks compact, let it rise longer at room temperature before baking.
💭Crucial Success Tips
- Use a kitchen scale if you can. I find it makes baking much easier, especially when getting the dough proportions right matters.
- Don't expect dry, fluffy dough. This dough is wet, and mine doesn't always turn into a fluffy cloud after bulk fermentation. If it's too sticky to manage, add a little flour at a time. If it feels too dry, work in a small splash of water. Keep the adjustments small so you don't change the dough more than necessary.
- Use a bench scraper. It helps you fold and roll the dough neatly, then transfer it into the loaf pan without pulling it apart.
- Spread the filling evenly. Avoid thick piles of cinnamon sugar, which can make rolling harder and lead to more leakage. Leave a small border around the edges.
- For a sweeter top, sprinkle a little extra cinnamon sugar over the loaf during the final 10-15 minutes of baking. Watch it closely as it browns.
Can I Add Yeast?
Option A: Just a Pinch (Long Fermentation)
Add 1 g (⅓tsp) instant yeast with the flour, keeping the 110 g active starter and all other ingredients the same. Follow the usual stretch and folds, but check the dough earlier-added yeast may shorten the first rise.
Rough timeline: Mix in the afternoon, refrigerate once puffy and almost doubled, then fill and shape the next morning. Let the loaf rise until puffy before baking. This option keeps the overnight fermentation.
Option B: Faster Version (Active Starter or Discard)
Add 3 g (1tsp) instant yeast with the flour. Use 110 g active starter or discard, made with equal weights of flour and water. No other ingredient changes are needed. Knead until smooth and elastic to develop strength before the shorter rise.
Rough timeline: Mix in the morning, allow about 1½-3 hours for the first rise, then chill for at least 2 hours. Fill and shape, allow several hours for the cold loaf to become puffy, then bake as directed.
Skip the original six-hour first rise for this option. Commercial yeast provides the main lift, and the shorter fermentation is different from the overnight version.
Which Grains Can I Use?
This loaf uses bread flour and all-purpose flour. After some trial and error, I settled on equal amounts of each for a soft loaf that still holds its shape.
- Bread flour and all-purpose flour: The original mix is 175 g of each. You can also use all bread flour.
- All-purpose flour only: I've made it with all 350 g of all-purpose flour. The dough is softer and trickier to handle, so I'd keep the blend if you're just starting out.
- Some whole wheat: Keep it to about 20% of the flour - replace up to 70 g of the white flour. Expect a slightly denser loaf with a nuttier flavor. You may need a little more water.
Baking with freshly milled flour? The grain and how finely it's milled can change how the dough handles. My fresh-milled flour guide explains what to watch for. A full fresh-milled swap, including spelt or einkorn, needs its own adjustments.
For cinnamon recipes already written for freshly milled hard white wheat, try my whole grain sourdough cinnamon rolls or sourdough star bread.
Recipe FAQs
Check that your starter was active and well risen before mixing. A cool kitchen or cold dough can also slow things down.
When I'm unsure, I tend to give the dough longer rather than bake it too soon. Watch whether it's gaining volume instead of treating the suggested hours as a deadline.
I've also had loaves show less rise than expected and then surprise me with their oven spring. That can happen, but it isn't a reason to skip the rises.
It's tempting to pile on the filling, but too much can cause it to ooze out and make rolling tricky. Aim for an even, moderate layer and leave a small border around the edges before folding. Also, brushing the dough with heavy cream or milk helps the filling stick better and reduces leaks.
Sourdough dough is often a bit sticky but manageable. If it's too wet to handle, sprinkle in a tablespoon of flour at a time during mixing or shaping until it feels less sticky. If it's too dry and cracks when folded, add a teaspoon of water to soften it up.
Yes. There are 20 g of white sugar in the dough and 65 g of light brown sugar in the filling. It's a sweet sourdough loaf, rather than a plain sourdough recipe.
The video shows more than one baking method. For this loaf-pan version, use 400°F (200°C) for about 50 minutes, keeping the loaf loosely covered with foil for the first 40 minutes. The higher temperature mentioned in the video is for the Dutch-oven version.
How To Store Sourdough Cinnamon Brown Sugar Bread
Place your leftover sourdough cinnamon sugar bread in a sealed container or wrap it tightly in plastic wrap. It will stay fresh for about 3 days. If you prefer to keep it in the fridge, use a container with a tight lid or a plastic bag. This way, your bread can last up to a week.
For longer storage, freeze your bread by wrapping it securely or placing it in a freezer-safe bag. It'll keep well for up to 3 months. When you're ready to eat it, warming it in the oven will give you that freshly baked taste and texture.
More Sourdough Recipes
- Fresh Milled Buckwheat Sourdough Rolls

- Einkorn Sourdough Bread for Beginners (50% Fresh Milled)

- The Easiest Fresh Milled Einkorn Sourdough Bread (Loaf Pan Method)
- Fresh Milled Sourdough English Muffins (Same Day or Overnight)
If you tried this sourdough cinnamon brown sugar bread or any other recipe on my blog please leave a 🌟 star rating and let me know how it went in the 📝 comments below! Happy Baking!
Brown Sugar Cinnamon Sourdough Recipe with Better Swirls
Jump to VideoEquipment
- 1 Loaf pan
- 1 kitchen scale or measuring cups and spoons
Ingredients
For the Dough:
- 220 grams water
- 175 grams bread flour
- 175 grams all-purpose flour plus extra for shaping, about 12 grams or 2 tbsp
- 110 grams sourdough starter active
- 20 grams sugar
- 10 grams oil neutral tasting oils work best
- 7 grams salt
For the Cinnamon Brown Sugar Filling:
- 12 grams ground cinnamon
- 65 grams light brown sugar
- a splash heavy cream milk or water work too
Instructions
- Start by combining your dough ingredients in a large mixing bowl. Use a spoon or your hands to mix until all the flour is hydrated and no dry spots remain. The dough will be shaggy and sticky at this stage-that's perfectly fine. Cover the bowl with a damp towel and let it rest for 30 minutes to allow the flour to absorb the water and start developing gluten.
- After the rest, perform 2-3 sets of stretch and folds, about every 30 minutes. To do this, grab a section of the dough, stretch it upward, and fold it over itself. Rotate the bowl and repeat on all four sides. The dough will start to feel smoother and stronger as you go.
- Once you've completed the stretch and folds cover the bowl with a lid, plastic wrap, or a plastic bag to prevent drying. Let it bulk ferment at room temperature until it has almost doubled in size and looks puffy-this entire process, from mixing to the end of bulk fermentation, should take about 6 hours, depending on the warmth of your kitchen.
- After the bulk ferment, cool the dough in the fridge for at least 2 hours, or overnight. This step helps develop flavor and makes the dough easier to work with.
- Prepare the cinnamon sugar filling by mixing ground cinnamon and light brown sugar in a small bowl. Shape your dough on a lightly floured surface into a rectangle. Lightly brush the dough with heavy cream (or milk/water). Sprinkle ⅔ of your filling on top, leaving a small border around the edges. Now, fold the dough: bring the short sides towards the middle, overlapping them slightly.Sprinkle the rest of your cinnamon sugar over this folded dough. Next, start at one short end and roll it up tightly, like you're making a dough log.
- Place this log seam-side down in your parchment paper lined loaf pan for its second rise. This final proof gives the bread its final shape and size, taking about 2-4 hours at room temperature.You can optionally also do a cold overnight proof as the second rise, but the dough will be a bit tangier if you do that. If you don't mind, that's ok!
- Preheat your oven to 400°F (200°C) to heat up. While that's happening, grab a cast iron pan or another oven-safe dish and fill it with some water. This is going to sit on the bottom of your oven and create steam while your bread bakes, which helps give the crust a nice texture. Now, take the dough that's been rising in the loaf pan and make a shallow cut down the center with a sharp knife or a razor blade. This isn't just for looks; it helps the bread expand evenly while it cooks. Brush the top of the dough with a little more cream, milk, or water-this helps the top get a nice color without burning.Then, loosely cover the loaf pan with aluminum foil to keep the moisture in. Carefully place your loaf pan in the oven, and don't forget to add the pan with water for steam. Bake it at the set temperature of 400°F (200°C) for about 50 minutes.Remove the foil 10 minutes before the bread is done for a golden brown crust.
- Cool the baked bread on a wire rack. Patience here is key; wait until the bread cools before slicing it to enjoy the full flavor and texture!
Video
Notes
- Video note: The video also shows a Dutch oven method with a different baking temperature. For the loaf-pan version on this page, follow the written instructions: 400°F (200°C), about 40 minutes covered with foil and 10 minutes uncovered.
- The total time is an estimate for the same-day version and excludes cooling. The first rise takes about 6 hours from mixing, including the initial rest and stretch and folds. Allow at least 2 hours for chilling and about 2-4 hours for the final rise. A cool kitchen or slower starter may need longer. Refrigerating overnight will extend the total time.
- Dough texture: If your dough is too wet, sprinkle in a little more flour; if it's too dry, add a splash of water. It's all about finding that perfect balance for a dough that's still manageable to work with and retains some of the hydration. Feel free to tweak the amounts slightly!
- Using a dough scraper: A dough scraper is not just for cutting; use it to fold your dough neatly and to transfer it into your loaf pan without a mess. It helps keep the shape intact and makes handling the dough much simpler.
- Adding the filling: When adding your cinnamon sugar mixture, aim for an even spread. This ensures every slice is packed with flavor. Also, remember not to overdo it; too much filling can lead to leaks and make rolling tougher.






Making this now. Just put it in my loaf pan. My dough looked like yours when I rolled it, but it was so very sticky. Stuck to my rolling pin even after flouring it. Anyway when I did the inclusions and tried to roll it, it was a mess!!! Stuck to my bench scraper and by the time I put it in the loaf pan, I have no idea where the seam is. I just went with it. I’m not sure I’ll be able to score it … Also , I noticed after putting it in the fridge this morning after leaving it out all night (my kitchen is about 60° overnight), I ran a few errands so it was in the fridge this morning for 3-4 hours, the dough had gone down on the bowl it was in (like my starter does after it hit its peak). Did I miss the sweet spot? Idk if it’ll turn out but if not I’ll just make a French toast casserole or something with it … I hope! Do you think I did something wrong? I hope like heck this turns out bc it sounds so good! Thank you for sharing the recipe!
Hi Nikki!
That's the tricky thing with sourdough, and dough in general—each type of flour absorbs water differently. Even if we both use all-purpose and bread flour, they might behave differently. If your dough was really sticky, I’d suggest using a bit less water (10-20g less) or adding more flour (10-20g more) next time. I really hope it still turns out okay this time, though!
From what you’ve described, adjusting the flour or water amount should help manage the stickiness better for future bakes. Please let me know how it turns out—I’m crossing my fingers for you! =D
Not sure what happened here. I made the bread with very active starter. Made no adjustments and the dough didn’t rise. The dough stayed extremely wet. Was not edible once baked.
Hi Mandy!
I'm sorry to hear the bread didn't work out. Sourdough can be tricky because things like the type of flour, humidity, and how wet your starter is can all affect the dough. It sounds like your dough ended up too wet.
If you're willing to try again, I suggest adding more flour—about 20g to 30g should help. You can use either bread flour or all-purpose flour. I know it's frustrating to throw food away; I've been there with my own recipe tests, and it sucks!
Sorry again, and I hope your next attempt is much better!
This was so good!
I'm glad you liked it! Thank you so much for taking the time to leave a review! =D
How long can I leave the dough in the fridge? It took a little longer to rise yesterday so I didn’t have time to finish. I put it in the fridge overnight and have some errands to run.
Hi Bryanna!
I almost always end up leaving it in the fridge for 12+ hours, sometimes up to 48 hours. I don't notice a huge difference actually, and the only thing that will change the more time you leave it is the sourness - the more time it's in the fridge, the more sour it gets. But even after 48 hours mine wasn't that much more sour than after 8 hours, so go run your errands in peace! =D
Another question. Feeling pretty silly. Was i suppose to do the stretch and fold process before beginning this one? Would explain a lot 😆
Hi Katie,
don't feel silly at all! Sourdough really is a process, and everyone makes mistakes when they're learning—I've had my fair share too, trust me! 😆 As for the stretch and folds, yes, they are typically done during the first part of the bulk fermentation, not before you start the process. It helps develop the dough's strength and structure as it ferments.
Keep experimenting and asking questions; that's the best way to learn and improve!
This is okay to leave out on the counter overnight? I’m on 3.5hrs of first rise. It hasn’t grown that much but since i’m suppose to put it in the fridge after the first 4-6 hour rise I assume I can just leave it out?
Hi Katie!
Sorry for the late reply—it might not help much now, but generally, it's not recommended to leave the dough out on the counter all night for this recipe, unless your kitchen is quite cool. Leaving it out could lead to overfermentation, which affects the texture and flavor of the bread. For future attempts, sticking to the fridge after the initial rise is usually safer to control the fermentation process.
Hope that helps for next time! 🙂
Could I substitute pumpkin for some of the water?
Hi Linda,
Substituting pumpkin for some of the water in the cinnamon swirl bread sounds like a good experiment! I haven’t tried it myself, but it should work. Maybe you can do half pumpkin half water and see how that goes first, just to be sure?
Let me know how it turns out!
I don’t have a stand mixer and thought I had everything ready to go per the list of what was needed. But timing will be different so I won’t make that today.
Hi Patrice!
You don't actually need a stand mixer, but it does make the job easier 🙂 If you don't have one, try kneading the dough for a good 15 minutes and it should be fine as well! 🙂
This turned out yummy! But, my dough was pretty wet and wanted to make sure I do out the 10 grams of oil into the dough mixture plus a bit of oil in the bowl? I could have put too much into my bowl. Thanks!
Yes, that's correct, 10 g + some for the bowl. Every flour has a bit different absorption rate, so maybe try to add an extra 10 grams of flour next time? 🙂
I am currently making this bread. I am a little concerned, it only calls for 350g of flour. That's less than 3 cups of flour while it calls for a whole cup of water. My dough is sooo very wet. It is currently proofing... but I'm not sure it will rise. I just feel like it is too wet... should I stretch and fold? I'm a bit worried.
Hi Kim!
It's true that so many factors affect the wetness of the dough, it's hard to predict how things will tourn out for everyone. But until now, people had great success with this bread so I'm holding my breath for your bread to turn out great too! And yes, the dough is quite wet but it should get more manageable after the bulk rise. Definitely use a lot of flour when shaping though! 🙂
Instead of a loaf pan could I use my oval banneton basket and bake in my Dutch oven?
I've never done it this way, but I don't see why it wouldn't work! Maybe the baking time will be a bit shorted though, if you're planning to put the dough directly into a preheated dutch oven. If you remember to do so, please get back to me about how it went! 🙂
Oh, I am definitely trying this!!! Time to go feed my starter to get it ready!
This looks so delicous!
Love your simple recipe! I am looking forward to making it this weekend.
I was JUST thinking I should make my own cinnamon bread this morning when I had some with breakfast. (Store bought). I got into bread making several years ago but have yet to replace one of my favorites. Maybe because I don’t buy it often so I don’t think to try making it until I do. Thanks for sharing! I can’t wait to try.
I'm still not completely done replacing all my favorites too! And I completely understand the desire to do so. I get so excited when I perfect a homemade alternative it's not even funny =P I hope this recipe helps!