
Extra Sour Sourdough Bread Recipe Using Citric Acid

While traditional methods of sourdough baking rely on long fermentation times and even cold fermentation to enhance sourness, they don't always guarantee that extra tangy punch some of us crave in sourdough. Here's the secret: citric acid.

By introducing it to our simple sourdough bread recipe, we ensure that the bread will have that distinct sour taste every single time. If you've never tried adding citric acid to your sourdough before, this is your chance to achieve consistent sour perfection in every loaf.
If you're more interested in achieving the sourness through a long fermentation process, be sure to check out my long-fermented sourdough bread recipe which is also suitable for beginners.
Quick Look
- This loaf uses ½ teaspoon (2.5 g) citric acid to give sourdough a stronger, more consistent tang without relying only on a long fermentation.
- Add it when you mix the dough with the starter, water and salt.
- For even more sour flavor, you can combine the citric acid with a cold proof.
- Start with the tested ½ teaspoon amount - too much can overpower the natural sourdough flavor.
Jump to:
- Quick Look
- Ingredients
- How To Make Extra Sour Sourdough Bread
- Substitution Notes
- Variations & Add-ins
- Tools You'll Need
- 💭Crucial Success Tips
- FAQ
- Baking Schedule
- How To Store Extra Sour Sourdough Bread
- More Sourdough Recipes
- Pin It For Later
- End Notes
- 📖Printable Recipe
- Extra Sour Sourdough Bread Recipe Using Citric Acid
As an Amazon Associate, I earn from qualifying purchases. This post may contain affiliate links, which means I make a small commission at no extra cost to you. See my full disclosure here.
Ingredients
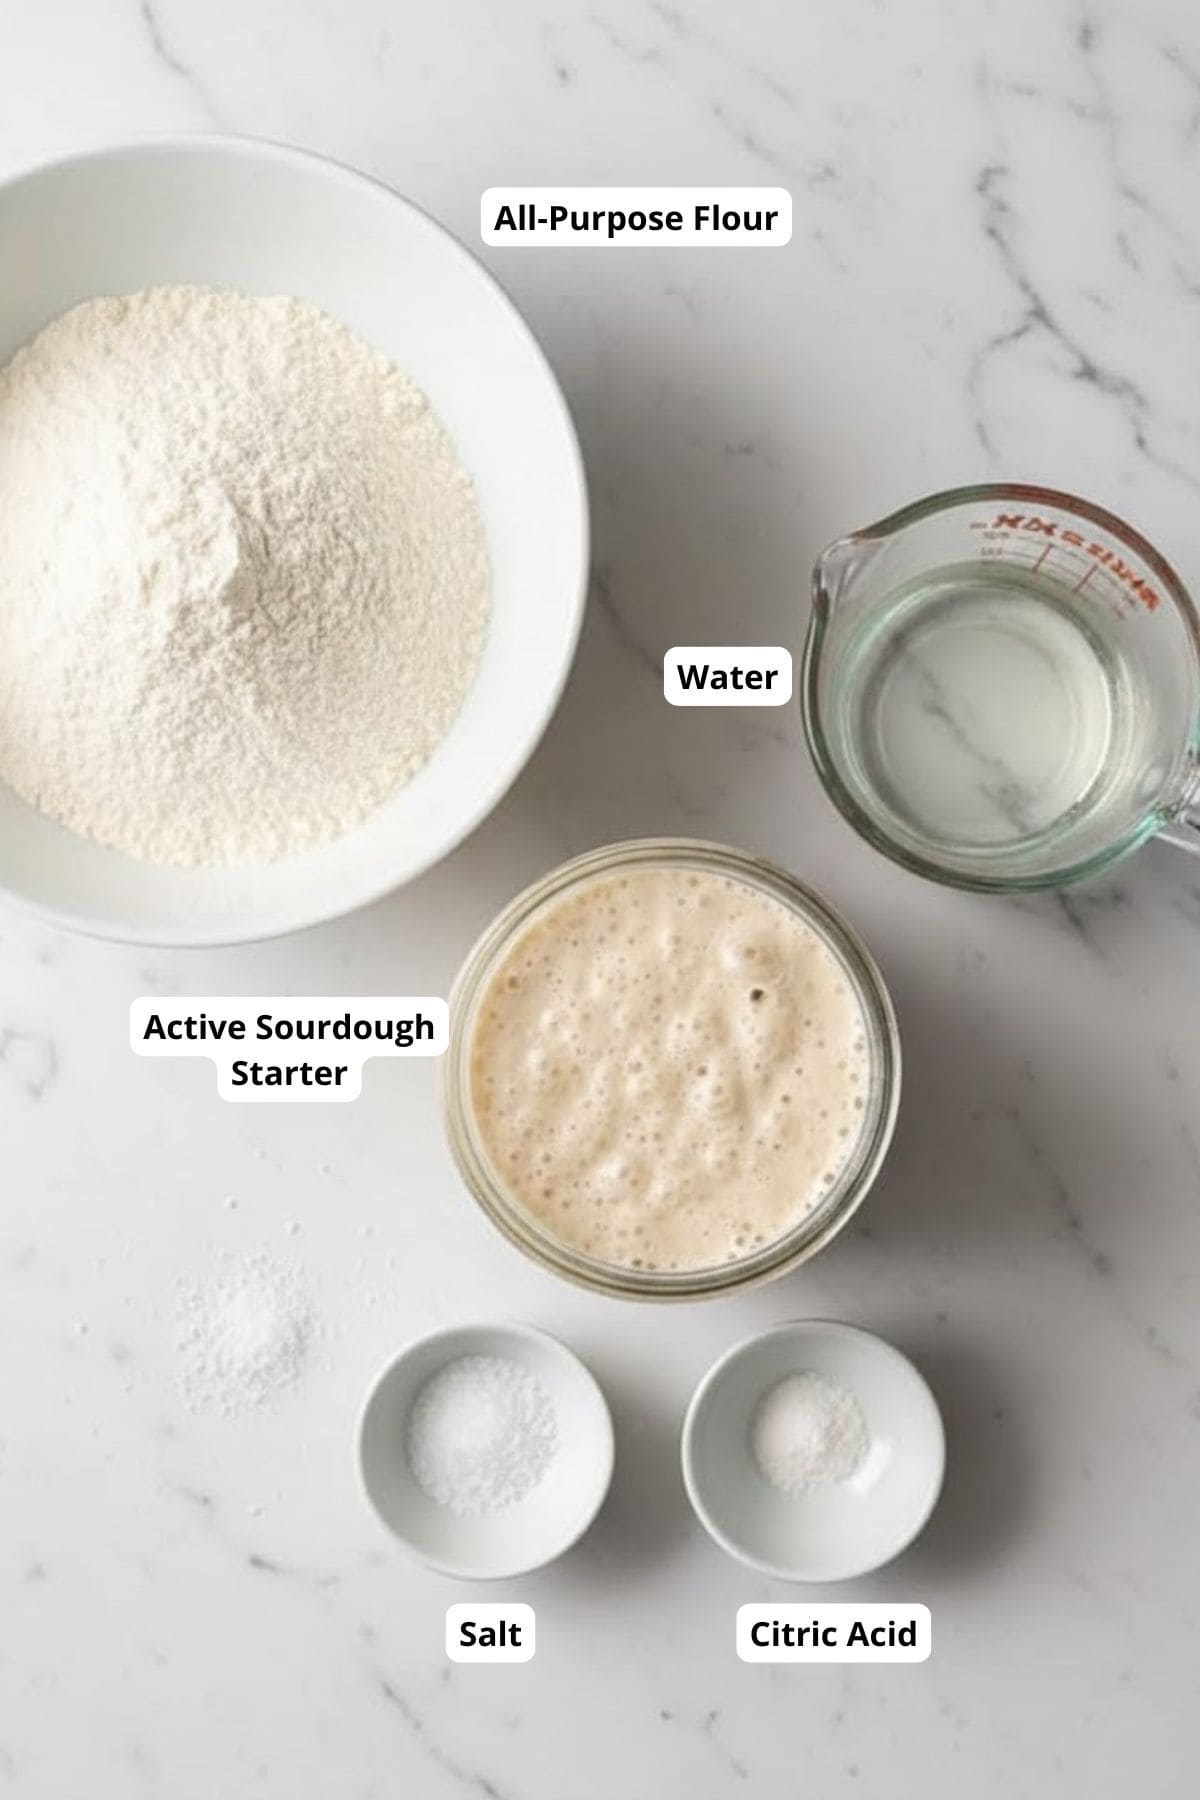
- mature sourdough starter
An active sourdough starter is a must for this recipe. Make sure your starter is at least 3 weeks old and doubles nicely in the 12-hour window after feeding.
- warm water
Using warm water instead of cold will cut off a bit of time from the fermentation process since we're giving our sourdough culture a head start - the yeast activity depends on temperature, and it is the warm temperatures they crave.
- all-purpose flour
We're using all-purpose flour in this recipe because it's a popular choice for many. However, you can easily swap it with another type of flour. Just remember to adjust the water content (more on hydration here), as different flours absorb moisture differently.
- salt
Use plain sea salt. Any salt works if measured correctly. Even in small quantities, salt is essential for fermentation. It's best to choose natural salt without added extras.
- citric acid
You only need a bit of citric acid for this recipe. You can find it at grocery stores, usually in the canning section with jam-making supplies. Or, just order it online for convenience.
See recipe card for quantities.
How To Make Extra Sour Sourdough Bread

In a large bowl, mix the active starter with warm water, salt, and citric acid. Gradually add flour, forming a shaggy dough. Let it rest for 30 minutes.
Let the dough rest in a covered bowl at room temperature for its first rise, allowing for bulk fermentation. This can take anywhere from 6 - 8 hours, depending on the temperature in your kitchen.

In the first hour of bulk fermentation, do 4 sets of stretch and folds, approximately 20 minutes apart.
To perform the stretch and folds, start by gently grasping the edge of your dough. Pull it upwards, then fold it across to the opposite side. After this step, give your bowl a quarter turn. Continue this process for three more turns. This makes one round of stretch and folds! After stretch and folds, you should have a smooth dough to work with.

Once the bulk fermentation is done, move your bread dough to a floured work surface and shape it: Fold the edge of the dough to the center, turn it a bit, and fold the next edge. Keep turning and folding until you've gone full circle. Turn the dough over so the seam faces the counter. Then shape the dough into a round ball with your hands. Place it gently in a proofing basket.

After shaping, place the dough in a proofing basket and cover it so it doesn't dry out.
For a same-day loaf, let the dough rise at room temperature for about 2 hours, or until it looks puffy. It does not need to double in size.
For an overnight loaf, place the covered dough in the refrigerator for up to 24 hours and bake it the next day.

Once the second proof is complete and your oven is ready, place a piece of parchment paper over the dough. Carefully turn the dough out of the proofing basket onto the parchment, with the seam facing down.
Use a razor blade or a sharp knife for deep horizontal slashes, ensuring that the crust will open only where you scored the bread. Scoring allows carbon dioxide to escape.
Put the dough with its paper into the preheated Dutch oven.

If you want more bubbles to make some nice crust on your bread, pour some water between the paper and Dutch oven for steam, then quickly cover it.
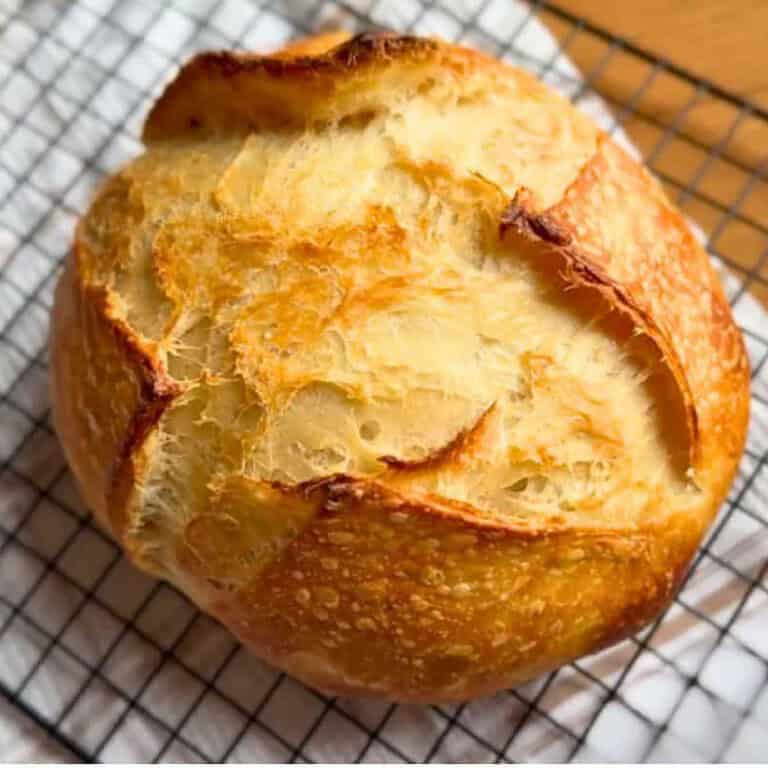
Bake the bread in an oven set to 460°F (238°C) for 35 minutes. Then, take off the lid and bake for another 12-15 minutes at 440°F (227°C) until it turns a nice golden brown color.
Once out of the oven, transfer the bread to a cooling rack. Drape a mildly wet cloth over it and wait for at least an hour before cutting.
Hint: If you want an even tangier loaf, you can extend the cold proof beyond the overnight option. I tested this dough in the refrigerator for up to 3 days, and it developed a slightly more sour flavor. The 3-day cold proof is optional - the citric acid already gives the bread plenty of tang.
Substitution Notes
- Flour - you can replace all-purpose white flour with bread flour, Manitoba flour, or other high-protein flour. These flours need a bit more water. You can also use whole wheat flour or whole grain flour, but the bread might be less soft. Add more water for these kinds of flour too since they soak up more. Using other flours works too, so rye flour buckwheat flour or spelt flour can be great! Just make sure you're only using these flours to spice up your bread; I wouldn't go past 10%, or you'll need a different recipe to follow.
Variations & Add-ins
- Whole grain - experiment with adding whole grains like barley or quinoa for added texture!
- Multi-seed - add sesame seeds, flax seeds, or any other favorite seeds for crunch and healthy fats.
- Cheesy - adding cheese is never a bad idea, right? Cheddar chees and jalapenos or parmesan and roasted garlic are my favorite combinations!

Tools You'll Need
- Kitchen scale - I can vouch for this one; it's cheap and does the job done!
- A large mixing bowl
- Parchment paper
- Bench scraper (optional)
- Proofing basket
- Razor blade
- (Cast Iron) Dutch oven - I use this beautiful red one from Lodge, which is available on Amazon. It's on sale half the time, so be sure to check it out if you're looking for one!
- Cooling rack (wire rack)
💭Crucial Success Tips
- Ensure your sourdough starter is active. It's crucial for the dough's good rise.
- To stop the dough from sticking, handle it with wet hands. The dough might feel sticky at first, but wet hands help.
- You can use olive oil to coat the bowl you are raising your bread in to avoid the dough from sticking.
- Let the dough rise fully for good bread. If you're unsure about what signs to look for, I have a whole post about how long to proof sourdough at room temperature.
- For easier scoring, you can keep the dough in the fridge overnight. The dough temperature matters in this case since cold dough is easier to cut.
- Don't use very hot water; it can harm the yeast.
- Look at the dough, not the clock how the dough feels and looks tells you when to move to the next step. Towards the end of the rising time, keep a close eye on your dough.
- Wait for the bread to cool for about an hour before cutting. Cutting it early can make the inside gummy.
FAQ
From what I've tried, citric acid can make your homemade sourdough bread taste tangier. I never achieved a very sour loaf, despite fermenting the bread at cold temperatures for several days. So, I sprinkled a bit of citric acid into my dough one time. It definitely made a difference, giving the bread a sour flavor! Just be careful not to add too much, or it might overpower the bread's natural flavors.
Yes, you can, but I think citric acid gives the bread a better flavor overall. If you do decide to add vinegar, add 2 tablespoon of vinegar (acetic acid). That will give the bread the same level of sourness as using ½ teaspoon citric acid.
Baking Schedule
This is an example schedule if you start your dough at 8:00 AM. Fermentation time can vary depending on the temperature of your kitchen and the strength of your starter, so watch the dough rather than relying only on the clock.
- 8:00 AM - Mix the dough
- Mix the active starter with warm water, salt, and citric acid.
- Gradually add the flour until a shaggy dough forms.
- Cover and let it rest for 30 minutes.
- 8:30 AM - Begin bulk fermentation
- Leave the covered dough at room temperature for about 6-8 hours.
- During the first hour, complete 4 sets of stretch and folds, about 20 minutes apart.
- 2:30-4:30 PM - Shape the dough
- Once bulk fermentation is complete, shape the dough and place it in a proofing basket.
From here, choose one of these options:
Same-Day Option
- Let the shaped dough rise at room temperature for about 2 hours, or until it looks puffy.
- Toward the end of the rise, preheat the oven and Dutch oven to 460°F (238°C).
- Score and bake the bread according to the recipe instructions.
Overnight Option
- Cover the shaped dough and place it in the refrigerator for up to 24 hours.
- The next day, preheat the oven and Dutch oven to 460°F (238°C), then score and bake the bread according to the recipe instructions.
How To Store Extra Sour Sourdough Bread
Cool the baked loaf on a wire rack. Store in a breadbox or airtight container at room temperature.
For longer freshness, slice and freeze. Make sure to use parchment paper to prevent the slices from freezing together if you're planning to take them out a few at a time!
More Sourdough Recipes
Looking for other recipes like this? Try these:




Pin It For Later

End Notes
If something didn't work or you had trouble with the recipe, let me know below. I'll help if I can. Or just tell me how it went. I like hearing from you!
HAPPY BAKING!👩🏻🍳
📖Printable Recipe
Extra Sour Sourdough Bread Recipe Using Citric Acid
Ingredients
- 120 grams active sourdough starter ½ cup
- 200 grams warm water roughly ¾ cup + 1½ tablespoons
- 300 grams all-purpose flour 2½ cups
- 6 grams salt 1 teaspoon
- 2.5 grams citric acid ½ teaspoon
Instructions
- In a large bowl, mix the active starter with warm water, salt, and citric acid. Gradually add flour, forming a shaggy dough. Let it rest for 30 minutes.
- Let the dough rest in a covered bowl at room temperature for its first rise, allowing for bulk fermentation. This can take anywhere from 6 - 8 hours, depending on the temperature in your kitchen.
- In the first hour of bulk fermentation, do 4 sets of stretch and folds, approximately 20 minutes apart.
- To perform the stretch and folds, start by gently grasping the edge of your dough. Pull it upwards, then fold it across to the opposite side. After this step, give your bowl a quarter turn. Continue this process for three more turns. This makes one round of stretch and folds! After stretch and folds, you should have a smooth dough to work with.
- Once the bulk fermentation is done, move your bread dough to a floured work surface and shape it: Fold the edge of the dough to the center, turn it a bit, and fold the next edge. Keep turning and folding until you've gone full circle. Turn the dough over so the seam faces the counter. Then shape the dough into a round ball with your hands. Place it gently in a proofing basket.
- Use something airtight (a plastic bag or a plastic wrap) to prevent the dough from drying out during the second rise.
- For the second proof, choose one of two options:Same day: Let the shaped dough rise at room temperature for about 2 hours, or until it looks puffy. It does not need to double in size.Overnight: Cover the shaped dough and refrigerate it for up to 24 hours. Bake it the next day.
- After your dough has risen a bit and your oven is ready, get a parchment paper. Carefully move the dough from the basket to the paper with the seam facing down.
- Use a razor blade or a sharp knife for deep horizontal slashes, ensuring that the crust will open only where you scored the bread. Scoring allows carbon dioxide to escape.
- Put the dough with its paper into the preheated Dutch oven.
- If you want more bubbles to make some nice crust on your bread, pour some water between the paper and Dutch oven for steam, then quickly cover it.
- Bake the bread in an oven set to 460°F (238°C) for 35 minutes. Then, take off the lid and bake for another 12-15 minutes at 440°F (227°C) until it turns a nice golden brown color.
- Once out of the oven, transfer the bread to a cooling rack. Drape a mildly wet cloth over it and wait for at least an hour before cutting.
Notes
- For a little more sour flavor, you can extend the cold proof for up to 3 days. I tested this method and found that the longer cold proof made the bread slightly more sour. This is optional; for the standard overnight version, refrigerate the shaped dough for up to 24 hours.
- Ensure your sourdough starter is active. It's crucial for the dough's good rise.
- To stop the dough from sticking, handle it with wet hands. The dough might feel sticky at first, but wet hands help.
- You can use olive oil to coat the bowl you are raising your bread in to avoid the dough from sticking.
- Let the dough rise fully for good bread.
- For easier scoring, you can keep the dough in the fridge overnight. The dough temperature matters in this case since cold dough is easier to cut.
- Don't use very hot water; it can harm the yeast.
- Look at the dough, not the clock how the dough feels and looks tells you when to move to the next step. Towards the end of the rising time, keep a close eye on your dough.
- Wait for the bread to cool for about an hour before cutting. Cutting it early can make the inside gummy.



My dough is not shaggy AT ALL. It's firm, like cookie dough. I used the cup measurements, not grams and I used AP flour (I know that can make a difference with hydration). I've done two sets of stretch and folds at this point but theres no stretch whatsoever. The dough just breaks. I've added a little water each time but I already feel like I'm on the road to failure here. Will it get looser as it rises?
Hi Jennie!
I'm really sorry to hear about the trouble with your dough! It sounds like it might not turn out this time, as it tipically gets firmer with fermentation, not looser...
and I understand how frustrating that can be. I've double-checked the measurements in the recipe to be sure, and they are correct, so it seems like the difference might be due to the way the flour was measured with cups? Or maybe your flour? It's really hard to say.
For your next batch, if possible, try using a scale to weigh the ingredients. This can really help make sure everything is precise. I'm here to help with any questions you might have, so don't hesitate to ask, and I'm sorry again!
I'm not seeing the amounts/ measures
Found them.....thanks