
Long Fermented Sourdough Bread Recipe - Beginner's Guide

This long-fermented sourdough recipe really makes the most of your fridge's cold temperatures. Because we're using cold fermentation, it's a bit of a slow ride, taking about 3 to 4 days to get to the finish line. I've put together a day-by-day baking timeline below to help you plan it out without hassle.
I've stuck with this low-effort method a lot, especially between flu season and the everyday craziness with little kids. It lets me keep up with my baking without it taking over my schedule. The trick is keeping your dough chilled and ready to go in the fridge, and this recipe makes that doable!
If you'd like to make sourdough bread a bit faster, check out my recipe for same day sourdough, same day sourdough with whole wheat flour or same day sourdough with quinoa!

Jump to:
- Quick Look
- Summarize & Adapt This Recipe On:
- Ingredients
- Add-ins & Variations
- How To Make Long Fermented Sourdough Bread
- Tools You'll Need
- Recipe Timeline
- 💭Crucial Success Tips
- Which Grains Can I Use?
- Can I Add Yeast?
- Recipe FAQs
- How to Store Long Fermented Sourdough Bread
- Other Sourdough Bread Recipes You'll Love
- Long Fermented Sourdough Bread Recipe
Quick Look
- Method: Mix, rest for 30 minutes, do about 4 sets of stretch and folds at room temperature, then let the fridge take over.
- Timeline: 3 to 4 days in total. The dough spends 24-72 hours in the fridge for bulk fermentation and another 12-24 hours after shaping.
- Flavor: Deep and slightly tangy. The longer it stays in the fridge, the tangier it gets.
- Starter: Use an active starter fed 4 to 12 hours earlier. Not sure? Here's how to tell when your sourdough starter is ready to use.
- Baking: Straight from the fridge into a hot Dutch oven.
Summarize & Adapt This Recipe On:
Ingredients
This sourdough bread recipe keeps it simple: just all-purpose flour, water, salt, and a bit of active sourdough starter.

- Active sourdough starter: Like all sourdough bread recipes, everything begins with your starter. For this recipe, we're looking for an active starter that's lively and full of bubbles. The sweet spot is a starter that's been freshly fed within the past 4 to 12 hours. That's when it's at its peak and ready to raise your bread. It is possible to make bread from sourdough discard, but since we're already using cold temperatures for this recipe, an active starter is recommended (otherwise the fermentation would take a bit too long).
- Water: Use warm water, not hot or cold, to help get your starter going. Just make sure it's not too warm, to protect the yeast. Regular tap water is fine if it's safe to drink and not full of chlorine. And if you've got any leftover whey, throw it in; it'll make your bread softer.
- Salt: Simple sea salt is perfect for this, but any salt will do as long as you use the right amount. It's not a huge quantity, but don't skip it. Salt matters for flavor, and it also helps keep fermentation in check.
- All-purpose flour: I chose all-purpose flour for this recipe for a soft, airy texture. Other flours work too; see the next section.
See the recipe card for quantities.
Add-ins & Variations
- Seeds: Sesame or other seeds add a nice texture and flavor.
- Herbs, olives, cheese, chocolate chips and other add-ins: Add easy ones like herbs or seeds during the first or second set of stretch and folds. If you add them too early, they can tear the dough and keep it from getting nicely elastic. If you add them too late, they're harder to mix in. Oily or sugary add-ins are less messy if you add them during shaping. My guide on how to add fillings and add-ins to sourdough bread has more ideas.
- What I'd skip: Sweeteners like honey or sugar, since they can speed up fermentation and leave you with overproofed dough in a recipe this long. I'd also avoid add-ins that don't keep well, because the dough sits in the fridge for days.

free resource
Get All 3 Sourdough Bake Schedules
Bake beautiful bread that fits Your life - not the other way around
How To Make Long Fermented Sourdough Bread
This long-fermented sourdough recipe really makes the most of your fridge's cold temperatures. Because we're using cold fermentation, it's a bit of a slow ride, taking about 3 to 4 days to get to the finish line.

Step 1: Mix the water, starter, and salt in a large mixing bowl so the starter and salt spread evenly. Add the flour and stir to a shaggy dough. I usually start with a Danish whisk or a wooden spoon, then switch to my hands so all the flour gets mixed in.
Cover with something airtight (plastic wrap, aluminum foil or a plastic bag) and let it rest for 30 minutes. Personally, I find a plastic bag the most convenient.

Step 2: Starting the bulk fermentation at room temperature, do about 4 sets of folds (stretch and folds or coil folds), 20 minutes apart. The warmth gives the dough an initial rise that continues later in the fridge. When you're done, the dough should feel pliant and elastic.

Step 3: Cover airtight and refrigerate for 24 to 72 hours (about 48 works best for me). Tiny bubbles will appear on the sides, and the dough should rise in volume and look puffy.
If your loaves haven't risen well before, leave the dough on the counter for another hour or two before it goes into the fridge.

Step 4: Turn the cold dough out, pinch opposite ends together at the top, repeat with the remaining ends, and let it rest on the counter for about 30 minutes.
Place it pinched side up in a banneton lined with a lightly floured tea towel. A bench scraper helps, but since the dough is chilled, it shouldn't give you much trouble. Cover it again (I slip the whole banneton into a shower cap or plastic bag) and refrigerate for 12 to 24 hours.

Step 5: Preheat the oven to 460°F (238°C) with your Dutch oven inside. Take the dough straight from the fridge and gently turn it out onto parchment paper, seam side down.
Make one deep cut on one side with a scoring lame, razor blade or sharp knife. Feel free to add a couple of shallower cuts on the other side for a pattern.

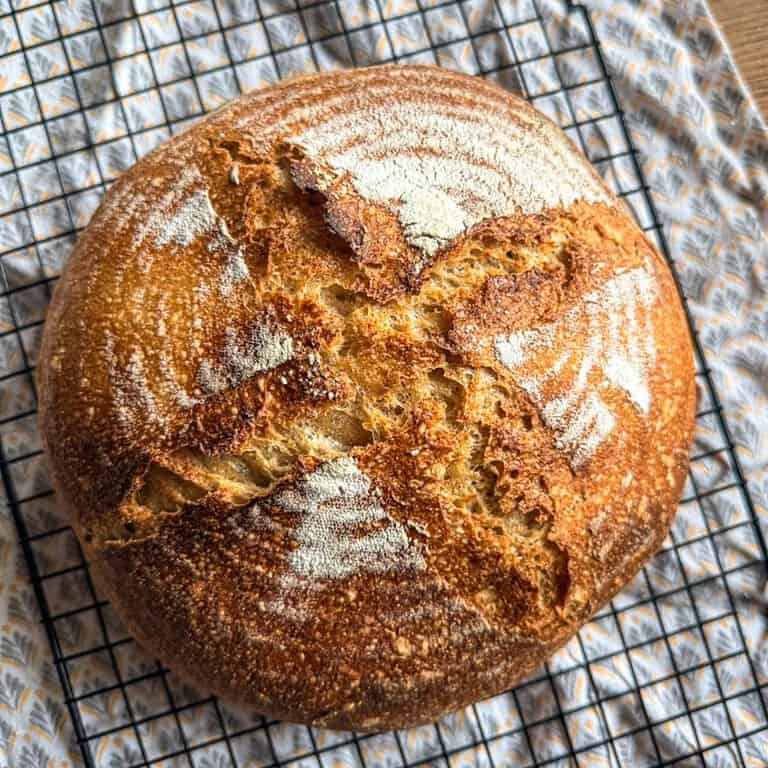
Step 6: Lift the parchment and dough into the hot Dutch oven, cover, and bake for 35 minutes. Remove the lid, turn the oven down to 440°F (227°C), and bake 12 to 15 more minutes until it's a lovely golden brown.
Cool on a wire rack, covered with a slightly damp kitchen towel, for at least an hour before slicing.
Hint 1: Since we're fermenting the dough for a long time, cover it with something airtight so it doesn't dry out. A damp towel is simply not enough here, because it will dry out long before the dough is ready. Don't worry about letting air in. Sourdough fermentation mostly doesn't need oxygen, so there'll be more than enough air for your starter to do its job.
Tools You'll Need
- A digital kitchen scale for weighing everything in grams
- A large mixing bowl
- A Danish whisk or a wooden spoon
- Shower caps or a plastic bag to keep the dough airtight
- A bench scraper (optional)
- A banneton basket or a bowl lined with a tea towel
- A scoring lame, razor blade or sharp knife
- A (cast iron) Dutch oven. I use this beautiful red one from Lodge, which is available on Amazon. It's on sale half the time, so be sure to check it out if you're looking for one!
Recipe Timeline
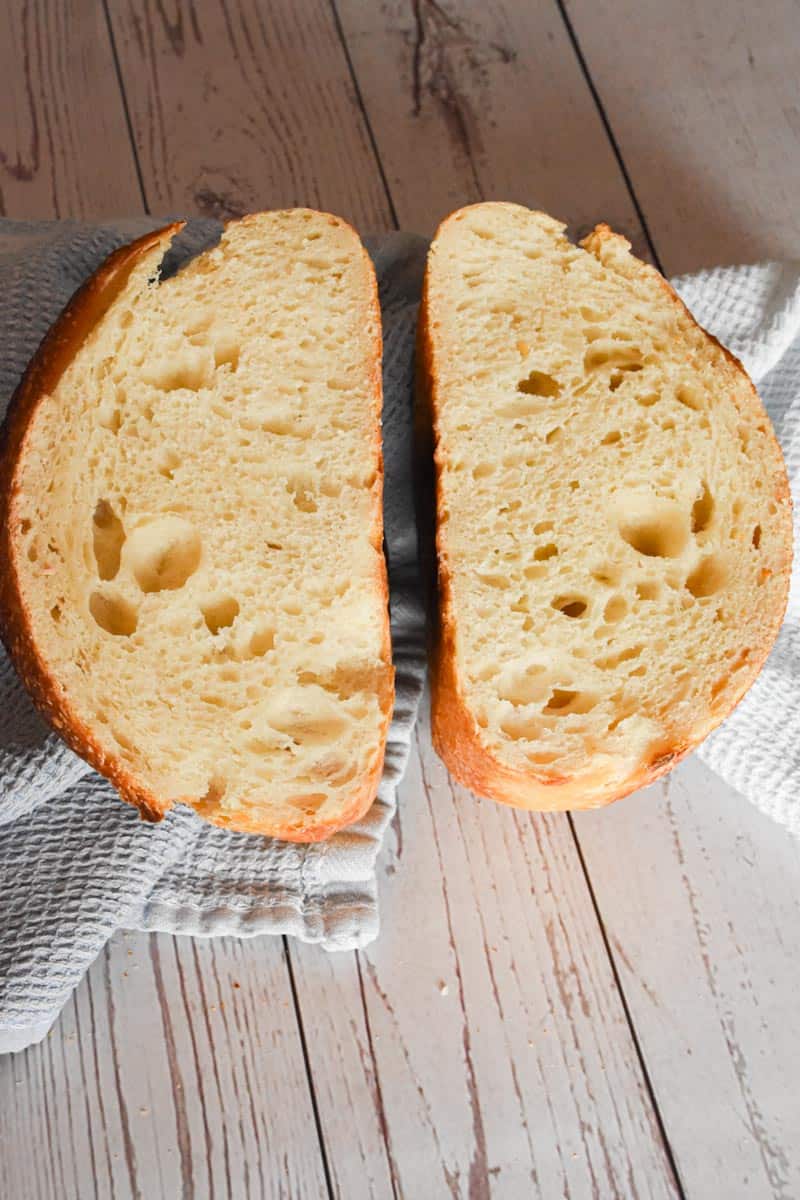
Plan on 3 to 4 days from mixing to baking, with the dough resting in the fridge most of that time. There are two fridge stages: bulk fermentation (24 to 72 hours) and the final proof (12 to 24 hours). If you give one stage more time, give the other one less.
OPTION 1: My Go-To 4-Day Schedule
- Day 1, 8:00 a.m.: Feed your starter.
- Day 1, 2:00 p.m.: Mix the dough and let it rest for 30 minutes.
- Day 1, 2:30 to 3:30 p.m.: Stretch and folds.
- Day 1, 3:30 p.m.: Into the fridge for bulk fermentation.
- Day 3, 8:00 to 9:00 a.m.: Shape the dough and put it into a banneton.
- Day 3, 9:00 a.m.: Back into the fridge for the final proof.
- Day 4, whenever you want fresh bread: Score and bake straight from the fridge!
OPTION 2: Faster Finish - Counter Proof
- Follow Option 1 through shaping on Day 3. Then, instead of putting the dough back in the fridge, let it rise in a warm place for about 3 hours and bake.
These times are estimates, so watch the dough more than the clock.
💭Crucial Success Tips
- Although a float test isn't 100% reliable, it is usually a great way of determining if your starter is ready to bake bread. You can do it when you're adding your starter into the bowl with the water and salt (step 1 of the recipe). Drop a bit of starter into the water. If it floats, it's ready to bake with; if it sinks, it needs more time to develop. This ensures your bread will rise well.
- Getting the dough to be just the right consistency is key, though it can pose a challenge. Here's a handy tip: if the dough is so sticky that you can't lift it in one go, it's time to sprinkle in a bit more flour. On the other hand, if it refuses to bind even after kneading for 2 minutes, just add a small dash of water to it.
- Although this is a wetter dough, similar to your usual artisan sourdough bread, it will be easier to handle because it will be chilled most of the time. If you find it too stiff to handle, just leave it at room temperature for a bit anytime you're handling it to make it more pliant.
- Wet your hands when handling the dough if you find it sticks to your fingers. You can also coat the bowl you're raising your bread in with a little olive oil so the dough doesn't stick.
- Pour a bit of water between the parchment and the Dutch oven to make steam, then quickly cover it to keep the steam in.
- Small or flat loaf? The dough probably didn't rise enough. Next time, leave it at room temperature until you see some bubbles and a slight increase in volume before it goes into the fridge, or give it a longer bulk ferment in the fridge. Also make sure your starter is strong and active. More on that in my post on proofing sourdough on the counter.
- Crust getting too dark? Your oven probably runs a bit hot. Bake the uncovered part at 420°F (215°C) instead of 440°F, or take a few minutes off the uncovered bake. Moving the Dutch oven up one rack can help with a dark bottom, too.
Which Grains Can I Use?
I developed this recipe with all-purpose flour, and that's what I'd start with. But you do have a few options:
- Bread flour: A reasonable substitute for all-purpose flour. It usually makes a stronger dough and may absorb more water. Start with the original amounts and adjust the consistency if you need to.
- Whole wheat flour: Replace up to 25% of the all-purpose flour. More than that can change how the dough ferments and give you a denser bread. Whole wheat also soaks up more water, so you'll probably need a splash more during mixing.
- Fresh-milled hard white or hard red wheat: Worth trying as a partial swap. Treat it the same way as whole wheat and start small. Fresh-milled flour absorbs water differently, so you might need to adjust the water. I haven't tested a full swap in this recipe, so I can't promise how a 100% fresh-milled version would turn out. If that's what you're after, my sourdough loaf made with freshly milled wheat is made for it, and my guide to baking with fresh-milled flour explains why it behaves differently in dough.
Whatever you use, keep in mind that different flours (even all-purpose and bread flour from different brands!) absorb different amounts of water. So my tip is to start with slightly less flour than the recipe says, especially with a flour mix, and add more as you go until the consistency feels right.
Can I Add Yeast?
No, not for this recipe. Commercial yeast would speed everything up, and long fermentation wouldn't be possible that way. The days in the fridge are the whole point of this bread! If you want bread sooner, try my quick sourdough loaf you can bake the same day instead.
Recipe FAQs
About 3 to 4 days in total: 24 to 72 hours in the fridge for bulk fermentation, then 12 to 24 hours after shaping. Before it goes into the fridge, the dough needs some time at room temperature, too. The Recipe Timeline above shows how to split the time between the stages.
After bulk fermentation, it should have risen, look puffy, and have tiny bubbles on the sides. For the shaped loaf, the poke test is less reliable when the dough is cold, so I go by how puffy it looks and how long it's been in the fridge rather than one single test.
Yes. The cold only slows things down, it doesn't stop them. Overfermented dough turns weak and sticky, is hard to shape, and spreads out in the oven. That's why I keep the whole process within 3 to 4 days and avoid sweeteners in this dough. If it does go too far, it can still become focaccia instead.
Not much, honestly! It's the same kind of dough. Fermenting it longer at a lower temperature gives you a stronger, tangier taste and a chewier texture. It takes more days but less attention, and it's more flexible, because even a few hours either way don't make much of a difference. Same-day sourdough is quicker, but you need to stay close to the dough all day. More flavor with no rush, and the practicality is just a bonus!
That's a question for an expert, so I'll leave it to one. I wrote a post together with a registered nutritionist about the nutritional and other health benefits of sourdough bread which covers what fermentation does and doesn't change.
Absolutely! It's actually a very beginner-friendly method. There's little hands-on time, the slow fermentation does most of the work for you, and the chilled dough is easier to handle. Just remember that patience is key. Follow the recipe closely, don't rush it, and you'll be rewarded with a delicious, yet simple sourdough bread!
Yes. Make the dough exactly as written, then follow the baking method from my sourdough bread in a loaf pan post.
How to Store Long Fermented Sourdough Bread
Sourdough bread stays good for about a week at room temperature, but it's best within the first three days. Here's how to store it:
- Use Cloth or Paper: Once your bread is cool, wrap it in a clean cloth or paper bag. It allows the bread to breathe and keeps the crust crispy.
- Skip Plastic Bags: They trap moisture and make the crust soft, but if you like it that way, just poke a few holes in the bag or leave it open.
- Try a Bread Box: It's perfect for keeping your sourdough fresh, balancing humidity, and preserving the crust.
If it gets stale after three days, freeze it or turn it into bread pudding, stuffing, breadcrumbs, or other tasty dishes.
Other Sourdough Bread Recipes You'll Love
Looking for other recipes like this? Try these:

If you tried this Long fermented sourdough bread or any other recipe on my blog please leave a 🌟 star rating and let me know how it went in the 📝 comments below! Happy Baking!

Long Fermented Sourdough Bread Recipe
Equipment
Ingredients
- 75 grams active sourdough starter ⅓cup
- 170 grams water ¾ cup
- 300 grams all-purpose flour 2½ cups
- 8 grams salt 1½ teaspoons
Instructions
- Mix the water, starter, and salt together in a large mixing bowl so the starter and salt spread evenly through the water.
- Add the flour and stir to make a shaggy dough. Start with a wooden spoon or Danish whisk, then switch to your hands to work in all the flour.
- Cover the bowl with something airtight (plastic wrap, aluminum foil, a plastic bag or a shower cap) and let the dough rest for 30 minutes.
- At room temperature, do about 4 sets of stretch and folds (or coil folds), 20 minutes apart. The dough should feel pliant and elastic at the end.
- Cover airtight and refrigerate for 24 to 72 hours (about 48 works best for me). The dough is ready when it has risen, looks puffy, and has tiny bubbles on the sides. If your loaves haven't risen well before, leave the dough at room temperature for an extra 1 to 2 hours before refrigerating.
- Turn the cold dough out onto your work surface. Shape it by pinching opposite ends together at the top, then repeat with the remaining ends. Let it rest on the counter for about 30 minutes.
- Place the dough, pinched side up, in a banneton or bowl lined with a lightly floured tea towel. A bench scraper helps. Cover it airtight.
- Refrigerate for the final proof, 12 to 24 hours. (In a hurry? Let it rise in a warm place for about 3 hours instead, and it will turn out great.)
- Preheat the oven to 460°F (238°C) with the Dutch oven inside. Cut a piece of parchment paper.
- Take the dough straight from the fridge and gently turn it out onto the parchment, seam side down. Score one deep cut on one side, plus a couple of shallow cuts on the other if you like.
- Lift the parchment and dough into the hot Dutch oven, cover, and bake for 35 minutes. Remove the lid, lower the oven to 440°F (227°C), and bake 12 to 15 more minutes until golden brown.
- Cool on a wire rack, covered with a slightly damp kitchen towel, for at least an hour before slicing.
Notes
- Since we're fermenting the dough for a long time, make sure to cover it with something airtight to prevent it from drying out. A damp towel is simply not enough for this situation, because we're letting the dough ferment for quite a long time and the towel will dry out in the meantime. Don't worry about letting air in - sourdough fermentation is mostly an anaerobic process (meaning it mostly doesn't require any oxygen), so there'll be more than enough air for your starter to do its job.
- Although a float test isn't 100% reliable, it is usually a great way of determining if your starter is ready to bake bread. You can do it when you're adding your starter into the bowl with the water and salt (step 1 of the recipe). Drop a bit of starter into the water. If it floats, it's ready to bake with; if it sinks, it needs more time to develop. This ensures your bread will rise well.
- Getting the dough to be just the right consistency is key, though it can pose a challenge. Here's a handy tip: if the dough is so sticky that you can't lift it in one go, it's time to sprinkle in a bit more flour. On the other hand, if it refuses to bind even after kneading for 2 minutes, just add a small dash of water to it.
- Although this is a wetter dough, similar to your usual artisan sourdough bread, it will be easier to handle because it will be chilled most of the time. If you find it too stiff to handle, just leave it at ambient temperature anytime you're handling it to make it more pliant.
- Wet your hands when handling the dough if you find it stick to your fingers.
- Pour a bit of water between the parchment and the Dutch oven to make steam, then quickly cover it to keep the steam in.
- You can use olive oil to coat the bowl you are raising your bread in to avoid the dough sticking.
Nutrition
Pin It For Later








I baked a couple plain loaves for a friend and she raved about them! She specifically asked for a 3-day ferment and now wants one with chocolate chips. I saw your mix in suggestions in a previous comment. Any other tips for a chocolate chip mix in?
Hi Alyssa!
I can believe that, some people really love long fermented sourdough bread!! It's not my cup of tea (I like it medium), but I have friends who like it sour! Hm for a chocolate chip mix in, I'd just make the bread as usual, and then mix in chocolate ships the first or second time you're stretching and folding. The thing is, if we add them in too early, they may cause the dough to not get as nicely elastic (because they're tearing the dough a bit when handling the dough with them inside), but if we add them too late, we might not get them incorporated as nicely. That's what I'd do at least!
I love the idea of long fermenting the dough. Thank you for this great recipe! You may have already addressed this but if I wanted to add something in - herbs, olives, cheese - when would I do that? Thank you!
Hi Kathy! I'm glad, I love anything long fermented too, I think it develops such nice flavor (and I like the improved digestability too!). If you want to add anything to your bread, just add it during stretch and folds (if it's easier to add, like herbs or seeds), or include in into the dough during the shaping process (if it's oily or sugary, to avoid the mess).
Just finding your YouTube channel and am so excited to bake my first loaf but I’m a bit confused because your YouTube has fresh milled whole grains which I want to use but your blog recipes have all purpose. How do I sub my whole grains accurately for these recipes?
Hi Dana!
I'm so sorry for the confusion! I actually created another website for all my fresh milled recipes: https://stretchandfolds.com/ ! I though that it might be better to have them separate since people are either looking for my recipes in general or fresh milled recipes specifically. I hope I'm not too late with this response!
Hi Tina,
Your recipe was the first I’ve ever baked a successful domed sourdough loaf! Thank you! One thing I was hoping you can help with is whether or not the dough rose enough. The loaf was very small, maybe 7 inches in diameter. I’m wondering if I did something wrong. It also got very very browned in the oven. To the point where I needed to put the cover back on because the bottom and edges were burned. Any tips for these? Thanks!
Hey Aubry,
Thank you so much for trying the recipe, and congrats on your first domed loaf! That’s a big deal 🤎
A smaller 7-inch loaf usually means the dough didn’t rise quite enough in the fridge. Every fridge is different, so you might just need a longer cold proof next time (48–72 hours works best for me) OR simply let the dough rise for about 4 hours at room temperature before putting it into the fridge. You can play around with that timing but I'd definitely wait fo rthe dough to start showing signs of fermentation: bubbles at the bottom of the bowl and on the surface, a slight increase in volume. When that happens, you can put it into the fridge. Also make sure your starter is nice and strong, and if you think it might not be the healthiest, try to figure that out first.
For the browning: your oven probably runs a bit hot. Try baking the uncovered part at 420°F instead of 440°F, or shorten the uncovered bake by a few minutes. Moving the Dutch oven up one rack can help with the dark bottom too.
Nothing you described is “wrong”, but these are some tiny adjustments I think would be good to make in your case. Ultimately, nothing works for everyone and it's a learning curve to figure out how to do this in your kitchen. Let me know if you have any questions!
Lovely recipe: may i ask do you take the bread out before baking and allow it to come back up in temperature a bit, or do you bake straight out of the fridge and into the oven?
Hi Noah, I always recommend baking straight from the fridge. In my experience, the dough is easier to score and handle that way because it's more firm, and it puffs up even better in the over. + it's way more practical!
Do you have any suggestions for baking in a loaf pan. I do not wish to go through the Dutch Oven method. I make wonderful sandwich bread, but for health reasons I want a LONG fermented regular SD bread like your recipe. Thank you!
Hi Joyce!
Absolutely, you can definitely bake sourdough bread in a loaf pan if you prefer not to use a Dutch oven. I have a detailed post and video that covers exactly how to do this: https://youtu.be/B0uM_Jecs_c?si=tg_-JHOXz1l1-38N . Just ude the process form this post and bake it like I show in the video, and I think you'll be good! =D
I'm looking forward to giving this a try! I have messed up more times than I can count! Thanks!
Hi Karol,
That’s great to hear! Don’t worry about the mishaps; every baker has them. Feel free to reach out if you need any help. Happy baking!
This is a super helpful guide. Pinning for later!
Thank you! 🙂
This looks wonderful! Thank you for sharing 🙂
Thank you so much!
This is really comprehensive for a sourdough beginner like me! Thank you so much.
That is my goal, to make it as beginner friendly as possible! 🙂
I was looking for a straightforward recipe! Thank you!
I hope you'll enjoy it as much as I do! 🙂