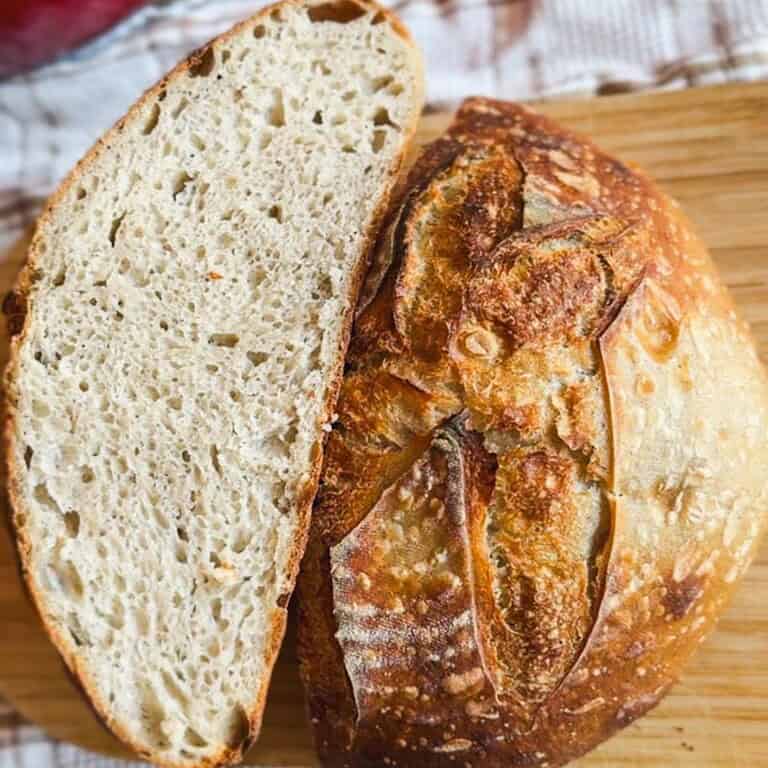
Same Day Sourdough Bread

Are you craving the delightful aroma of freshly baked bread without the wait? Look no further! This easy same day sourdough bread recipe will have you enjoying a delicious loaf of bread in just a matter of hours.
With a few simple ingredients and a little bit of patience, you'll achieve that beautiful golden-brown crust and airy crumb you've been dreaming of- without compromising the taste or the fermentation benefits of sourdough bread. AND it is totally appropriate for a beginner baker- just like my skillet sourdough naan recipe!

Summarize & Adapt This Recipe On:
If you've always been intimidated by the idea of making your own sourdough, you're going to love this recipe. It's really easy to put together, you can plan it around your schedule and is actually quite forgiving too!
If you're super into bread baking and you mill your own flour at home (like I do!), here's a fresh milled same day sourdough bread recipe you need to check out!

Free resource
Get all 3 when you subscribe
Bake beautiful bread that fits Your life - not the other way around
Recipe Quick Look
- Prep time: 2 hours.
- Cook time: 45 mins.
- Servings: 15 slices.
- Main ingredients: Flour, sourdough starter, water, salt.
- Cooking method: Combine water, starter and salt 🡢 add flour 🡢 mix, cover and rest 🡢 do 1 set of stretch and folds 🡢 cover and rest for 20 minutes 🡢 do 1 more set of stretch and folds 🡢 shape into a ball, cover and let rise for 3-4 hours 🡢 shape dough ball 🡢 rise again and score 🡢 transfer to parchment paper and into a Dutch oven 🡢 bake for 30-40 minutes 🡢 cool, slice and serve.
- Difficulty: Medium.
- Serving ideas: Serve a slice of the crusty sourdough with a bowl of your favorite soup, or use it as a bowl to make broccoli cheddar soup in a sourdough bowl.
Jump to:
- Summarize & Adapt This Recipe On:
- Recipe Quick Look
- Important Ingredients
- Substitutions & Variations
- How to Make Same Day Sourdough Bread
- Baking Schedule
- Crucial Success Tips
- Recipe FAQs
- More Easy Sourdough Recipes
- Same Day Sourdough Bread
- Need Help Tweaking This Recipe?
- Other Sourdough Recipes You'll Love
- Neapolitan-Style Sourdough Pizza Dough
- Sourdough Semolina Pizza Dough (Crispy, Chewy, and Full of Flavor)
- Italian Semolina Sourdough Bread
Important Ingredients
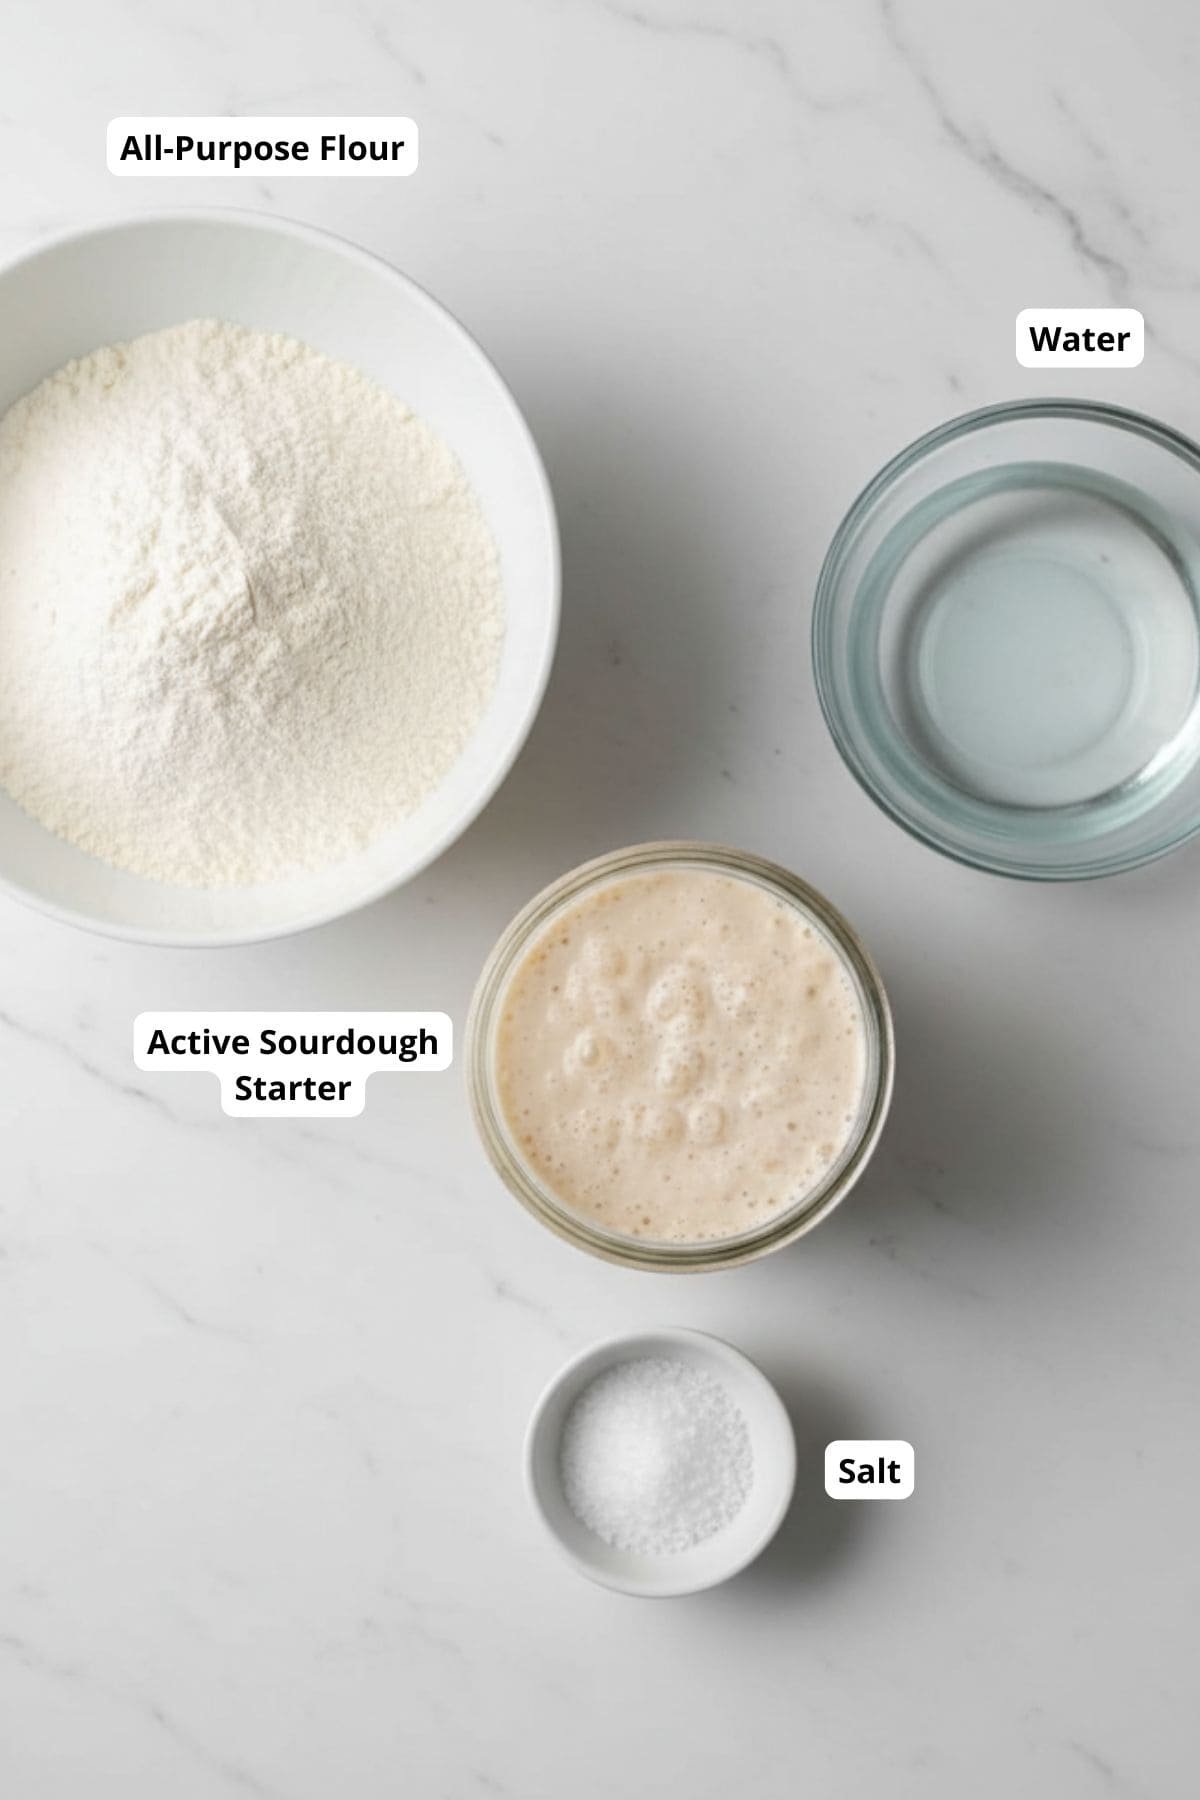
- Active sourdough starter: For that signature tang and lift. If you don't have this at hand, follow my easy recipe that teaches you how to make sourdough starter from scratch.
- Water: To hydrate the dough and activate the starter for fermentation.
- Salt: To enhance the flavor and strengthen the dough structure.
- All-purpose flour: The base of your dough creating structure and texture for the loaf.
See recipe card for quantities. I included a baking schedule at the end, so you'll have an easier time calculating when to feed your starter and start the whole process.
Also, a Dutch oven is a must if you ask me. There are ways of baking bread that don't require you to have it, but having it makes everything much simpler!
Substitutions & Variations
- You can swap up to 20% of the all purpose flour you're using here for a different kind of flour like rye flour or bread flour to create different versions of the bread. If you want to bake your sourdough using whole wheat flour, I suggest you check out my no-knead rustic whole wheat sourdough bread recipe.
- You can also top the bread with some seeds for a bit of extra texture and deliciousness. Sesame seeds, poppy seeds, pumpkin seeds, and sunflower seeds are all great options.
- For that hint of golden yellow color, you can also add some turmeric powder into the mix. I usually about 1 teaspoon at the beginning to my water, starter, and salt mixture to ensure it is evenly distributed.
- To make a cheesy loaf, add a cup of shredded cheese into the dough during the last series of stretch and folds. This one's sure to be a total crowd pleaser- just like my roasted garlic and Parmesan sourdough bread.
How to Make Same Day Sourdough Bread

In a large bowl, combine water, starter, and salt. I like mixing those up first so the starter and the salt have a chance to disperse in the water

Add the flour and mix well. I usually do this with a spoon and finish with my hands to break up all the flour. Cover with something airtight (plastic wrap, aluminum foil, plastic bag, even a shower cap works!) and let rest for 30 minutes.

After 30 minutes, do a set of stretch and folds. Grab the edge of the dough, stretch it up, and fold it under on the other side. Rotate your bowl for 90 degrees and repeat 3 more times. We're going for 4 sets of stretch and folds in total. Cover again and leave to rest for 20 minutes and do another set of stretch and folds. Repeat this process until you do 4 sets of stretch and folds (which should take 1 hour in total). Be sure to cover your dough with something airtight in-between sets of stretch and folds to prevent the dough from drying out! After that's done, let the dough ball rise for 3 - 4 hours at room temperature.

Once it looks almost double in volume, transfer your dough to a lightly floured surface. It's now time to shape the dough! Grab the opposite ends of the dough and pinch them together on top. Repeat with the other two opposites. Prepare your bread basket (or banneton basket) so that you line it with a lightly floured tea towel.

Carefully transfer your dough ball into a tea towel-lined basket. The pinched parts should be facing upwards. Preheat your oven and prepare a piece of parchment paper. Transfer your dough from the basket to the parchment paper, so the floured bottom of the dough is now the top of the dough up. Score your dough with a razor blade or a sharp knife; make two deep cuts so you get a crisis cross pattern.

Transfer your parchment paper with a dough on it into a hot Dutch oven. Splash just a bit of water between the parchment paper and Dutch oven to create some steam and cover quickly to capture it inside. Put the bread in the oven for 30 minutes at 460°F (238°C). Take the lid off and bake for an additional 10 minutes with the lid off at 440°F (227°C) to get that golden brown color. Transfer to a cooling rack, cover with a damp kitchen towel and cool for at least an hour before you slice into it.
Pro Tip: Use a HEAVY bowl for mixing the dough and doing stretch and folds. I love using this natural ceramic bowl from Amazon (also in the pictures above!). When I stretch the dough, no matter how dense it is, the bowl stays on the counter. And I can make big amounts of dough in it when I'm batch baking sourdough bread.
Baking Schedule
OPTION 1: Feed the starter the day before, have bread for dinner the next day.
- 8.00: Mix up the dough.
- 8.30: Start stretch and folds.
- 9.30 - 12.30: Bulk rise.
- 12.30: Shaping and second rise.
- 13.30: Bread goes in the oven.
- 14.15: Bread comes out of the oven to cool down.
OPTION 2: Feed the starter in the morning, have bread for late dinner or the next day.
- 8.00: Feed starter.
- 13.00: Mix up the dough.
- 13.30: Start stretch and folds.
- 14.30 - 17.30: Bulk rise.
- 17.30: Shaping and second rise.
- 18.30: Bread goes in the oven.
- 19.15: Bread comes out of the oven to cool down.
Crucial Success Tips
- The temperature of your kitchen plays a big role in how fast your dough will rise. If you want to speed your process up a little, proof your dough in a warmer spot if you have one.
- For best results, wet your fingers with water to prevent the dough from sticking to your hands when you handle the dough. It will still stick a bit (because we're dealing with medium to high-hydration dough, but wetting your hands really helps! Use this tip especially when doing the sets of stretch and folds.
- It is normal for the dough to be very sticky the first time you do stretch and folds- don't panic. Just keep going.
- If you're adding seeds to your same day sourdough bread, sprinkle them in during the last series of stretch and folds.
- Wrap your cooled sourdough bread in a clean cloth or paper bag. This allows the bread to breathe slightly and helps maintain its crust's texture.
- Avoid storing sourdough bread in plastic bags, as they can trap moisture and make the crust soft. However, if you want to keep the crust softer for a longer time, you can use a plastic bag but leave it open or puncture a few holes in it.
- If you have a bread box, it can be an excellent option for storing your sourdough bread. A bread box provides a slightly humid environment that can help keep the bread's crust from becoming too hard.
Recipe FAQs
Check the size of the dough. If it has nearly doubled in size, it has proofed. You can also perform a "poke test." When you poke the bread dough, your finger should leave a dent behind, but the dent should slowly start to fill up again.
Absolutely! A (mature) starter is usually ready to use in baking after 4 - 6 hours after feeding. If you look at the first baking schedule below, you'll see that it calls for feeding your starter in the morning and having the bread baked in the late afternoon.
Although sourdough bread can last up to a week at room temperature, it's best to eat it within the first three days.
After three days, consider freezing it. If it goes stale before you have a chance to eat or freeze it, you can always turn it into bread pudding, stuffing, breadcrumbs, etc.
More Easy Sourdough Recipes
Looking for other recipes like this? Try these:


If you tried this same day sourdough bread or any other recipe on my blog please leave a 🌟 star rating and let me know how it went in the 📝 comments below! Happy Baking!

Same Day Sourdough Bread
Jump to VideoEquipment
Ingredients
- 410 grams all-purpose flour
- 290 grams water
- 160 grams starter
- 8 grams salt
Instructions
- In a large bowl, mix together your water, starter, and salt. I like mixing those up first so the starter and the salt have a chance to disperse in the water.
- Add the flour and mix well. I usually do this with a spoon and finish with my hands to break up all the flour. Cover with something airtight (plastic wrap, aluminum foil, plastic bag, even a shower cap works!) and let rest for 30 minutes. I find putting a plastic bag over top is the most practical.
- After 30 minutes, do a set of stretch and folds. That means that you grab the edge of the dough, stretch it up, and fold it under on the other side. Rotate your bowl for 90 degrees and repeat 3 more times. We're going for 4 sets of stretch and folds in total. Cover again and leave to rest for 20 minutes and so another set of stretch and folds.
- Repeat this process until you do 4 sets of stretch and folds (which should take 1 hour in total). Be sure to cover your dough with something airtight in-between sets of stretch and folds to prevent the dough from drying out!
- After you are finished with stretch and folds, cover the dough again (it should resemble a smooth ball by now) and let the dough rise for 3 - 4 hours at room temperature (I usually just leave it on the counter). It should almost double in volume.
- After the bulk fermentation, transfer your dough to a lightly floured surface. We are going to shape your dough. The way to do that is to grab the opposite ends of the dough and pinch them together on top. Repeat with the other two opposites.
- Prepare your bread basket (or banneton basket) so that you line it with a lightly floured tea towel. Carefully transfer your dough ball into a tea towel-lined basket. The pinched parts should be facing upwards. If your dough is extra wobbly, you can help yourself with a dough scraper.
- Cover the dough again (I use the same plastic bag as before) and let it do its final rise for 2 hours at room temperature. About an hour in, you can turn your oven on to preheat it.
- When your dough puffed up a bit and your dutch oven and oven are both sufficiently preheated, prepare a piece of parchment paper. Transfer your dough from the basket to the parchment paper, so the floured bottom of the dough is now the top of the dough. Score your dough with a razor blade or a sharp knife; make two deep cuts so you get a crisis cross pattern.
- Transfer your parchment paper with a dough on it into a hot dutch oven. Splash just a bit of water between the parchment paper and dutch oven to create some steam and cover quickly to capture it inside. Put the bread in the oven for 30 minutes at 460°F (238°C). Take the lid off and bake for an additional 10 minutes with the lid off at 440°F (227°C) to get that golden brown color. Bake time depends on the strength of your oven, so you can adjust it a bit after. After taking the bread out of the oven, put it on a cooling rack, cover it with a damp kitchen towel and leave it to cool for at least an hour before you slice into it.
Video
Notes
- Wet your fingers with water before doing the stretch and folds. This will help prevent the dough from sticking to your fingers.
- Allow the dough to proof until almost double in size.
- Add your mix-ins like seeds, spices and cheese during the last series of stretch and folds.


Could I use this recipe to make 2 baguettes?
Hi Sue,
yes, absolutely! I would make a few tiny tweaks though: use more flour (about 40g more) so the dough will be easier to shape. Also, make the bulk fermentation just a bit longer because if you use more flour, the dough needs longer to ferment. Other than that, follow the recipe and I hope the baguettes turn out alright"
Hello Tina
I did this loaf yesterday and it turned out not too bad but not too good either. It always results as a super stick mass. It stuck to my fingers, to the the banetton, to the counter etc, In your vid you manged to get a shape - I couldn't let alone score it.
But in a moment of desperation I tossed in a bowl and baked it. Wonder of wonder I got a 5 cm rise.
I guess our flour is the culprit not the bulk ferment cos I did only 2 hrs instead of three.
Hi Joe,
yes, this recipe is quite sticky, I initially made it that way because it ferments quicker that way. But I do now realize it can cause problems too. So if you don't mind bulk fermenting it an hour or so longer, I'd go ahead and add at least 20g (if not 30 or 40g) of extra flour next time. That way, the dough should be more manageable, and the bulk ferment will last about an hour longer!
Let me know if that helps and let me know if you have more questions!
Joe, did you use bread flour? Bread flour requires less water.
This is my favourite recipe….turns out great every time.
Thank you for sharing!
Hi Donna,
Thank you so very much!
Looks great… do you have a recipe for rye bread preferably with seeds?
Hi Gabriella!
I'm glad you found the recipe helpful! I do have a seeded rye bread recipe! You'll find it here: https://stretchandfolds.com/rustic-rye-sourdough-bread-with-seeds/
Hi,
Can this be put in the fridge overnight? I started it a little too late in the day.
Hi Kim,
Yes, absolutely! You can definitely put it in the fridge overnight. I’d just try not to leave it for more than 24 hours, since it has a bit more starter in it and will keep fermenting in the fridge (just more slowly). That said, if you don’t mind a slightly more sour flavor, it’s totally fine to leave it in longer too!
Should the dutch oven be in the oven when pre-heating?
Hi Stephanie!
Yes, ideally the Dutch oven should preheat along with your oven—you really want it to get as hot as possible. But that said, if you’re not super comfortable letting it heat that long, just preheating it while the oven heats up is totally fine too. I’ve done that plenty of times and still got a great result!
This is a fantastic recipe, thank you so much! I was a little worried at first because the dough seemed wetter than what I’ve experienced with other recipes. I followed your recipe exactly and it turned out perfect.
Hi Anne, I'm so glad it did! =D Thanks for letting me know!
Oh my goodness. I’ve tried a few times to make sourdough. Not much luck. This is amazing!!!I I did it in one day!! We live in high altitude so I baked it 10 minutes longer. Perfect. Thank you for simplifying this for me.
Hi Diana, I'm so glad the recipe worked for you! Thank you so much for taking your time and leave a comment!
Hello. Found your blog just now and was very interesting. Noted the recipe to try tomorrow.
But I am hesitant to do because I have spent a lot of time and money on failures. If you don't mind clarify my problem.
After the first rise (bulk) no matter how stiff the dough starts the rise I always end up with a sticky unmanagebale dough. Is this normal? I wonder!
Thanks you and God bless.
Joe
Hi Joe,
Thanks so much for the kind note—and I hear you. Honestly, your message reminded me of how I felt in the beginning too.
That sticky, unmanageable dough after bulk ferment can be normal—especially if it went a bit too long or your kitchen is warm. Even if the dough starts off nice and firm, if it ferments too far, it can get super soft and hard to shape.
My best tip: don’t go by time alone. Try to catch the dough when it’s puffed up, looks a bit airy, and still feels like it can hold some shape. If it starts feeling too loose or collapses easily, it likely fermented a bit too much. In that case, you can still bake it—might not be the prettiest, but usually still tasty!
I'm crossing my fingers for your next bake to turn out as it should!
What a great recipe! Thank you Miss Tina! You're beautiful and so is this recipe. I've now made it 6 times. Works perfect every time!
Hi Johnny, thank you so much!!
If I have to leave overnight in the fridge, when do I add that in? Would that be that the bulk fermentation?
Hi Kaitlyn!
You can pop the dough in the fridge after the bulk fermentation, so after the 3–4 hour rise and once you’ve done all the stretch and folds. That’s your overnight option instead of the 2-hour final rise at room temp.
So basically:
Mix + stretch & folds ✅
Let it rise for 3–4 hours at room temp ✅
Then shape it, place it in your basket, and refrigerate it overnight for the second rise instead of doing it on the counter.
It’ll be ready to bake straight from the fridge the next day!
The best sourdough recipe! I like in a very hot and humid climate so overnight recipes always turned out flat and sloppy for me. This time schedule is perfect! I’ve made it 3 times in two weeks and I love how easy it is. I use AP flour, replace 15-25 grams of water with oil, and bake using the two loaf pan method for added height and structure. I wish I could share a picture because it comes out beautiful!
Hi! Thank you so much for sharing—I believe you that it looks amazing! I love hearing how people make it work for their own kitchen and climate, and it sounds like you’ve really found your way with this recipe.
Love this recipe! Any chance you’ve tossed it in the fridge overnight before?? I’m curious to add that step and see
Hi Samantha!
I actually do that more often than not! Since this recipe uses quite a bit of starter, the dough ferments faster than some others—so I wouldn’t leave it in the fridge longer than a day. With my other sourdough recipes, I sometimes go 2–3 days before it gets sour, but with this one, it’s quicker. That said, 1 day in the fridge totally works!
Your site won’t allow me to leave a “5 star” rating. This recipe and your straightforward presentation in the video makes for a fantastic bread for us beginners. I made it as written and could not be more satisfied with my bread! Thank you!
Hi Joyce!
Thank you so much!! I'll have to look into the issue of my site not allowing 5 star ratings...but I'll take 4 stars too, my main goal is to show sourdough can be easy and I was so glad to read your comment! 🙂
I have been trying different sourdough recipies, an this is the best one yet. My husband loved it, he almost atr the whole loaf in one sitting. This will be my go to, thank you for making it so easy.
Hi Maria!
I'm so so glad this is a go-to recipe for you too - it still is for me! Can't really beat the simplicity of it 🙂